— 3 —
Inserting the Batteries
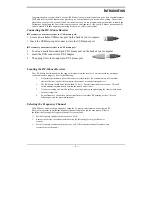
The RF-Mouse uses two AA batteries. For best performance, use only alkaline batteries. Refer to
the following to insert the batteries:
1.
Press the tab on the bottom of the mouse cover as shown here and remove the cover.
2.
Insert the two AA batteries. (The correct polarity is indicated on the battery
compartment casing.)
3.
Replace the cover.
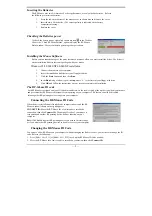
Checking the Batteries power
To check the battery power, right-click the mouse icon
in the Taskbar.
Choose the “Check RF-Mouse Status” option to display the RF-Mouse
Status window. The current battery percentage charge is shown.
Installing the Mouse Software
Before you can take advantage of the many features your mouse offers, you must install the driver. The driver is
on the installation diskette that came packaged with your mouse.
Windows 95/98/2000/NT4.0/ME/XP installation
1.
Connect the mouse to your computer.
2.
Insert the installation diskette into your floppy disk drive.
3.
Click the
Start
button and then click
Run
.
4.
In the
Run
dialog window, type
A:\setup
, where “A” is the letter of your floppy disk drive.
5.
Click
OK
and follow the instructions on your screen to complete the installation.
The RF-Mouse ID code
Each RF-Mouse is assigned a unique ID code at manufacture, so the receiver only picks up the signal from your mouse
and prevents other RF-Mouse radio signals from operating on your computer. This feature can also be disabled,
allowing other RF-pointing devices to operate your computer.
Connecting the RF-Mouse ID Code
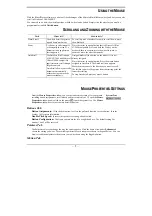
When the driver installation is finished your computer reboots and the RF-
Mouse window (shown on the right) appears.
CONNECT ID:
Move the RF-Mouse for a few seconds to establish a
connection, then click
Connect ID
. The unique ID code of your mouse is
recognized and another RF pointing device will not function on your
computer.
Exit:
Click
Exit
if no other RF pointing devices are within 3 meters range
or if you want other RF pointing devices to be able to access your computer.
Changing the RF-Mouse ID Code
You can use a new RF-Mouse on your computer without changing the Radio receiver; you just need to change the ID
code. Refer to the following:
1.
Press [Shift + Alt + F11] or [Shift + Alt + F12] to call up the RF-Mouse ID Code window.
2.
Move the RF-Mouse for a few seconds to establish a connection, then click
Connect ID
.


