


proper storage, use and disposal of this product,
national laws and regulations must be observed.
Safety and Compliance Information
Safety Symbols
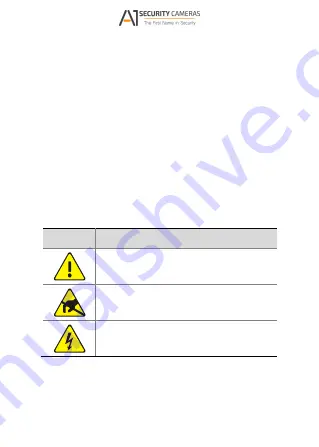
The symbols in the following table may be found
on installation-related equipment. Be aware of the
situations indicated and take necessary safety
precautions during equipment installation and
maintenance.
Symbol
Description
Generic alarm symbol: To suggest a
general safety concern.
ESD protection symbol: To suggest
electrostatic-sensitive equipment.
Electric shock symbol: To suggest a
danger of high voltage.
The symbols in the following table may be found in
this manual. Carefully follow the instructions
Available from A1 Security Cameras
www.a1securitycameras.com email: [email protected]


