


10
Operation of the Software
Introduction of the Software
Installation
The ANI-4MV can be controlled by using the included software
ANI-4MVGUI
.
•
INSTALLATION:
Copy the software files to the controlling computer. To run the executable program, double click on the icon (or file
name)
ANI-4MV GUI
(shown in
Figure 5
).
•
UNINSTALL:
Delete all other software files.
Figure 5: ANI-4MV Control Software
Note:
ANI-4MV_v1.1.30.exe
is only used in its own given path.
Control connection
WAYS FOR SOFTWARE CONTROL:
The ANI-4MV provides (3) ways to connect to the ANI-4MV, including the RS-232 serial port, USB
interface and TCP/IP network port.
SOFTWARE ACTIVATION:
You can control the ANI-4MV if any of the connections are valid.
OPERATION:
Click the
CONNECTION
button on the menu bar.
Figure 6: Popup Menu for Connection
RS-232:
If connected successfully, the message window in the lower right corner of the main interface will show the message
“Connection
Successful”
. If not, a popup window will appear with the message
“Can’t Open Com”
.
USB:
If not connected, a popup window will appear with the message
“Can’t Find USB”
. If connected, the message window will show
the message
“Connection Success”
.
TCP/IP:
Using the network port, enter the IP address. The default IP address is
192.168.0.178
, and the port number is
4001
. The
message window will show the message
“Connect NET Success”
. This IP address can be changed if necessary.
DISCONNECT:
To disconnect the current connection,
Figure 7
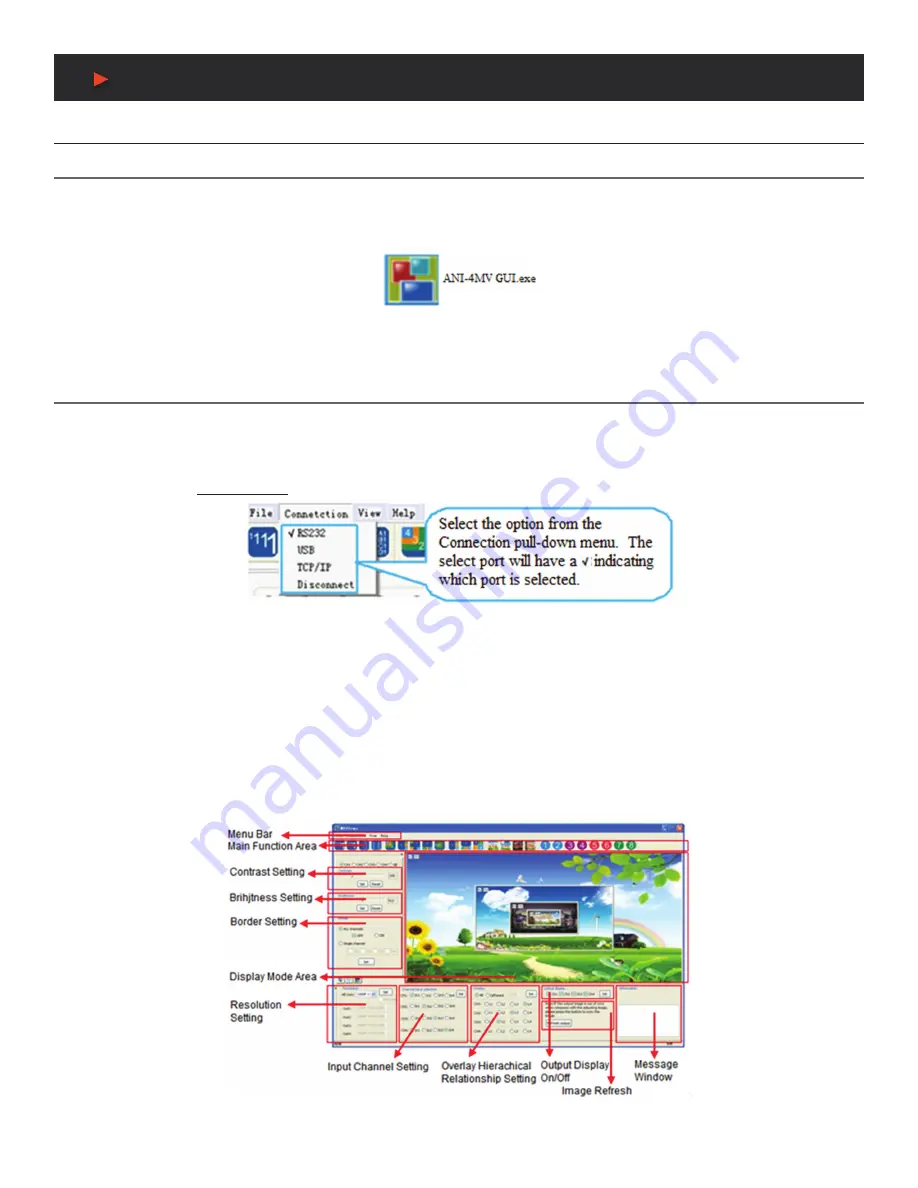
shows the main interface and the available settings. The settings
mentioned below
(Main Function Settings to Shortcut Button Customization)
are referenced on the next page.
Figure 7: Main Interface
A
NEU
VIDEO
Содержание ANI-4MV
Страница 26: ...THIS PAGE IS INTENTIONALLY LEFT BLANK ...
Страница 27: ...THIS PAGE IS INTENTIONALLY LEFT BLANK ...


