background image

installation precautions and tips

Please read these instructions completely for the best enjoyment of your HT Series speakers.

When you cut into the wall to install the speaker, do not cut through the facing or insulation that 
may be  behind the wall. This facing is a moisture barrier. Use duct tape or wide vinyl tape to seal 
any cuts.

Keep debris and loose material away from the installation location.  Do not allow debris to get in 
the openings of the woofer basket. Debris and loose material can cause buzzing or rattling, and can 
damage the woofer cone. Install plastic or fiberglass screening above the speaker to keep debris 
away.  Handle the speaker carefully. 

Do not let anything touch the speaker cone or dome.  Do not clean the speaker with paint thinner 
or any solvents.

• 

Consider the services of a professional custom installer.  If you have any doubts about your own 
abilities, it is better not to risk damaging your walls or ceilings, electrical wiring, ventilation 
ducts or plumbing.

• 

Work with good quality, correct tools.  This will save you time and assure superior results.

• 

Allow sufficient clearance.  

• 

When using speakers outdoors, locations should be sheltered from direct sunlight, rain or snow.  
Direct exposure will shorten product life.

• 

Combined impedance for speakers connected to each channel should be at least 4 ohms.  This is the
minimum impedance tolerated by most amplifiers.  Check with your dealer before wiring multiple 
speaker pairs.

general mounting suggestions

Avoid placing the speaker within two feet (0.6 meters) of a corner. The acoustic reflections from surfaces
near the speakers can detract from the sound quality. Do not place the speaker behind heavy fabrics; if you
cannot see through a fabric, you cannot hear through it.
The in-wall speakers are designed for "infinite baffle" operation. The area behind the speaker installation
should be at least one-half cubic foot in volume to ensure proper performance. If the area is too small it will
limit bass response and cause a peak in the mid-bass range.

prewiring

• 

Check local building and electrical codes for compliance of the speaker wire.

• 

Use stranded wire of at least 16 gauge; for runs over 100 feet, it is preferable to use 14 gauge wire.

• 

Use only insulated staples or nylon tie straps to secure wiring within the wall to avoid shorts. 

• 

Do not stretch the wire as it is being routed.  This could create future (and costly) problems.

Leave about 2-3 feet of free wire at both ends.  Cutting excess wire is better than splicing.

• 

Always "home run" wires:  run a continuous wire from each speaker directly to the source location.  
Do not connect speakers together any other way for easier diagnosis of faulty wire or speaker problems.

• 

Wire speakers in phase with the same polarity.  Attach positive (+/red) and negative (-/black) terminals 
consistently.

• 

Combined impedance for speakers connected to each channel should be at least 4 ohms. This is the 
minimum impedance tolerated by most amplifiers. Check with your dealer before wiring.

3

Содержание HT300iw

Страница 1: ...analog and digital systems HT300iw HT400iw HT800iw owner s manual ...

Страница 2: ...ur best record of the date of purchase which is required for warranty service Read and follow all cautions warnings and notes cautions To reduce the risk of electric shock do not remove any parts of the speaker There are no user serviceable parts inside If service is required have it performed by a qualified service professional WARNING To prevent fire or shock hazard do not expose the speakers to...

Страница 3: ...trend Using the most advanced injection molded driver technology available it outperforms all others in its category Attractively styled in a neutral off white finish it can be painted to perfectly match any wall aluminum extrusion mounting side rails The advantage to this design is an incredibly rigid durable mounting system that runs the entire length of the speaker from top to bottom The mounti...

Страница 4: ...ck with your dealer before wiring multiple speaker pairs general mounting suggestions Avoid placing the speaker within two feet 0 6 meters of a corner The acoustic reflections from surfaces near the speakers can detract from the sound quality Do not place the speaker behind heavy fabrics if you cannot see through a fabric you cannot hear through it The in wall speakers are designed for infinite ba...

Страница 5: ...f the template Save this section it will serve as a painting mask if you wish to paint the speaker in the wall Use the inside edge of the remaining section of the template to mark the hole size 2 Cut the hole 3 Route the speaker wire from the amplifier to the speaker installation location Secure the wires to prevent them from falling into the wall before the speaker is mounted 4 Adhesive backed fo...

Страница 6: ... other mounting bracket enters the mounting hole and the speaker is seated on the wall fig 2 fig2 9 Hold the speaker in place in the mounting hole and begin tightening the mounting screws to draw the mounting bracket against the backside of the wall Gradually tighten the screws moving from one to another until the speaker is firmly clamped in place fig 3 fig3 5 ...

Страница 7: ...rille is removed custom painting Paint the speaker frame and grill before mounting to the wall paint grill and frame separately Before painting mask the recessed area of the speaker to completely protect the speaker drivers After painting the grill gently blow through its perforated holes to prevent paint clogging operation checking the system Listen carefully to each speaker If you hear buzzing o...

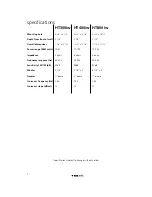
Страница 8: ...0 1 8 7 1 4 x 15 7 8 7 1 4 x 27 1 2 Power range RMS watts 15 80 15 100 15 150 Impedance 4 ohms 8 ohms 4 ohms Frequency response Hz 53 20k 45 20k 40 20k Sensitivity 1W 1M dB 87dB 89dB 91dB Woofer 5 1 4 5 1 4 x 2 5 1 4 x 4 Tweeter 1 dome 1 dome 1 dome Crossover frequency Hz 2 6k 2 4k 2 4k Crossover slope dB oct 12 12 12 Specifications subject to change without notice 7 ...

Страница 9: ...TS OF THIRD PARTIES INCLUDING ITS AUTHORIZED DEALERS OR INSTALLERS Unit must be returned to Directed postage pre paid with bill of sale or other dated proof of purchase bearing the following information consumer s name telephone number and address authorized dealer s name and address and product description Note This warranty does not cover labor costs for the removal and reinstallation of the uni...

Страница 10: ...a Directed Electronics Inc All rights reserved G39556 61 71 03 05 ...

Отзывы: