9
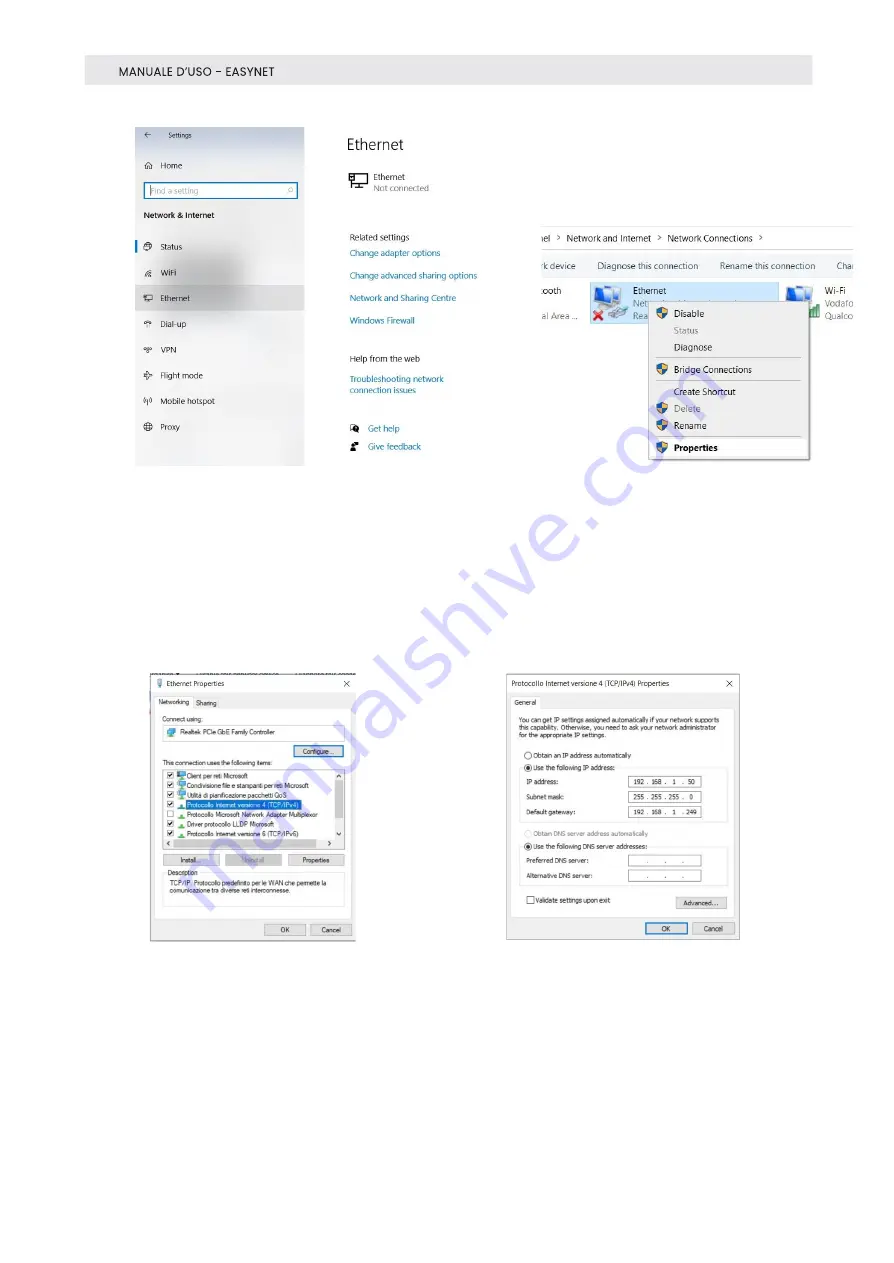
Fig. 10
Fig. 11
Fig. 12
Fig. 13
Fig. 14
6.
Place the mouse over Ethernet, press the right button and choose
"Properties
”
.
7.
From the Ethernet properties menu (Fig.13), select "Internet Protocol
version 4 (TCP/IPv4)
”
and press the properties button. The following
screen will open (Fig.14).
8.
Make a note of all existing settings that will be used later for recovery.
9.
Set the IP address to 192.168.1.1.
10.
Set the Subnet mask to 255.255.255.0 and confirm with OK.
11.
You can now open the web browser and type in 192.158.1.100 to configure
EasyNET.
12.
Login with username and password.
The default values are
Username
: admin
Password
: admin (Fig. 7)
13.
Select "Network" from the Configurations menu to set the EasyNET
network parameters to match those of your Ethernet network. For
example, if in the original screen in Fig.7 the IP address was 192.168.10.1,


