


EE
C o p y r i g h t ©
4I P N E T , I N C . A l l r ig h ts r es er v ed .
4ipnet W H G 3 0 3
Q u ic k I ns ta l l a tio n G u id e
ENGLISH
4ipnet
W H G 3 0 3 S e c u r e W L A N C o n t r o l l e r
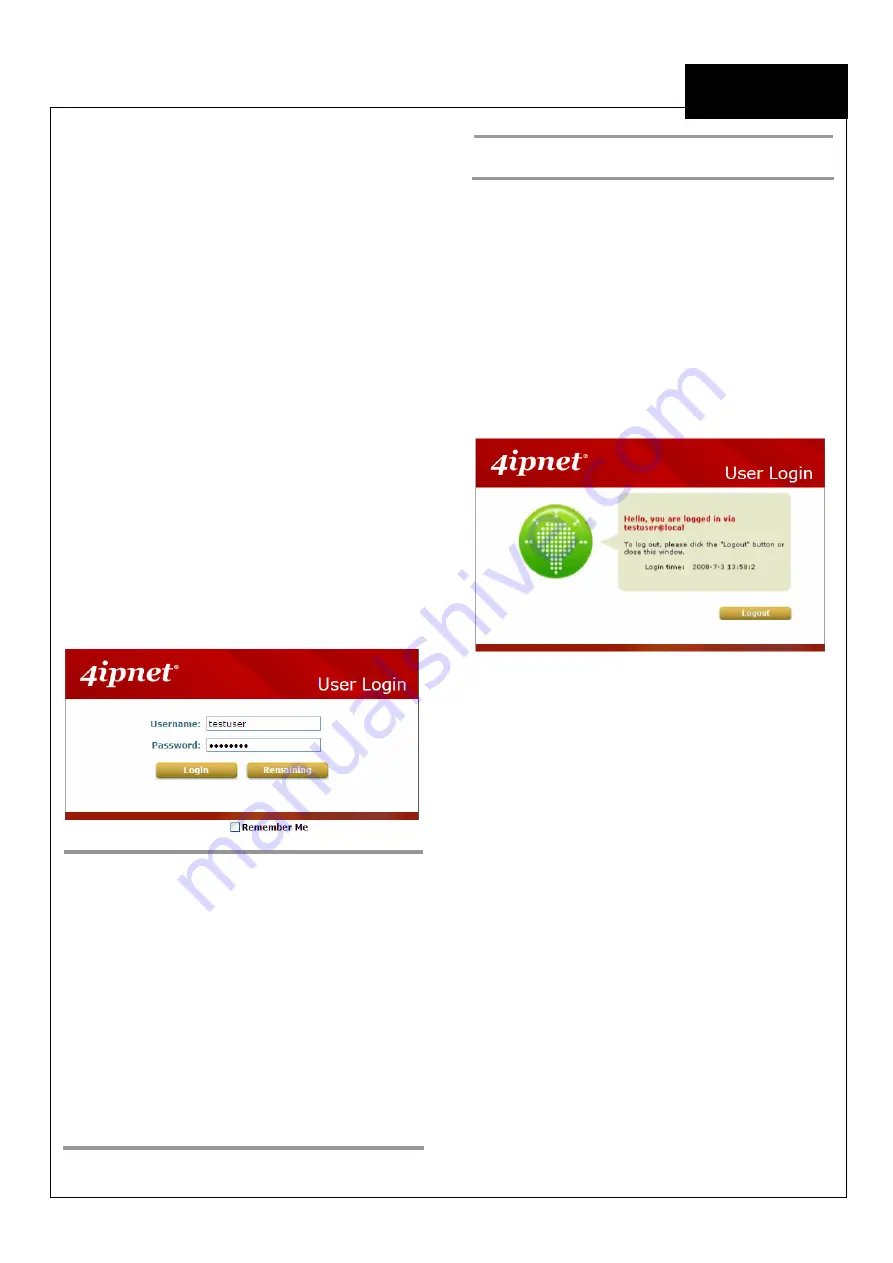
< User Login >
To verify whether the configuration of the new local
user account(s) created via the
Setup Wizard
has
been completed successfully:
1.
Connect a client device (e.g. laptop, PC) to any
LAN Port of WHG303. The device will obtain an
IP address automatically via DHCP.
2.
Open a web browser on a client device, access
any URL, and then the default
User Login
Page
will appear.
3.
Enter the
Username
and
Password
of a local
user account previously generated via Setup
Wizard (e.g.
“testuser@local”
as the
Username
and
“testuser”
as the
Password
);
then Click
Login
.
Note:
1.
WHG303 supports multiple authentication
options including built-in local user database
and external authentication database (e.g.
RADIUS). The system will automatically
identify which authentication option is used
from the full username entered.
2.
The format of a full (valid) username is
userid@postfix
, where
“userid”
is the user
ID and
“postfix”
is the name of the selected
authentication option.
3.
Exception:
The postfix can be omitted only
when the default authentication option is
used. For example,
“LOCAL”
is the default
authentication option at this system;
therefore, you may enter either
“
testuser”
or
“
testuser@local”
in the
Username
field.
Congratulation!
The Login Success Page will appear after a client
has successfully logged into WHG303 and has
been authenticated by the system.
The appearance of Login Success Page means
that WHG303 has been installed and configured
properly.


