


Pg. 7
www.3xlogic.com | 877 3xLOGIC | [email protected]
Change the port as necessary when the network type is
set to STATIC.
A ‘Port Forwarding’ has to be set for external access
to the camera.
Refer to the manual of the network hub for ‘Port
Forwarding’ settings.
An additional change of HTTPS, RTSP port can be
done at Web Viewer >Admin page.
9
Change Password.
T
he default user ID and password must be changed for security
reasons. Video will not stream from the camera until the default
admin password is changed. Enter the default credentials (admin
/ admin) and click Change Password. A pop-up will deploy. Enter
and confirm a unique password, then click OK to complete the
change.
The ID and PW will be set to defaults when a ‘factory reset’ is
performed on the camera.
10
Make sure to click on ‘Save’ button to save changed values.
An Apply message will deploy when the
settings are applied normally, or an error message
will deploy if the settings fail to apply. This step saves
settings to the camera itself
11
After applying the new camera settings, click Save to VIGIL
This step saves the camera to the VIGIL Server software
The camera will occupy the camera channel you selected
in Step 1 (iv) of this section.
*
Rebooting or Resetting the Camera to Factory Settings
If a factory reset is required, login to the camera’s
browser interface (enter IP into a browser URL bar and login
to the camera) then navigate to Setup > System > Factory
Reset. To perform a basic camera retart, Navigate to Setup
> System > Restart.
Run the 3xLOGIC Camera Setup Utility-B
i. Download and install the latest version of the utility
at www.3xlogic.com.
ii. Navigate to Start > Programs > VIGIL>Utilities and
launch the VIGIL Firewall Utility. Create a firewall rule
for
VISIXIPSetup-B Utility
if one has not already been
created.
iii. Launch VIGIL Server, navigate to Settings > Cameras.
iv. Select the desired camera channel from the treeview.
v. Open Network Camera Settings and set the Type to
VISIX-IP-B.
vi. Click the
Detect Camera
button. The utility will now
launch.
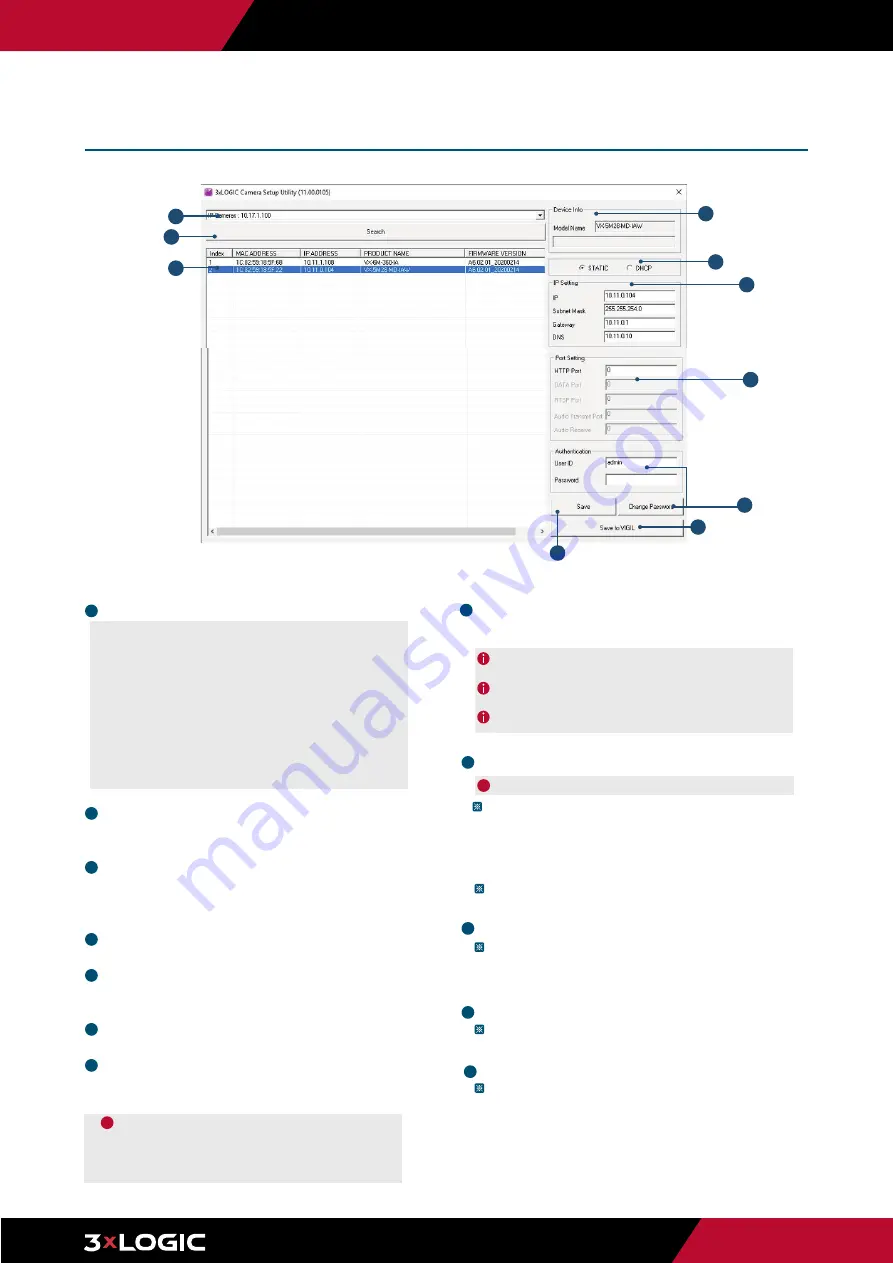
Click on Network Adaptor selection Menu (NIC)
after the utility deploys.
3
Select the NIC associated with your cameras then click
on the Search button. Allow the utility time to identify
cameras.
4
Select the desired camera.
5
The information of the selected camera will be
shown in Device Info.
6
Select the network type.
7
Input IP settings information when the network
type is set to STATIC. Always click Save after
changing IP Settings.
Setup Tools -
3xLOGIC Camera Setup Utility-B
i
Default TCP/IP information
- IP: 192.168.1.80
-
Subnet Mask: 255.255.255.0
- Gateway: 192.168.1.1
- DNS : 168.126.63.1
Default ID / PW : admin / admin
2
3
4
5
6
7
8
9
10
11
8
i
1
2
Standard usage of the 3xLOGIC Camera Setup Utility-B is detailed on this page.


