Downloaded from Projector.com
ENGLISH
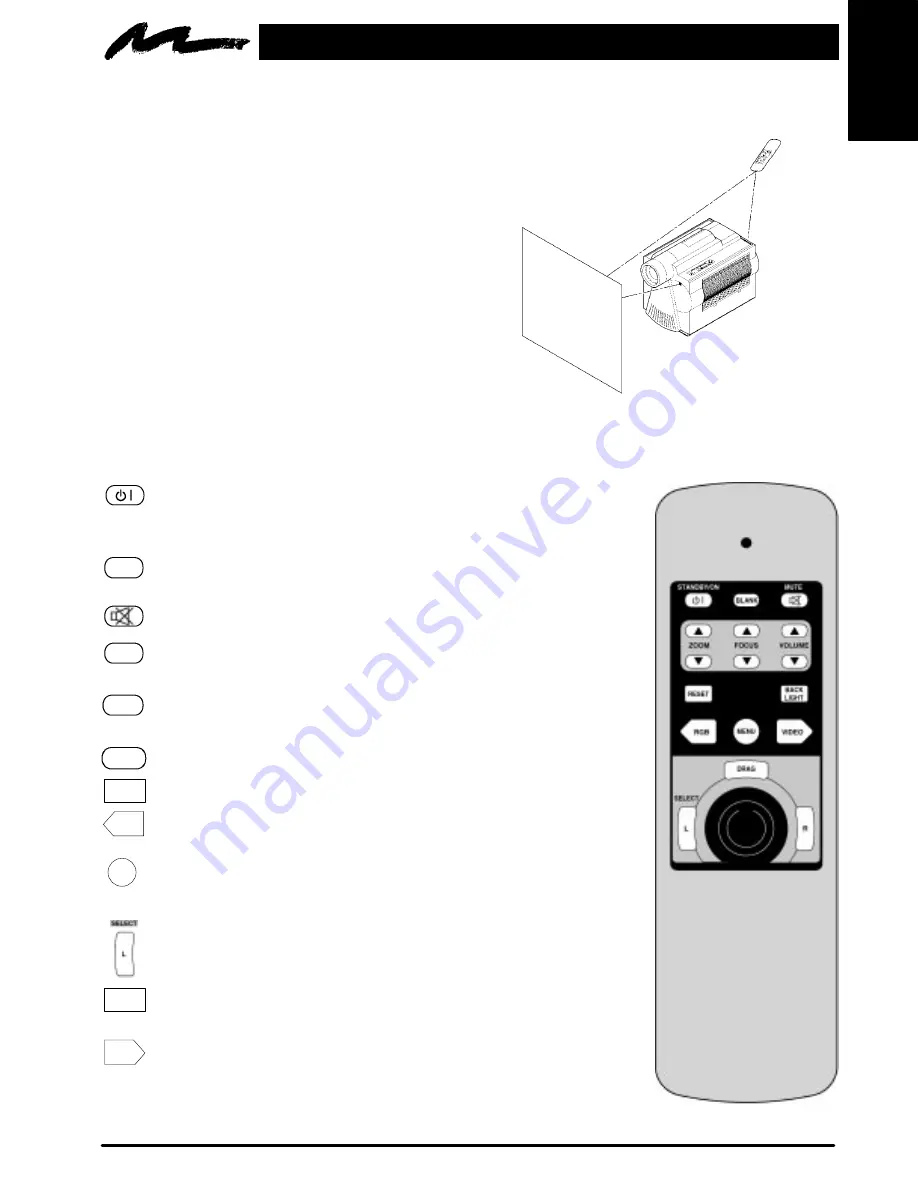
Figure 5-2. Remote Control
17
3M 1997
3M
Multimedia Projector MP8660
Section 5: Remote Control
5-1. How to Operate the Remote Control
The remote control keypad (Figure 5-2) controls
basic projector functions.
To use the remote control:
a.
Aim the remote toward the projection screen
or at the back of the projector (Figure 5-1).
b. Press the desired button and the signal will
bounce off of the screen to the front sensor or
directly enter the back sensor.
The function of each remote control button is
explained below.
Figure 5-1. Using the Remote Control
Remote Control Buttons
Press STANDBY/ON to switch projector between projection and
standby mode. In projection mode the lamp is ON. In standby mode
the lamp is OFF.
Press BLANK to display a black background with no image. Press
again to return the image to the screen.
Press MUTE to switch the audio sound ON or OFF.
Press ZOOM (
B
) to increase or decrease the size of the screen
image.
Press FOCUS (
B
) to increase or decrease the sharpness of the
screen image.
Press VOLUME (
B
) to adjust internal/external speaker volume.
Press BACK LIGHT to light the remote buttons.
Press RGB to switch computer video input (RGB1
⇒
RGB2
⇒
RGB1).
Press MENU to display the on–screen menus. Move the mini–joy
stick up/down or left/right as needed to nagivate the menu options.
Note: Press SELECT to choose the option that is highlighted.
Press SELECT (L) to choose the highlighted menu option. Refer to
On–Screen Menus in Section 4.
Press RESET to reset menu options to the factory default setting.
Refer to On–Screen Menus in Section 4.
Press VIDEO to switch between video inputs (VIDEO1
⇒
VIDEO2
⇒
VIDEO1).
BLANK
ZOOM
FOCUS
VOLUME
BACK
LIGHT
RGB
MENU
RESET
Video


