


E. System Checkout and Volume Balancing
1. Plug the power transformer in a 120 VAC, 50/60Hz outlet and turn the front panel OFF/ON switch to ON. The green
front panel LED should light.
2 Turn up the front panel volume control and check for incoming audio. Upon power up, the unit should be in standby
mode.
3 Push the TALK switch and adjust the talk volume control on the bottom of the unit for the desired sound level at the
outside speaker.
4. Press the STANDBY switch and confirm that the unit enters standby (silent) mode.
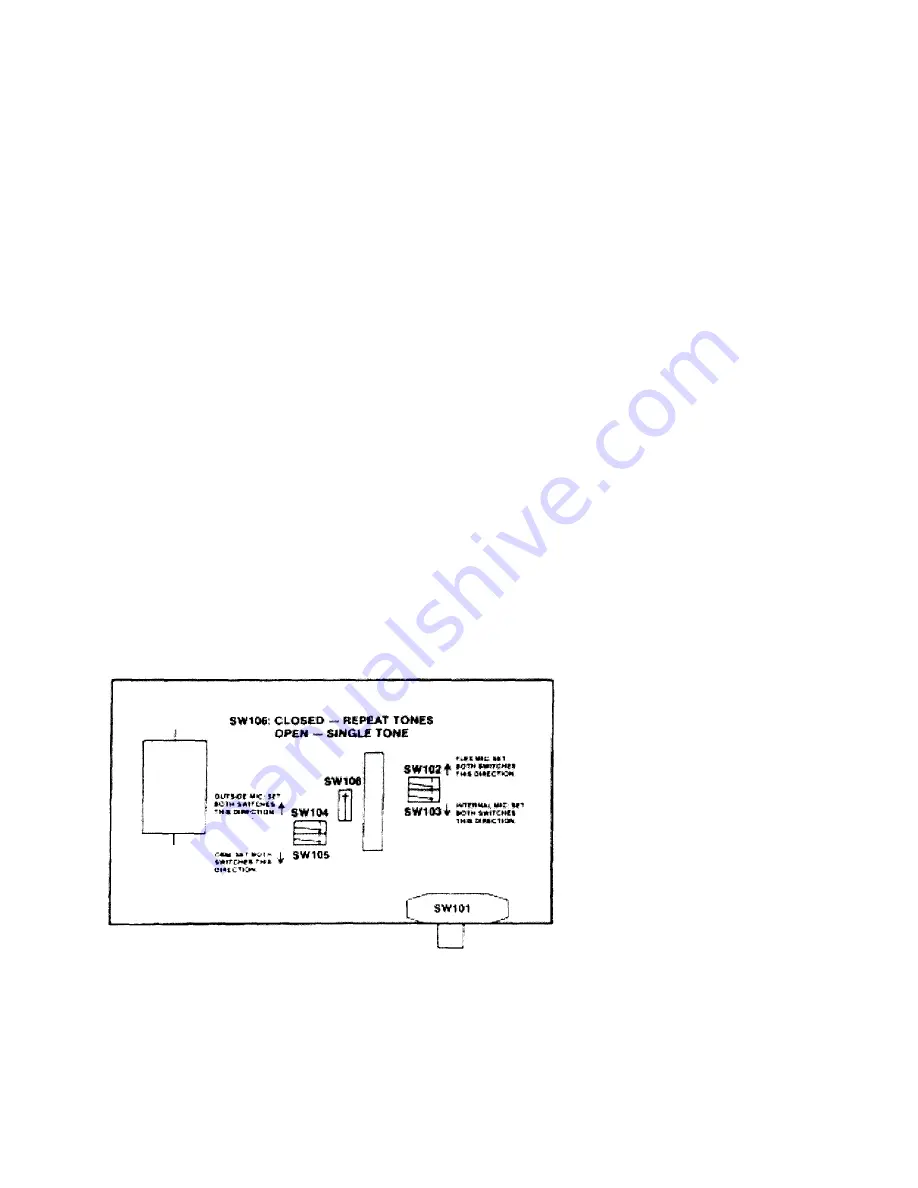
5. If a single presence alert tone is desired, change the internal switch SW106 to SINGLE position (see figure 2). The unit is
set at the factory for repeat tones.
6 Activate the vehicle detection system. Confirm that (1) the unit comes out of standby into the listen mode (2) the yellow
vehicle light stays lit until the car leaves. (NOTE: VEHICLE LIGHT WILL NOT STAY LIT WHEN USED WITH AN
AIRSWITCH OR OTHER PULSE- SYSTEM) (3) The presence alert tone is heard over the internal speaker.
7. Adjust the ALERT VOLUME control on the bottom of the unit for the desired level.
8. Press the TALK switch and confirm that the tone is canceled. NOTE: D-15 does not self-cancel.
9. If using a multiple master system, press and hold the TALK switch of one unit. The red and green lights of the other units
should light and those units should emit a low "busy" tone if their TALK switch is pressed. Pressing the TALK switch of
one unit should cancel the alert tone in all units, (see figure 5).
10. Check the operation of all optional accessories installed with the unit.
11. Instruct the operator and present the operating instructions.
12. Complete the Dealer Receiving Report card and place it in the mail.
F. Service Information
Customers should contact their local authorized 3M Sound Products dealer for service on this product. For the name
of
your
local dealer, repair or installation assistance, contact 3M Food Services Trade Technical Service at
1-800-328-0033.
Figure 1. Model 478DA Internal Switches
Содержание 478DA (D-15)
Страница 5: ...Figure 2 Intercom Mounting Methods ...
Страница 6: ......
Страница 7: ......
Страница 8: ......
Страница 9: ......


