


Ver 1.0.0.0
2
6. If your WAN port is using a fixed IP
Æ
Set up the fixed IP on the DWR.
7. For cable modem users (DHCP), please leave the Internet setup as default.
y
Set up the DWR for wireless devices
With our proprietary wifiDHCP technology, the wireless IP camera series such as wifiCAMit,
wifiCAMit_Dome, wifiCAMit_CS…etc. can be plug and play with regards to its WIFI
settings if you use it in conjunction with 3JTech’s Dedicated Wifi Router (DWR). Please
follow the procedures below to set up your wifiCAMit IP camera or other wireless devices
with the DWR. For more details on WIFI settings, please also refer to the DWR user’s
manual.
-
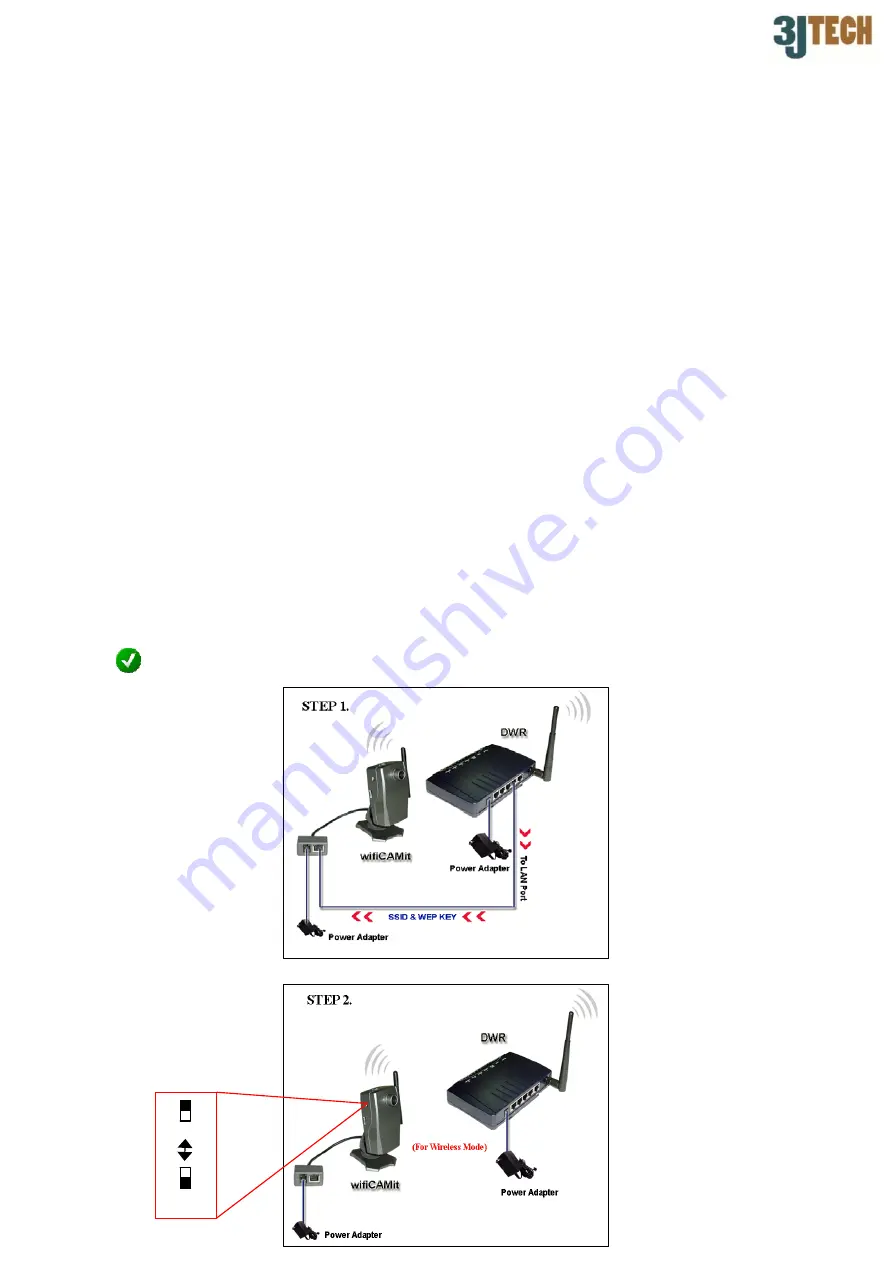
Connecting the wifiCAMit IP camera to the DWR
(Please skip this section if you would like to use other wireless devices.)
1) Connect the power cable to the power jack of DWR.
2) Connect the wifiCAMit to a LAN port of DWR via the RJ-45 cable.
3) Connect the power cable to RJ-22 jack of the wifiCAMit.
4) The LED on the back of the wifiCAMit will flash when the SSID and WEP Key of the
DWR are passed to the wifiCAMit successfully.
5) Remove the power cable of the camera and RJ-45 cable.
6) Switch the button located at the left side of the camera into
“Wireless”
position.
7) Plug in the power cable of the wifiCAMit.
NOTE: The new SSID and WEP key will be generated after resetting the DWR.
WIRELESS
WIRED


