background image

C

ORE

B

UILDER

® 

5000 S

WITCH

M

ODULE

  Q

UICK

  S

TART


AND

  R

EFERENCE

5

c

The total watts that are available in the hub (from 
step a) must be greater than the total watts that are 
required by the SwitchModules (from step b). Use the 
following worksheet to calculate power 
consumption:

2

To expose slots for SwitchModule installation, remove 
as many blank faceplates from the chassis as required. 

WARNING: 

Hazardous energy levels exist inside of 

the hub. Do not place hands or objects into the hub 
or touch components on an inserted module.

3

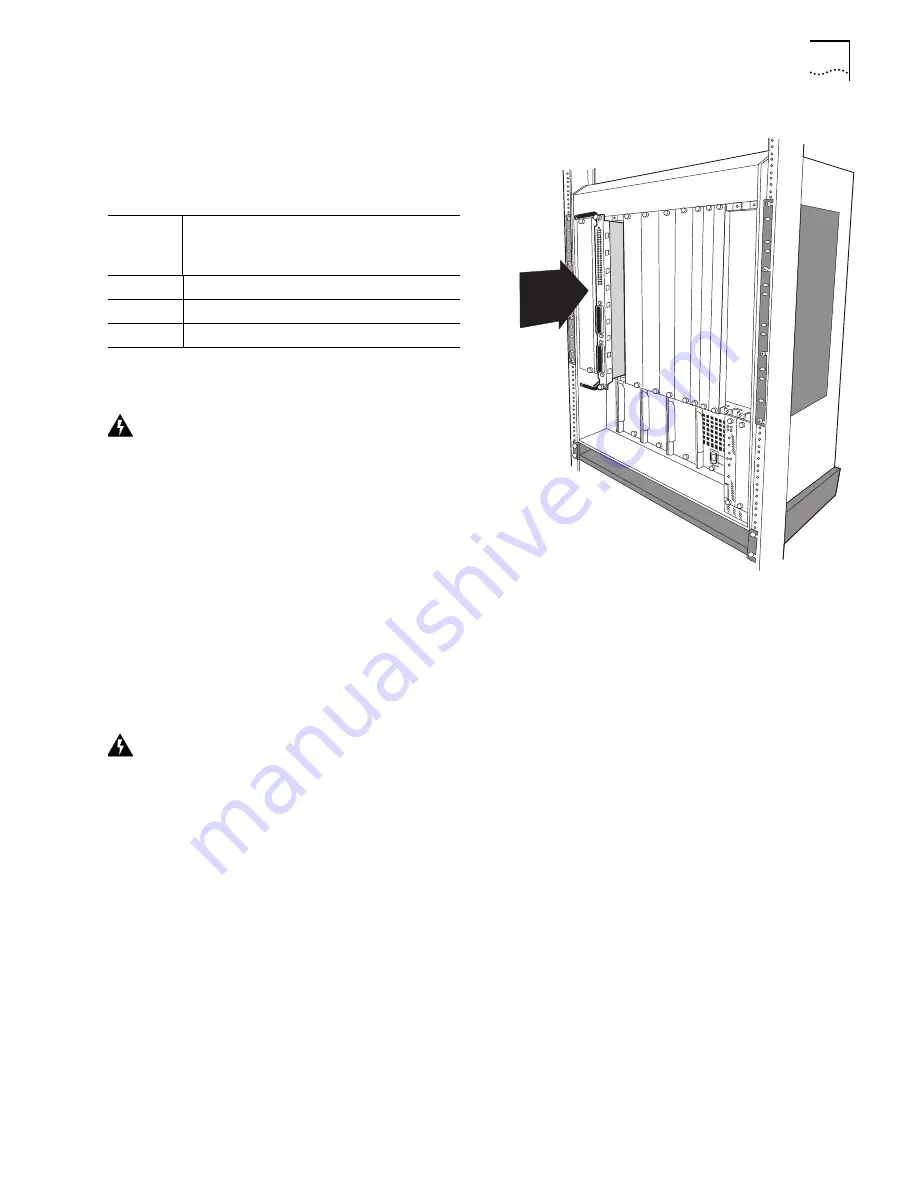
Insert each SwitchModule into the module guides at the 
top and bottom of the selected slot and slide it into the 
chassis by pressing firmly at the top and bottom of the 
front panel (see the figure at right).

4

Lock the SwitchModules into place by applying pressure 
to the front panel with one hand while you close each 
ejector handle. Ensure that the SwitchModule remains 
fully seated in the backplane connector while you close 
the ejector handles. 

5

To secure the SwitchModule front panel to the front of 
the chassis, use a flat-blade screwdriver to tighten the 
top and bottom screws to torque specification 
3 to 5 inch pounds. Do not overtighten.

WARNING: 

For safety reasons and to ensure 

adequate cooling airflow, install blank faceplates 
over all empty slots.

Voltage 

Category

 Watts 

Available 

in Hub

 Watts 

Required by 

SwitchModule

=

 Watts 

Remaining

+5

=

–5

=

+12

=

6

To ensure that the DMM recognizes the installed 
SwitchModule, enter the SHOW MODULE ALL 
command. Verify that the model number of the 
SwitchModule appears in the correct slot.

There may be a delay (no more than 30 seconds) before 
the DMM recognizes the SwitchModule.

7

Ensure that the hub is operating with enough power by 
entering the SHOW POWER BUDGET command.

Slide the 
SwitchModule into the 
selected slot as shown here.

Содержание CoreBuilder 5000

Страница 1: ...r later CoreBuilder 5000 Distributed Management Module Commands Guide for software Version v6 00 or later You can view these documents online with the 3Com DocsOnCD documentation CD ROM that comes wit...

Страница 2: ...416SW 10 Slot Slots 9 and 10 are reserved for the CoreBuilder 5000 ATM Switch Control Point Module Model Number 3C96416SW 3 3 Software Prerequisites Before you install a new SwitchModule 1 Determine t...

Страница 3: ...0 operational code to all SwitchModules in the hub 3 Download ATM SwitchModule software Version v3 00 operational code to all ATM Backbone SwitchModules in the hub The ATM SwitchModule model number is...

Страница 4: ...tchModule User Guide CoreBuilder 5000 SwitchModule Quick Start and Reference this guide CoreBuilder 5000 SwitchModule Command Reference CoreBuilder 5000 SwitchModule Planning Chart CLASS 1 LED PRODUCT...

Страница 5: ...t panel with one hand while you close each ejector handle Ensure that the SwitchModule remains fully seated in the backplane connector while you close the ejector handles 5 To secure the SwitchModule...

Страница 6: ...col is enabled on virtual bridge 1 and on all SwitchModule ports Spanning Tree parameters are set to their default settings which are described in Chapter 7 in the CoreBuilder 5000 SwitchModule User G...

Страница 7: ...able the existing in band DMM interface SwitchModules in slots 2 3 and 4 NMS LAN DMM in slot 1 For more information about IP configuration see the CoreBuilder 5000 SwitchModule User Guide on the DocsO...

Страница 8: ...th this product You can also use a network management application such as 3Com Transcend Network Control Services to further configure SwitchModules See the appropriate network management documentatio...

Страница 9: ...in chassis and connected to the PacketChannel backplane Off SwitchModule is not connected to the PacketChannel backplane or was inserted in slots 9 12 17 slot hub or 9 and 10 10 slot hub which are res...

Страница 10: ...o connectors with 12 ports per connector for a total of 24 ports The following illustrations show these SwitchModules The X that follows the port numbers indicates a crossover port Port Status Activit...

Страница 11: ...lows the port number indicates a crossover port CoreBuilder 5000 10BASE T modules use crossover ports This means that if you connect a 10BASE T SwitchModule port to another CoreBuilder 5000 10BASE T m...

Страница 12: ...enabled and link is OK 1 Blink No light on receive fiber 2 Blinks Port received jabber 3 Blinks Port is partitioned 4 Blinks Remote fault Off Port or port functions are disabled Yellow On Heavy traff...

Страница 13: ...On Port is enabled and link is OK Green Blinking Link failure or waiting for network connection Off Port or port functions are disabled Yellow On Heavy port traffic activity Yellow Blinking Normal po...

Страница 14: ...dule is a Dual Attachment Concentrator DAC which is composed of 4 M ports and an A and B port pair that is connected to a single MAC 15 3 Optical Bypass Connector FDDI SwitchModules support one optica...

Страница 15: ...Port is in full duplex mode Green Blinking Autonegotiation is determining the correct duplex setting Off Port is in half duplex mode Copyright 3Com Corporation 2000 All rights reserved 3Com the 3Com l...

Страница 16: ...xhibits a defect in materials or workmanship within the first forty eight 48 hours of installation but no later than thirty 30 days after the date of purchase and this is verified by 3Com it will be c...

Отзывы: