background image

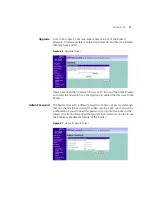
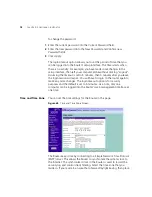
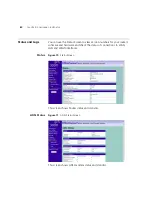
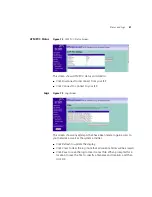
Advanced

71

Gateway

 — the router used to route data to the network specified by 

the network address.

To add a static route entry to the table, click 

Add

 and on the screen that 

appears type in the network address, subnet mask and router. To change 
an entry, click 

Edit

 and to delete an entry, click 

Delete

. After you have 

finished making changes to the table, click 

Apply

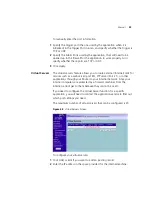
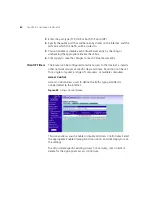
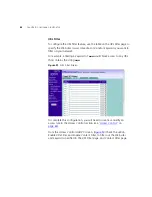
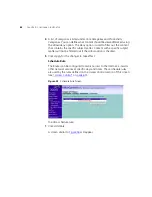
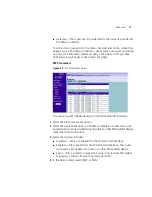
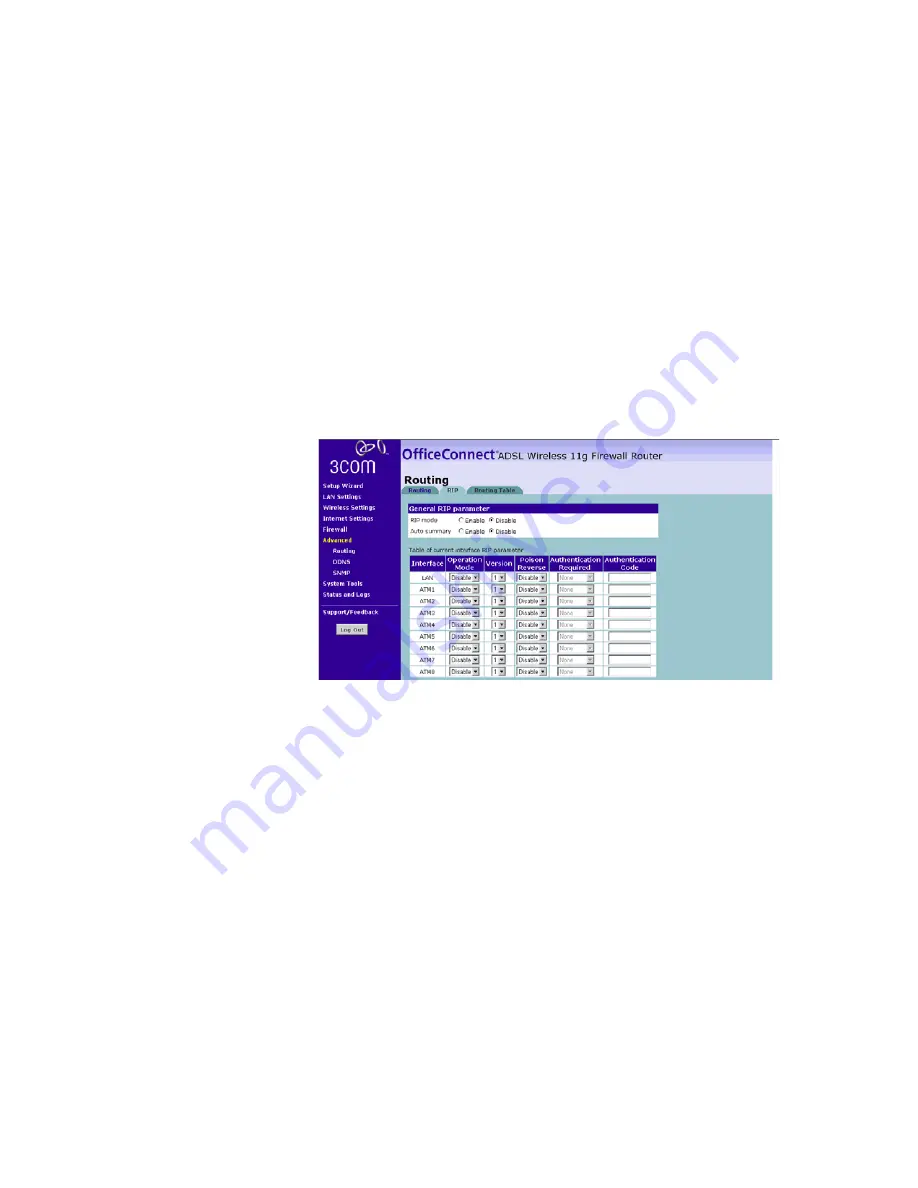
RIP Parameters

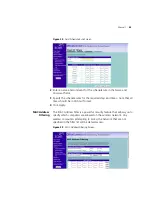
Figure 59   

RIP Parameter Screen

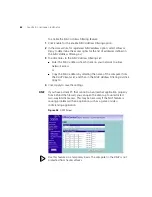
You can set up RIP independently on both LAN and WAN interfaces.

1

Select the RIP Mode 

Enable

 option.

2

Select the appropriate option to enable or disable 

Auto Summary

. Auto 

Summarization sends simplified routing data to other RIP-enabled devices 
rather than full routing data.

3

Select the 

Operation Mode

:

Disabled

 — RIP is not enabled for the WAN or LAN interface.

Enabled

 — RIP is enabled for the WAN or LAN interface. The router 

will transmit RIP update information to other RIP-enabled devices.

Silent

 — RIP is enabled, however the router only receives RIP update 

messages, it will not transmit any messages itself.

4

In the 

Version

 field, select 

RIPv1

 or 

RIPv2

.

Содержание 3CRWDR100A-72 - OfficeConnect ADSL Wireless 11g Firewall Router

Страница 1: ...http www 3com com Part No DUA100A 72AAA02 Published August 2005 OfficeConnect ADSL Wireless 11g Firewall Router User Guide Model WL 542 3CRWDR100A 72 3CRWDR100B 72 3CRWDR100U 72 ...

Страница 2: ...ocumentation contained in or delivered to you in conjunction with this User Guide Unless otherwise indicated 3Com registered trademarks are registered in the United States and may or may not be registered in other countries 3Com and the 3Com logo are registered trademarks of 3Com Corporation Intel and Pentium are registered trademarks of Intel Corporation Microsoft MS DOS Windows and Windows NT ar...

Страница 3: ... Minimum System and Component Requirements 12 Front Panel 12 Rear Panel 13 2 INSTALLING THE ROUTER Introduction 15 Safety Information 15 Positioning the Router 15 Using the Rubber Feet 16 Powering Up the Router 16 Connecting the Router 16 3 SETTING UP YOUR COMPUTERS Obtaining an IP Address Automatically 21 Windows 2000 21 Windows XP 23 Windows 98 ME 23 Macintosh 23 Disabling PPPoE and PPTP Client ...

Страница 4: ...eless Settings 39 Configuring Wireless 39 Encryption 40 Internet Settings 46 Connection Type 46 DNS 55 Hostname MAC 56 Firewall 57 Special Applications 58 Virtual Servers 59 Client IP Filters 60 MAC Address Filtering 65 DMZ 66 Advanced 68 Routing 70 DDNS 73 SNMP 74 System Tools 75 Restart Router 75 Reset to Factory Default 76 Backup Restore Settings 76 Upgrade 77 Admin Password 77 Time and Time Zo...

Страница 5: ...t to Factory Defaults 84 Wireless Networking 85 Recovering from Corrupted Software 87 Frequently Asked Questions 88 A IP ADDRESSING The Internet Protocol Suite 89 Managing the Router over the Network 89 IP Addresses and Subnet Masks 89 How does a Device Obtain an IP Address and Subnet Mask 91 DHCP Addressing 91 Static Addressing 91 Auto IP Addressing 91 B TECHNICAL SPECIFICATIONS OfficeConnect ADS...

Страница 6: ...GREEMENT E OBTAINING SUPPORT FOR YOUR PRODUCT Register Your Product 103 Purchase Value Added Services 103 Troubleshoot Online 104 Access Software Downloads 104 Telephone Technical Support and Repair 104 Contact Us 105 GLOSSARY REGULATORY NOTICES INDEX ...

Страница 7: ...note is shipped with the ADSL 11g Wireless Router and contains information that differs from the information in this guide follow the information in the release note Most user guides and release notes are available in Adobe Acrobat Reader Portable Document Format PDF on the 3Com World Wide Web site http www 3com com Naming Convention Throughout this guide the OfficeConnect ADSL Wireless 11g Firewa...

Страница 8: ...Caution Information that alerts you to potential loss of data or potential damage to an application system or device Warning Information that alerts you to potential personal injury Table 2 Text Conventions Convention Description The words enter and type When you see the word enter in this guide you must type something and then press Return or Enter Do not press Return or Enter when an instruction...

Страница 9: ...Do not use this e mail address for technical support questions For information about contacting Technical Support please refer to Appendix E Related Documentation In addition to this guide each Router document set includes one Installation Guide This guide contains the instructions you need to install and configure your Router ...

Страница 10: ...8 ABOUT THIS GUIDE ...

Страница 11: ...is designed to provide a cost effective means of sharing a single broadband Internet connection amongst several wired and wireless computers The Router also provides protection in the form of an electronic firewall preventing anyone outside of your network from seeing your files or damaging your computers The Router can also prevent your users from accessing Web sites which you find unsuitable Fig...

Страница 12: ... you use the Router in your network Figure 2 it becomes your connection to the Internet Connections can be made directly to the Router or to an OfficeConnect Switch or Hub expanding the number of computers you can have in your network Figure 2 Example Network Using a Firewall Router ...

Страница 13: ...l network address settings DHCP Acts as a Virtual server to enable remote access to Web FTP and other services on your network Security Firewall protection against Internet hacker attacks and encryption to protect wireless network traffic Package Contents The Router kit includes the following items One OfficeConnect ADSL Wireless 11g Firewall Router One power adapter for use with the Router Four r...

Страница 14: ...e ADSL subscription and connection A Web browser that supports JavaScript such as Netscape 4 7 or higher Internet Explorer 5 0 or higher or Mozilla 1 2 1 or higher Front Panel The front panel of the Router contains a series of indicator lights LEDs that help describe the state of various networking and connection operations Figure 3 Router Front Panel 1 Power LED Green Indicates that the Router is...

Страница 15: ...e LED is flashing the link is OK and data is being transmitted or received If the LED is off nothing is connected or the connected device is switched off or there is a problem with the connection refer to Chapter 6 Troubleshooting The port will automatically adjust to the correct speed and duplex Rear Panel The rear panel Figure 4 of the Router contains four LAN ports one ADSL port a reset button ...

Страница 16: ...nt interface for example due to a lost password then you may use this button Refer to Forgotten Password and Reset to Factory Defaults on page 84 for further details 10 Power Switch Push this switch to the in position to turn the unit on In the out position the unit is off 11 Ethernet Ports Using suitable RJ45 cables you can connect your Router to a computer or to any other piece of equipment that...

Страница 17: ...lire attentivement la section Consignes importantes de sécurité avant de mettre en route Positioning the Router You should place the Router in a location that is conveniently located for connection to the telephone socket is centrally located to the wireless computers that will connect to the Router A suitable location might be on top of a high shelf or similar furniture to optimize wireless conne...

Страница 18: ...ber Feet Use the four self adhesive rubber feet to prevent your Router from moving around on your desk or when stacking with flat top units Only stick the feet to the marked areas at each corner of the underside of your Router Powering Up the Router To power up the Router 1 Plug the power adapter into the power adapter socket located on the back panel of the Router 2 Plug the power adapter into a ...

Страница 19: ... are using a full rate G dmt connection your service provider will attach the outside ADSL line to a data voice splitter In this case you can connect your phones and computer directly to the splitter as shown below Figure 6 or If you are using a splitterless G lite connection then your service provider will attach the outside ADSL line directly to your phone system In this case you can connect you...

Страница 20: ...18 CHAPTER 2 INSTALLING THE ROUTER Figure 6 Installing with a splitter ...

Страница 21: ...cate with the Internet 3Com recommends that you perform the initial Router configuration from a computer that is directly connected to one of the LAN ports If you configure the Router from a wireless computer note that you may lose contact with the Router if you change the wireless configuration To communicate wirelessly with your Router your wireless NIC should be set as follows Encryption none S...

Страница 22: ...20 CHAPTER 2 INSTALLING THE ROUTER ...

Страница 23: ...is follow the instructions in this chapter Obtaining an IP Address Automatically Windows 2000 If you are using a Windows 2000 based computer use the following procedure to change your TCP IP settings 1 From the Windows Start Menu select Settings Control Panel 2 Double click on Network and Dial Up Connections 3 Double click on Local Area Connection 4 Click on Properties 5 A screen similar to Figure...

Страница 24: ...l Area Properties Screen 6 Ensure that the options Obtain an IP Address automatically and Obtain DNS server address automatically are both selected as shown in Figure 9 Click OK Figure 9 Internet Protocol TCP IP Properties Screen 7 Restart your computer ...

Страница 25: ... 7 Restart your computer Windows 98 ME 1 From the Windows Start Menu select Settings Control Panel 2 Double click on Network Select the TCP IP item for your network card and click on Properties 3 In the TCP IP dialog select the IP Address tab and ensure that Obtain IP address automatically is selected Click OK Macintosh If you are using a Macintosh computer use the following procedure to change yo...

Страница 26: ... similar to Figure 10 should be displayed 4 Select the Never Dial a Connection option Figure 10 Internet Properties Screen You may want to remove the PPPoE client software from your computer to free resources as it is not required for use with the Router Disabling Web Proxy Ensure that you do not have a web proxy enabled on your computer Go to the Control Panel and click on Internet Options Select...

Страница 27: ...Ensure that you have at least one computer connected to the Router Refer to Chapter 2 for details on how to do this 2 Launch your Web browser on the computer 3 Enter the following URL in the location or address field of your browser http 192 168 1 1 Figure 11 The Login screen displays Figure 11 Web Browser Location Field Factory Default 4 To log in as an administrator enter the password the defaul...

Страница 28: ...logged in either The Status screen will appear Figure 13 Select Setup Wizard from the menu or If your Router has not been configured before the Wizard will launch automatically refer to Figure 14 6 You will be guided step by step through a basic setup procedure Figure 13 Status Screen ...

Страница 29: ...y Select a DSL mode from the following PPPoE PPP over Ethernet providing routing for multiple PCs see page 28 PPPoA PPP over ATM providing routing for multiple PCs see page 29 Bridge Mode for a single PC RFC1483 Bridged Mode for single PCs only see page 31 Routing Mode over ATM RFC1483 Routed Mode for multiple PCs see page 32 Dynamic Fixed IP in 1483 Bridge Mode for multiple PCs see page 33 and cl...

Страница 30: ...x 2 Enter your PPP over Ethernet password in the Password text box 3 Re type your PPP over Ethernet password in the Retype Password text box 4 Enter your VPI and VCI information in the VPI VCI text boxes 5 Select the encapsulation type LLC or VC MUX in the Encapsulation drop down list This information will have been provided to you by your ISP 6 Check all of your settings and then click Next The W...

Страница 31: ...ks in your area you should give your wireless network a unique name PPPoA Mode Figure 17 PPPoA Screen To set up the router for use with a PPP over ATM PPPoA connection use the following procedure 1 Enter your PPP over ATM user name in the Username text box 2 Enter your PPP over ATM password in the Password text box 3 Re type your PPP over ATM password in the Retype Password text box 4 Enter your V...

Страница 32: ...SP 6 Check all of your settings and then click Next The Wireless Settings screen is displayed Figure 18 Wireless Settings Screen 7 Set the Wireless Channel you want to use from the Channel drop down list 8 Specify the SSID to be used by your Wireless Network in the SSID field If there are other wireless networks in your area you should give your wireless network a unique name ...

Страница 33: ...LLC or VC MUX in the Encapsulation drop down list This information will have been provided to you by your ISP 3 Check all of your settings and then click Next The Wireless Settings screen is displayed Figure 20 Wireless Settings Screen 4 Set the Wireless Channel you want to use from the Channel drop down list 5 Specify the SSID to be used by your Wireless Network in the SSID field If there are oth...

Страница 34: ...the Subnet Mask text box 3 Enter the default router in the Default Gateway text box 4 Enter the DNS address in the DNS text box 5 Enter your VPI and VCI information in the VPI VCI text boxes 6 Select the encapsulation type LLC or VC MUX in the Encapsulation drop down list This information will have been provided to you by your ISP 7 Check all of your settings and then click Next The Wireless Setti...

Страница 35: ...it Figure 23 Dynamic Fixed IP for Bridge Mode Screen To obtain an IP address automatically from a DHCP server Check the Get WAN IP By DCHP field and then click Next The Wireless Settings screen is displayed To assign a fixed IP address 1 Enter your Internet IP address in the WAN IP text box 2 Enter the subnet mask in the Subnet Mask text box 3 Enter the default router in the Default Gateway text b...

Страница 36: ...your area you should give your wireless network a unique name Configuration Summary Figure 25 Configuration Summary Screen When you complete the Setup Wizard a configuration summary will display Verify the configuration information of the Router and then click Apply to save your settings 3Com recommends that you print this page for your records Your Router is now configured and ready for use See C...

Страница 37: ...ut if you changed the Router LAN IP address during initial configuration use the new IP address instead When you have browsed to the Router log in using your system password default password is admin Main Menu At the left side of all screens is a main menu as shown in Figure 26 on page 35 When you click on a topic from the main menu that page will appear in the main part of the screen Status Scree...

Страница 38: ...ou can make are Change the Internal IP address of the Router The default is 192 168 1 1 Change the Subnet Mask The default is 255 255 255 0 Enable Disable the DHCP Server Function Default is ON Enabled Specify the Starting and Ending IP Pool Address Default is Starting 2 Ending 254 Specify the IP address Lease Time Default is Half day Specify a local Domain Name Default is NONE To make changes cli...

Страница 39: ...ant to use the Router as a DHCP Server click in the On check option 3 If you need to you can change the range of addresses given out by the Router by changing the IP Pool Start Address and IP Pool End Address fields 4 Specify the DHCP Lease time by selecting the required value from the Lease Time drop down list The lease time is the length of time the DHCP server will reserve the IP address for ea...

Страница 40: ... s network card Client Type Whether the client is connected to the Router by wired or wireless connection As you connect more devices the client list will grow to a maximum number of 253 clients From this section of the screen you can do the following In the table check the Fix text box to permanently fix the IP address In the table click Release to release the displayed IP address Click New to al...

Страница 41: ... enable or disable the wireless section of your LAN When disabled no wireless PCs can gain access to either the Internet or other PCs on your Wired or Wireless LAN through this Router Select the required setting and press Apply Configuring Wireless Click Configuration on the left hand menu the Wireless Configuration Screen displays Figure 30 Wireless Configuration Screen ...

Страница 42: ... then displayed in a site survey and your computer can select a network By clicking disable you can block this random search and set the computer s SSID to a specific network for example WLAN This increases network security If you decide to enable SSID Broadcast ensure that you know the name of your network first 4 In the Wireless Mode drop down list select whether your router will operate in 11b ...

Страница 43: ...rity mode WPA PSK no server WPA WiFi Protected Access provides dynamic key changes and constitutes the best security solution In a wireless network where not all devices support WPA WEP Wired Equivalent Privacy should be used Figure 32 WPA PSK no server Screen To enable WPA PSK 1 Enter the pre shared key in the Pre shared Key PSK field The pre shared key is a password in the form of a word phrase ...

Страница 44: ...your Router and wireless client devices to use WEP Figure 33 128 bit WEP Screen To enable 128 bit WEP 1 You can enter the 128 bit WEP key manually enter your WEP key as 13 pairs of hex digits 0 9 A F Or you can generate the 128 bit WEP key automatically enter a memorable passphrase in the Passphrase box and then click Generate to generate the hex keys from the passphrase The WEP keys on each devic...

Страница 45: ...er the key enter the WEP key as 5 pairs of hex digits 0 9 A F Automatically generate the key enter a memorable passphrase in the Passphrase box and then click Generate to generate the hex keys from the passphrase For 64 bit WEP you can enter up to four keys in the fields Key 1 to Key 4 The radio button on the left hand side selects the key that is used in transmitting data Note that all four WEP k...

Страница 46: ...ction requires that a Radius server is running on the network Figure 35 WPA with RADIUS Server Screen To enable WPA with Radius server 1 Enter the IP address of the RADIUS server on your network into the RADIUS Server field 2 Enter the port that the RADIUS server is operating on in the RADIUS Port field 3 Enter the key for the RADIUS server in the RADIUS Key field 4 By default the WPA keys are cha...

Страница 47: ...nals to extend range and reach though this can affect the overall throughput of data Figure 36 Wireless WDS Settings Screen To enable wireless repeating 1 Check the Enable WDS check box 2 Enter the MAC address es of one or more access points in the AP MAC Address table 3 Click Apply To refresh the list of available access points click Rescan Wireless Networking ...

Страница 48: ...nection you should choose Figure 37 Internet Settings Screen There are six options available for the DSL connection mode PPPoE PPP over Ethernet providing routing for multiple PCs see page 47 PPPoA PPP over ATM providing routing for multiple PCs see page 49 Bridge Mode RFC1483 Bridged Mode for single PCs only see page 51 Routing Mode over ATM RFC1483 Routed Mode for multiple PCs see page 52 Dynami...

Страница 49: ... This information will have been provided to you by your ISP 5 Select the type of Quality of Service CBR UBR or VBR in the QoS field CBR constant bit rate the CBR service class is intended for real time applications for example those requiring tightly constrained delay and delay variation such as voice and video applications The consistent availability of a fixed quantity of bandwidth is considere...

Страница 50: ...the Internet Manual Start in Disconnected means that after re booting the Router the Internet connection will need to be re established manually by the user Manual Start in Connected means that after re booting the Router it will automatically establish connection to your ISP Manual Start in Last State means that after re booting the Router the Internet connection will stay in the previous conditi...

Страница 51: ...n the QoS field CBR constant bit rate the CBR service class is intended for real time applications for example those requiring tightly constrained delay and delay variation such as voice and video applications The consistent availability of a fixed quantity of bandwidth is considered appropriate for CBR service UBR unspecified bit rate the UBR service class is intended for delay tolerant or non re...

Страница 52: ...s on Auto Triggered by Traffic means your Router will automatically connect to your ISP every time a PC needs to access the Internet Manual Start in Disconnected means that after re booting the Router the Internet connection will need to be re established manually by the user Manual Start in Connected means that after re booting the Router it will automatically establish connection to your ISP Man...

Страница 53: ...age appears 1 Select Bridge Mode from the Protocol drop down menu 2 Enter the VPI and VCI parameters provided to you by your ISP in the VPI and VCI fields 3 Select the encapsulation type LLC or VC MUX in the Encapsulation Type field This information will have been provided to you by your ISP 4 Select the type of Quality of Service that you want from the QoS Class drop down menu CBR constant bit ra...

Страница 54: ...Enter the PCR SCR MBS values 6 Click Apply Routing Mode over ATM RFC 1483 Routed Mode This mode is commonly used with either dynamic or static IP addressing In this mode the WAN ADSL port will be configured with an IP address provided by the ISP To configure this page correctly you should obtain the information on this page from your ISP Figure 41 Routing Mode over ATM Screen After clicking Edit o...

Страница 55: ...strained delay and delay variation such as traditional computer communications applications The UBR service may be considered as best effort service VBR variable bit rate QoS class defined by the ATM Forum for ATM networks VBR is subdivided into a real time RT class and non real time NRT class VBR RT is used for connections in which there is a fixed timing relationship between samples VBR NRT is u...

Страница 56: ...elect the type of Quality of Service that you want from the QoS Class drop down menu CBR constant bit rate the CBR service class is intended for real time applications for example those requiring tightly constrained delay and delay variation such as voice and video applications The consistent availability of a fixed quantity of bandwidth is considered appropriate for CBR service UBR unspecified bi...

Страница 57: ...ent box 8 Click Apply Disable Selecting this option means that you do not want your Router to connect to the Internet Figure 43 Disable Internet Connection Screen DNS Domain Name Service or Server an Internet service that translates domain names into IP addresses Because domain names are alphabetic they re easier to remember The Internet however is really based on IP addresses Every time you use a...

Страница 58: ... to enter this information into the Router If you are using a Static IP connection type you may need to enter a specific DNS address and secondary DNS address for your connection to work properly If your connection type is Dynamic PPPoA or PPPoE it is likely that you do not have to enter a DNS address Hostname MAC To configure the Hostname and MAC Address information for your Router select Interne...

Страница 59: ...the MAC Address to the default select Reset MAC 2 Click Apply to save the settings Firewall From these pages you can configure settings for the firewall Your Router is equipped with a firewall that will protect your network from a wide array of common hacker attacks including Ping of Death PoD and Denial of Service DoS attacks You can turn the firewall function off if needed Turning off the firewa...

Страница 60: ...e of the Router Figure 47 Special Applications Screen A list of popular applications has been included to choose from Select your application from the Popular Applications drop down list Then select the row that you want to copy the settings to from the Copy To drop down list and click Copy To The settings will be transferred to the row you specified Click Apply to save the setting for that applic...

Страница 61: ... for services such as a web server port 80 FTP server Port 21 or other applications through your Router to your internal network Since your internal computers are protected by a firewall machines from the Internet cannot get to them because they cannot be seen If you need to configure the Virtual Server function for a specific application you will need to contact the application vendor to find out...

Страница 62: ...e configured to restrict access to the Internet e mail or other network services at specific days and times Restriction can be set for a single computer a range of computers or multiple computers Access Control Access Control allows users to define the traffic type permitted or not permitted to the Internet Figure 49 Access Control Screen This screen allows you to enable or disable all Access Cont...

Страница 63: ...ces to be blocked A list of popular services is given on this screen to block a particular service place a check in the appropriate Blocking check box If the service to be restricted is not listed on the screen you can enter a custom range of ports at the bottom of the page under User Defined Blocked Ports 5 If you want the restriction to only apply at certain times select the schedule rule to app...

Страница 64: ...rd of xxx would block access to any URL that contains the string xxx Figure 51 URL Filter Screen To complete this configuration you will need to create or modify an access rule in the Access Control section see Access Control on page 60 From the Access Control Add PC screen Figure 50 check the option Enable URL Filter and Enable Content Filter to filter out the Web sites and keywords specified in ...

Страница 65: ...ntent Filter feature 1 Select the server that you want to use from the Content Filter Server drop down menu If the server you want to use is not listed enter the server address manually 2 Define the time in the Server Timeout field the default value is 3000ms If the Content Filter Server does not respond within this time period the Router will use the default content filter rule The default rule i...

Страница 66: ...h a specific subject matter will not be filtered out if the Allow option is checked 5 Click Apply for the changes to take effect Schedule Rule The Router can be configured to restrict access to the Internet e mail or other network services at specific days and times These schedule rules are used by the rules defined on the Access Control section of this screen see Access Control on page 60 Figure ...

Страница 67: ... times note that all times should be in 24 hour format 4 Click Apply MAC Address Filtering The MAC Address Filter is a powerful security feature that allows you to specify which computers are allowed on the wireless network Any wireless computers attempting to access the network that are not specified in the filter list will be denied access Figure 55 MAC Address Filtering Screen ...

Страница 68: ... allow network access or Copy the MAC address by selecting the name of the computer from the DHCP Clients List and then in the MAC Address Filtering List click Copy To 4 Click Apply to save the settings DMZ If you have a client PC that cannot run an Internet application properly from behind the firewall you can open the client up to unrestricted two way Internet access This may be necessary if the...

Страница 69: ...dress if known that will be accessing the DMZ PC into the Public IP field so that only the computer on the Internet at this address can access this PC without firewall protection If the IP address is not known or if more than one PC on the Internet will need to access this PC then set the Public IP to 0 0 0 0 Click Apply ...

Страница 70: ... 57 Advanced Screen NAT NAT Before you enable NAT Network Address Translation make sure you have changed the administrator password NAT is the method by which the router shares the single IP address assigned by your ISP with the computers on your network This function should only be disabled by advanced users and if your ISP assigns you multiple IP addresses or you need NAT disabled for an advance...

Страница 71: ...application that is Universal Plug and Play compliant has the ability to communicate with the Router basically telling the Router which way it needs the firewall configured The Router ships with the Universal Plug and Play feature disabled If you are using any applications that are Universal Plug and Play compliant and want to take advantage of the Universal Plug and Play features you can enable t...

Страница 72: ...e presented in the Routing screen Routing RIP Routing Information Protocol RIP allows the network administrator to set up routing information on one RIP enabled device and send that information to all RIP enabled devices on the network Routing table Routing Figure 58 Routing Parameter Screen The Routing parameter screen shows a list of current static route entries For each entry the following info...

Страница 73: ...ndependently on both LAN and WAN interfaces 1 Select the RIP Mode Enable option 2 Select the appropriate option to enable or disable Auto Summary Auto Summarization sends simplified routing data to other RIP enabled devices rather than full routing data 3 Select the Operation Mode Disabled RIP is not enabled for the WAN or LAN interface Enabled RIP is enabled for the WAN or LAN interface The route...

Страница 74: ...ta loops 6 Use the Authentication Required field to choose one of three modes of authentication None Switches off authentication on the specified interface Password An unencrypted text password that needs to be set on all RIP enabled devices connected to this router RIP information is not shared between devices whose passwords do not match 7 In the Authentication Code field enter the password that...

Страница 75: ...ic Domain Server DDNS Screen To set up Dynamic DNS 1 Select the Dynamic DNS Enable option 2 Select a DDNS Service Provider from the drop down list TZO com If you select TZO com 1 In the Domain Name text box enter the domain name 2 In the E mail text box enter the account name 3 In the Key text box enter the account password 4 Click Apply to make this service active DynDNS If you select DynDNS org ...

Страница 76: ...lumn enter the name of the SNMP communication channel Your SNMP management agent needs to be configured with this name so that it can communicate with your router 2 In the Access column select Read to allow the management agent to collect data for example bandwidth usage from your router Select Write to allow the management agent to change the configuration of your router 3 Check the appropriate V...

Страница 77: ...nel to which you want your router to send status messages 3 Set the Version field to match the version of trap messaging that your SNMP management agent supports The router supports V1 and V2c trap messaging System Tools These pages lets you manage different parameters of the router and perform certain administrative functions Restart Router Sometimes it may be necessary to restart or reboot the R...

Страница 78: ...ttings click Reset Backup Restore Settings Figure 65 Backup Restore Settings Screen You can save your current configuration by clicking Save in Backup Settings Saving your configuration will allow you to restore it later if your settings are lost or changed It is recommended that you backup your current configuration before performing a firmware update The Restore Settings option will allow you to...

Страница 79: ...lick Browse and select the firmware file Click Upgrade to upload the firmware to the Router Admin Password The Router ships with a default password of admin 3Com recommends that you change the password for added security Keep your password in a safe place as you will need this password to log into the router in the future It is also recommended that you set a password if you plan to use the Remote...

Страница 80: ...leave the login session will expire You will have to login to the router again to make any more changes The login timeout option is for security purposes and the default is set to 5 minutes As a note only one computer can be logged into the Router s web management interface at one time Time and Time Zone You can set the time settings for the Router in this page Figure 68 Time and Time Zone Screen ...

Страница 81: ...self You can specify which SNTP servers the Router will use to update it s system clock although doing this should only be necessary if you are experiencing difficulty Syslog Server Using third party syslog software this Syslog Server tool will automatically download the Router log to the specified server IP address Figure 69 Syslog Server Screen 1 Check Enable to use this function 2 Enter the ser...

Страница 82: ...version numbers for your router s software and hardware and check the status of connections to WAN LAN and WLAN interfaces Status Figure 70 Status Screen This screen shows Router status and statistics ADSL Status Figure 71 ADSL Status Screen This screen shows ADSL modem status and statistics ...

Страница 83: ...ogs Figure 73 Logs Screen This screen shows any attempts that have been made to gain access to your network as well as the system activities Click Refresh to update the display Click Clear to clear the log note that all current entries will be erased Click Save to save the log to disk in a text file When prompted for a location to save the file to specify a filename and location and then click OK ...

Страница 84: ...ack screen to obtain support and help Support Figure 74 Support Screen This screen shows support information Feedback To provide feedback to 3Com please click Provide Feedback and this will connect you to 3Com Web site Figure 75 Feedback Screen This screen shows feedback information ...

Страница 85: ...Router configuration screens check the following Confirm that the physical connection between your computer and the Router is OK and that the LAN Status LEDs on the Router and network adapter are illuminated and indicating the same speed 10Mbps or 100Mbps Some NICs do not have status LEDs in which case a diagnostic program may be available that can give you this information Ensure that you have co...

Страница 86: ...sure that you have entered the correct information into the Router configuration screens as required by your Internet Service Provider Use the Internet Settings screen to verify this Check that the PPPoE or PPPoA user name and password are correct Ensure that your computers are not configured to use a Web proxy On Windows computers this can be found under Control Panel Internet Options Connections...

Страница 87: ...Router If you have a wired and a wireless NIC in the same computer ensure that the wired NIC is disabled Check the status of the WLAN LED it should be lit if wireless is enabled and will flash when there is wireless activity If not lit go to Wireless Settings on page 39 and enable wireless networking Ensure that the TCP IP settings for all devices are correct Ensure that the Wireless Clients are u...

Страница 88: ...en try initiating a search manually if the client software supports this feature or manually set the channel on your wireless computer to correspond to the Router channel number Please refer to your Wireless computer adapter documentation and vendor to do this Speed of connection The 802 11b and 802 11g standards will automatically choose the best speed depending on the quality of your connection ...

Страница 89: ...will need to reconfigure this computer to obtain an IP address automatically see Obtaining an IP Address Automatically on page 21 3 Restart the computer and re apply power to the Router 4 Using the Web browser on the computer enter the following URL in the location bar http 192 168 1 1 This will connect you to the Recovery utility in the Router 5 Follow the on screen instructions Enter the path an...

Страница 90: ...s switches and wireless access points connected to the Router 3Com wireless access points and hubs and switches provide a simple reliable means of expanding your network contact your supplier for more information or visit http www 3com com Does the Router support virtual private networks VPNs The Router supports VPN passthrough which allows VPN clients on the LAN to communicate with VPN hosts on t...

Страница 91: ...vice over the network the Router must be correctly configured with the following IP information An IP address A Subnet Mask IP Addresses and Subnet Masks Each device on your network must have a unique IP address to operate correctly An IP address identifies the address of the device to which data is being sent and the address of the destination network IP addresses have the format n n n x where n ...

Страница 92: ...ne 192 168 100 identifies the network on which the device resides Part two 8 identifies the device within the network This type of IP Address operates on a subnet mask of 255 255 255 0 See Table 3 for an example about how a network with three computers and a Router might be configured Table 3 IP Addressing and Subnet Masking Type Two In larger networks where there are more devices the IP address o...

Страница 93: ... gets reallocated once you disconnect from the network DHCP will work on any client Operating System such as Windows 95 Windows 98 or Windows NT 4 0 Also using DHCP means that the same IP address and subnet mask will never be duplicated for devices on the network DHCP is particularly useful for networks with large numbers of users on them Static Addressing You must enter an IP Address and the subn...

Страница 94: ... x with a subnet mask of 255 255 0 0 If two devices allocate themselves the same address the conflict is detected and one of the devices allocates itself a new address Automatic IP addressing support was introduced by Microsoft in the Windows 98 operating system and is also supported in Windows 2000 ...

Страница 95: ...6 24 18 12 or 6 Mbps Maximum channels 14 Range up to 304 8m 1000ft Frequency US Canada Europe 2 400 2 4835 GHz Sensitivity 6 12 18 24 36 48 Mbps 85 dBm 54 Mbps 66 dBm typical Modulation CCK BPSK QPSK OFDM Encryption 40 64 bit WEP 128 bit WEP WPA Maximum clients 128 O P Power 18dBm Standard IEEE 802 11b Direct Sequence Spread Spectrum DSSS Transmission rate 11bps automatic fallback to 5 5 2 or 1 Mb...

Страница 96: ...ons Width 220 mm 8 7 in Depth 133 mm 5 2 in Height 38 mm 1 5 in Weight Approximately 550 g 1 1 lbs Standards Functional ISO 8802 3 IEEE 802 3 IEEE 802 11b 802 11g Safety EN 60950 EMC EN 55022 Class B EN 55024 FCC Part 15 Class B ETSI EN 301 489 17 Radio ETS 300 328 2 4 GHz ISM band wide band transmission systems Environmental EN 60068 IEC 68 See Regulatory Notices for conditions of operation ...

Страница 97: ... ME Windows 2000 Windows XP Mac OS 8 5 or higher Unix Ethernet Performance The Router complies to the IEEE 802 3i u and x specifications Cable Specifications The Router supports the following cable types and maximum lengths Category 3 Ethernet or Category 5 Fast Ethernet or Dual Speed Ethernet Twisted Pair shielded and unshielded cable types Maximum cable length of 100m 327 86 ft ...

Страница 98: ...96 APPENDIX B TECHNICAL SPECIFICATIONS ...

Страница 99: ...WARNING To ensure compliance with international safety standards only use the power adapter that is supplied with the unit WARNING The socket outlet must be near to the unit and easily accessible You can only remove power from the unit by disconnecting the power cord from the outlet WARNING This unit operates under SELV Safety Extra Low Voltage conditions according to IEC 60950 The conditions are ...

Страница 100: ... Sie sich bei den zuständigen Stellen ob die Verwendung von Funkfrequenz in dem Bereich in dem der Bluetooth Access Point eingesetzt werden soll erlaubt ist VORSICHT Bei der Installation und beim Ausbau des Geräts ist mit höchster Vorsicht vorzugehen VORSICHT Aufgrund von internationalen Sicherheitsnormen darf das Gerät nur mit dem mitgelieferten Netzadapter verwendet werden VORSICHT Die Netzsteck...

Страница 101: ... Nous vous demandons de lire attentivement les consignes suivantes de sécurité avant d installer ou de retirer l appareil AVERTISSEMENT La Router fournit et utilise de l énergie radioélectrique radio fréquence rf L utilisation de l énergie radioélectrique est interdite dans certains environnements L utilisateur devra se renseigner sur l autorisation de cette énergie dans la zone prévue AVERTISSEME...

Страница 102: ...du moyeu Si vous avez un problème physique avec le moyeu qui ne peut pas être résolu avec les actions de la résolution des problèmes dans ce guide contacter votre fournisseur AVERTISSEMENT Débranchez l adaptateur électrique avant de retirer cet appareil AVERTISSEMENT Ports RJ 45 Il s agit de prises femelles blindées de données RJ 45 Vous ne pouvez pas les utiliser comme prise de téléphone Branchez...

Страница 103: ...INEERING You may transfer the Software Documentation and the licenses granted herein to another party in the same country in which you obtained the Software and Documentation if the other party agrees in writing to accept and be bound by the terms and conditions of this Agreement If you transfer the Software and Documentation you must at the same time either transfer all copies of the Software and...

Страница 104: ...of liability applicable to the Software are as stated on the Limited Warranty Card or in the product manual whether in paper or electronic form accompanying the Software Such warranties and limitations of liability are incorporated herein in their entirety by this reference GOVERNING LAW This Agreement shall be governed by the laws of the State of California U S A excluding its conflicts of laws p...

Страница 105: ...vice Request If you have trouble registering your product please contact 3Com Global Services for assistance Purchase Value Added Services To enhance response times or extend warranty benefits contact 3Com or your authorized 3Com reseller Value added services like 3Com ExpressSM and GuardianSM can include 24x7 telephone technical support software upgrades onsite assistance or advance hardware repl...

Страница 106: ...duct Support heading at www 3com com Software Upgrades are the feature releases that follow the software version included with your original product In order to access upgrades and related documentation you must first purchase a service contract from 3Com or your reseller Telephone Technical Support and Repair To enable telephone support and other service benefits you must first register your prod...

Страница 107: ... directory of contact information posted on the 3Com Web site at http csoweb4 3com com contactus Country Telephone Number Country Telephone Number Asia Pacific Rim Telephone Technical Support and Repair Australia Hong Kong India Indonesia Japan Malaysia New Zealand Pakistan 1 800 678 515 800 933 486 61 2 9424 5179 or 000800 650 1111 001 803 61009 00531 616 439 or 03 3507 5984 1800 801 777 0800 446...

Страница 108: ...00 133 266 AT T 800 998 2112 AT T 800 998 2112 AT T 800 998 2112 57 1 592 5000 800 011 3266 AT T 800 998 2112 AT T 800 998 2112 AT T 800 998 2112 AT T 800 998 2112 AT T 800 998 2112 AT T 800 998 2112 AT T 800 998 2112 AT T 800 998 2112 Guadalupe Guatemala Guyana Haiti Honduras Jamaica Mexico Local Number Mexico Mexico Monserrat Nicaragua Panama Paraguay Peru Puerto Rico Saba Anquila St Kitts Neive...

Страница 109: ...Contact Us 107 US and Canada Telephone Technical Support and Repair 1 800 876 3266 Country Telephone Number Country Telephone Number ...

Страница 110: ...108 APPENDIX E OBTAINING SUPPORT FOR YOUR PRODUCT ...

Страница 111: ...her wireless clients and which acts as a bridge between wireless clients and a wired network such as Ethernet Wireless clients can be moved anywhere within the coverage area of the access point and still connect with each other If connected to an Ethernet network the access point monitors Ethernet traffic and forwards appropriate Ethernet messages to the wireless network while also monitoring wire...

Страница 112: ...Mbps Category 5 cabling is better to use for network cabling than Category 3 because it supports both Ethernet 10 Mbps and Fast Ethernet 100 Mbps speeds Channel Similar to any radio device the Wireless Cable DSL router allows you to choose different radio channels in the wireless spectrum A channel is a particular frequency within the 2 4GHz spectrum within which the Router operates Client The ter...

Страница 113: ...ed into the router and each of it s wireless clients Ethernet A LAN specification developed jointly by Xerox Intel and Digital Equipment Corporation Ethernet networks use CSMA CD to transmit packets at a rate of 10 Mbps over a variety of cables Ethernet Address See MAC address Fast Ethernet An Ethernet system that is designed to operate at 100 Mbps Firewall Electronic protection that prevents anyo...

Страница 114: ...vided into two or three fields a network number and a host number or a network number a subnet number and a host number IP Address Internet Protocol Address A unique identifier for a device attached to a network using TCP IP The address is written as four octets separated with periods full stops and is made up of a network section an optional subnet section and a host section IPsec IP Security Pro...

Страница 115: ... collection of computers and other computer equipment that are connected for the purpose of exchanging information or sharing resources Networks vary in size some are within a single room others span continents Network Interface Card NIC A circuit board installed into a piece of computing equipment for example a computer that enables you to connect it to the network A NIC is also known as an adapt...

Страница 116: ... as opposed to valid IP address numbers recognized by the Internet which must assigned by InterNIC Subnets A network that is a component of a larger network Switch A device that interconnects several LANs to form a single logical LAN that comprises of several LAN segments Switches are similar to bridges in that they connect LANs of a different type however they connect more LANs than a bridge and ...

Страница 117: ...h though this can affect the overall throughput of data WECA Wireless Ethernet Compatibility Alliance An industry group formed to certify cross vendor interoperability and compatibility of 802 11b and 802 11g wireless networking products and to promote the standard for enterprise small business and home environments see also 802 11b 802 11g Wi Fi WEP Wired Equivalent Privacy A shared key encryptio...

Страница 118: ...WLAN is a group of computers and devices connected together by wireless in a relatively small area such as a house or office WPA Wi Fi Protected Access A dynamically changing encryption mechanism for wireless networking Encryption strength is 256 bit ...

Страница 119: ...ential installation This equipment generates uses and can radiate radio frequency energy and if not installed and used in accordance with the instructions may cause harmful interference to radio communications However there is no guarantee that interference will not occur in a particular installation If this equipment does cause harmful interference to radio or television reception which can be de...

Страница 120: ...dows to provide maximum shielding Equipment or its transmit antenna that is installed outdoors is subject to licensing Pour empecher que cet appareil cause du brouillage au service faisant l objet d une licence il doit etre utilize a l interieur et devrait etre place loin des fenetres afin de Fournier un ecram de blindage maximal Si le matriel ou son antenne d emission est installe a l exterieur i...

Страница 121: ...5 EG befindet BMWi Hiermit erklärt 3Com Corporation die Übereinstimmung des Gerätes RLAN device mit den grundlegenden Anforderungen und den anderen relevanten Festlegungen der Richtlinie 1999 5 EG Wien Greek ΜΕ ΤΗΝ ΠΑΡΟΥΣΑ 3Com Corporation ΔΗΛΩΝΕΙ ΟΤΙ RLAN device ΣΥΜΜΟΡΦΩΝΕΤΑΙ ΠΡΟΣ ΤΙΣ ΟΥΣΙΩΔΕΙΣ ΑΠΑΙΤΗΣΕΙΣ ΚΑΙ ΤΙΣ ΛΟΙΠΕΣ ΣΧΕΤΙΚΕΣ ΔΙΑΤΑΞΕΙΣ ΤΗΣ ΟΔΗΓΙΑΣ 1999 5 ÅÊ Italian Con la presente 3Com Corpora...

Страница 122: ...nal spectrum authority to operate this device outdoors In Belgium outdoor operation is only permitted using the 2 46 2 4835 GHz band Channel 13 In France outdoor operation is only permitted using the 2 4 2 454 GHz band Channels 1 7 BRAZIL RF COMPLIANCE Este equipamento opera em caráter secundário isto é não tem direito a proteção contra interferência prejudicial mesmo de estações do mesmo tipo e n...

Страница 123: ... icons About This Guide 8 text About This Guide 8 D DDNS 70 DHCP 87 DHCP Clients List 42 DHCP server 25 42 disabling 26 DMZ Screen 67 DNS 24 DNS Screen 55 DSL mode 29 Dynamic Domain Server DDNS Screen 70 Dynamic IP Address 34 Dynamic Fixed IP for Bridge Mode Screen 35 55 DYNDNS 70 E Editing DHCP Clients List Screen 42 Encryption Screen 44 Encryption disabling 45 F Firewall Screen 59 Forgotten Pass...

Страница 124: ...ing Table Screen 59 S Schedule Rule Screen 65 Setup Wizard 27 SNMP Community Screen 71 SNMP Trap Screen 72 Special Applications Screen 60 Specifications technical 89 SSID 31 32 33 35 36 43 Static Addressing 87 Static Route Parameters Screen 57 Status Screen 28 40 Subnet Mask 85 T TCP IP 23 25 85 Technical specifications 89 standards 89 Time and Time Zone screen 76 TZO com 70 U Universal Plug and P...

Отзывы: