background image

E

XTERNAL 

M

ODEM 

I

NSTALLATION WITH 

W

INDOWS

®


95

39

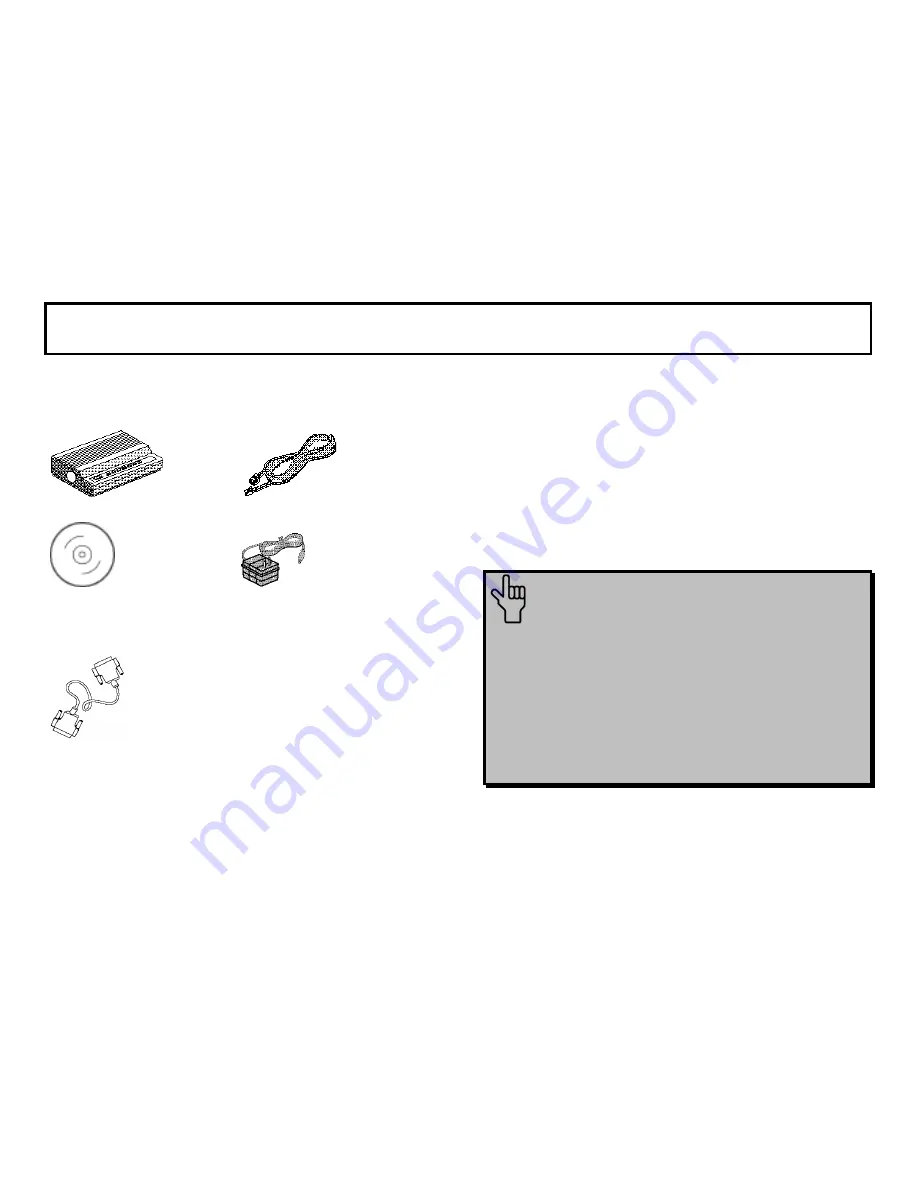
You’ll need these items from your
Sportster

®

 modem box:

 modem      

phone cord

 Connections

 CD

power adapter

Plus:

Serial modem cable. (Not included. See next

column.)

How to Determine Which
Serial Cable to Buy

Before you can begin installation, you need to
purchase an RS-232 serial modem cable. This
section will help you to determine which serial
modem cable to purchase.


NOTE:

 Your computer’s rear panel

may not be identical to the following
diagrams. However, you should look for
connectors that match the enlarged
portions of the diagrams. If you cannot
locate the proper connector, refer to
your computer’s manual.

Содержание 000839-08

Страница 1: ...vice mark of 3Com Corporation or its subsidiaries Windows and Internet Explorer are registered trademarks of Microsoft Corp CompuServe is a registered trademark of CompuServe Inc America Online is a registered trademark of America Online Inc Netscape Navigator is a trademark of Netscape Communications Corp Any other trademarks trade names or service marks used in this manual are the property of th...

Страница 2: ...st s Recommendation 9 How to Change the Modem s Settings 12 How to Insert the Modem into the Computer 14 Internal Modem Installation with Windows 95 21 Plug and Play Installation 21 How to Prepare for Plug and Play Installation 21 How to Insert the Modem into the Computer 23 Installing the Modem Drivers 27 External Modem Installation with Windows 3 x 35 How to Determine Which Serial Cable to Buy 3...

Страница 3: ...ation and Testing 58 Software Installation and Registration Using the Setup Wizard 58 Sending Your First Fax 74 Installing Other Fax Data Software 77 Type of Modem 77 Initialization String 77 Flow Control 77 UART External Modems Only 78 Using Modem Station 79 Why Modem Station 79 What Does Modem Station Do 79 Installing Modem Station 79 Starting Modem Station 82 Using Detect New Modems 84 Using Te...

Страница 4: ...ing Problems 126 If You Need to Return the Modem to Us 127 RapidComm Troubleshooting Tips 127 A Note to Users with Older Versions of RapidComm on Their Systems 128 Glossary 129 Technical Quick Reference 143 Front Panel Lights External Modems 144 Command Summary 145 DIP Switches Modems with DIP Switches Only 160 S Registers 162 The Serial Interface 172 Regulatory Information 174 Manufacturer s Decl...

Страница 5: ...F CONTENTS v IC Canada 175 UL Listing CUL Listing 175 Connecting to the Telephone Company 175 Fax Branding 176 Radio and Television Interference 176 For Canadian Modem Users 178 Limited Warranty 181 Index 184 ...

Страница 6: ...ck the Device Manager tab 4 Double click Computer and the Computer Properties screen appears 5 Select the option at the top of the screen to show Interrupt Requests IRQs You will see the IRQs your system is currently using If IRQs 3 4 5 and 7 are being used you need to free an IRQ before you begin installation This process involves moving a device from the IRQ you want to use to a different and us...

Страница 7: ...desktop with the right mouse button 2 Click Properties 3 In the System Properties screen look at the system information under the General tab circled in the following screen image The number following the text Microsoft Windows 95 will end with 950 950a or 950b This indicates your version of Windows 95 Write this number on the blank below for later reference Then click OK Windows 95 version ______...

Страница 8: ...2 products are capable of 56 kbps downloads however due to FCC rules which restrict power output of the service providers modems current download speeds are limited to 53 kbps Actual speeds may vary depending on line conditions Uploads from users to service providers travel at speeds up to 28 8 kbps An x2 capable modem an x2 compatible analog phone line and an x2 capable Internet Service Provider ...

Страница 9: ...use sound card enhanced graphics card scanner etc require a special connection through which they can communicate with the computer For some devices this connection is called a communications or COM port Most computers have 1 or 2 COM ports but they can have up to 4 Although internal modems do not connect to COM ports directly they do require a COM port setting which is determined by the setting o...

Страница 10: ...ck up or otherwise fail to communicate properly with your modem when there is an IRQ conflict D KEY POINT Accessories cannot share COM ports and should not share IRQs When accessories try to share settings they will either not work properly or not work at all This section of the manual will help you understand the COM IRQ settings on your new Sportster modem U S Robotics has set your modem to a de...

Страница 11: ...onnections CD into your CD ROM drive 2 In Windows Program Manager click Run on the File menu Type d comtest exe and press ENTER This starts ComTest the program that determines which COM ports and IRQs are available for use by your modem 3 The screen in the next column appears when ComTest starts If there is a modem in your computer which you are replacing with your new Sportster modem go to Testin...

Страница 12: ...ou have a free setting you will see a screen like this COM2 IRQ3 is free in this example ComTest might instead recommend COM1 IRQ4 COM3 IRQ4 or COM4 IRQ3 for your modem Write down the displayed settings in the spaces provided on the first page of this manual You ll need to know these settings later Click Next ...

Страница 13: ...o not have a free setting you will see a screen like this Click Finish to exit ComTest Go to What to Do with ComTest s Recommendation on page 8 6 When you see this screen click Finish to exit ComTest Go to What to Do with ComTest s Recommendation on page 8 ...

Страница 14: ...settings down in the spaces provided on the first page of this manual Turn off and unplug your computer and remove your present modem Go to How to Change the Modem s Settings on page 10 What to Do with ComTest s Recommendation NOTE If your communications software requires a modem that ComTest does not recommend there is a good chance that the setting is being used by another device in your system ...

Страница 15: ... the modem but you run the risk that the modem and or the other accessory sharing the IRQ might not work properly If you do not have a sound card use COM3 IRQ5 Write COM3 and IRQ5 in the spaces provided on the first page of this manual You will have to change the settings on your modem Go to How to Change the Modem s Settings on page 10 If you do have a sound card use COM2 IRQ3 To use this setting...

Страница 16: ...your computer manufacturer s manual Find out which socket is COM1 and which is COM2 If nothing is plugged into either port you may choose either of the ports to disable Your computer manufacturer s manual will tell you how to disable the COM port If one port does not have anything plugged into it note if the port is COM1 or COM2 This is the port you ll want to disable for your modem If both ports ...

Страница 17: ...r computer the back is usually unpainted to discharge static electricity before handling the modem Static can damage your modem Then take the modem out of its plastic bag 2 Find the COM and IRQ jumper shunts small black plastic pieces on your modem s jumper pins see the following diagram 3 To change the COM port and IRQ settings you need to reposition the jumper shunts on the COM port and IRQ pins...

Страница 18: ...omputer with the tweezers pliers A jumper shunt needs to be sitting on both jumper pins in order to effectively set the modem to the desired setting 4 Move the jumper shunt to the new setting The COM port setting can involve one to three shunts The four possible COM port settings are as follows 0 1 SEL COM 1 0 1 SEL COM 3 0 1 SEL COM4 0 1 SEL COM2 Unlike most COM port settings the IRQ setting invo...

Страница 19: ...ur customer support department a customer support representative will ask you for the serial number This will help him or her identify your modem 1 Turn off your computer and unplug it from the electrical outlet 2 Unplug any peripheral devices printer monitor keyboard mouse etc from the computer TIP Before you unplug anything label the cords or make a sketch of how things are connected This can be...

Страница 20: ...Contact your computer manufacturer or review their manual if you need further instructions 4 Find an empty ISA expansion slot at least as long as the gold edge of your modem ISA slots have black plastic grooves lined with silver Unscrew and remove the expansion slot cover the long narrow piece of metal that keeps dust from entering through the opening perpendicular to the slot Be careful not to dr...

Страница 21: ...omputers have vertically aligned slots The instructions apply to both styles You need to apply a little pressure to seat the modem properly Sometimes a gentle back and forth motion helps to fit the modem all the way into the slot If you feel resistance the modem may not be properly lined up with the slot Do not force it into the slot Remove the modem and try again 6 Once the modem is in place fast...

Страница 22: ...e for an ANALOG phone line the type found in most homes Many office buildings have digital phone lines Be sure you know which type of line you have The modem will be damaged if you use a digital phone line 9 Plug one end of the phone cord that came with the modem into the TELCO jack at the rear of the modem Plug the other end of the cord into the wall jack 10 If you wish to use a phone through the...

Страница 23: ...he power cords cables and peripherals back into the computer and turn the computer on 12 Start Windows 13 If you have your modem set to COM1 IRQ4 or COM2 IRQ3 go to Software Installation and Testing on page 57 If you have your modem configured to any other setting open Program Manager and double click the Main icon 14 Double click the Control Panel icon ...

Страница 24: ...H WINDOWS 3 X 19 15 Double click the Ports icon 16 If it s not already selected click the COM port for your modem Then click Settings 17 Click Advanced 18 In the Interrupt Request Line IRQ box select the IRQ that ComTest recommended ...

Страница 25: ...il you see a screen with a Close button Click Close to exit Program Manager You are now ready to install the software on the Connections CD ROM included with your Sportster modem Turn to Software Installation and Testing page 57 for detailed information about installing the software registering the modem and trying out your modem by faxing U S Robotics ...

Страница 26: ...ce your new Sportster is a Plug and Play device Windows 95 may be able to detect your modem automatically after you plug it into your computer This section will guide you through this Plug and Play installation How to Prepare for Plug and Play Installation 1 Touch an unpainted metal part of your computer the back is usually unpainted to discharge static electricity Static can damage your modem ...

Страница 27: ...When doing a Plug and Play installation the jumper shunts should be placed so that they are hanging from single jumper pins rather than on pairs of pins Move your jumper shunts so they are hanging as in the following diagram NOTE If you need to move the jumper shunts grasp them with a tweezers or a needle nosed pliers DO NOT grasp too firmly however or you may crush the jumper shunts If a jumper s...

Страница 28: ...ort department a customer support representative will ask you for the serial number This will help him or her identify your Sportster modem 1 Turn off your computer and unplug it from the electrical outlet 2 Unplug any peripheral devices printer monitor keyboard mouse etc from the computer TIP Before you unplug anything label the cords or make a sketch of how things are connected This can be helpf...

Страница 29: ...act your computer manufacturer or review their manual if you need further instructions 4 Find an empty ISA expansion slot that s at least as long as the gold edge of your modem ISA slots are black plastic grooves lined with silver Unscrew and remove the expansion slot cover the long narrow piece of metal that keeps dust from entering through the opening perpendicular to the slot Be careful not to ...

Страница 30: ...ed to apply a little pressure to seat the modem properly Sometimes a gentle back and forth motion helps fit the modem all the way into the slot If you feel resistance the modem may not be properly lined up with the slot Do not force it into the slot Remove the modem and try again 6 Once the modem is in the slot screw the modem firmly into place using the screw that you removed in step 4 7 Replace ...

Страница 31: ...you use a digital phone line 9 Plug one end of the phone cord included with the modem into the TELCO jack at the rear of the modem Plug the other end of the cable into the wall jack 10 If you wish to use a phone through the line the modem uses when the modem is not in use plug your phone s cord into the modem s PHONE jack NOTE You cannot use the modem and a phone at the same time if they share the...

Страница 32: ...on 950b on page 29 Otherwise follow these instructions Installing Modem Drivers with Windows 95 Versions 950 and 950a 1 When Windows 95 restarts it should detect the modem If it does you will see the following screen Click Driver from disk provided by hardware manufacturer Then click OK NOTE If this screen does not appear go to the section titled Manual Modem Installation on page 49 ...

Страница 33: ...E If your CD ROM drive has a different letter name type that letter instead of D Click OK Windows will load the modem s drivers 3 Once Windows finishes loading the information from the CD ROM you should verify that the modem installation was a success When your desktop returns click the Windows Start button and point to Settings Then click Control Panel ...

Страница 34: ...NTERNAL MODEM INSTALLATION WITH WINDOWS 95 29 4 Double click the Modems icon circled in the screen image below 5 In the Modems Properties screen you should see Sportster 33600 Fax PC Plug and Play listed ...

Страница 35: ... section on page 49 6 Next click the Diagnostics tab at the top of the Modems Properties screen Write down the COM setting for your modem NOTE Your screen may show a different setting than that shown in the following screen You will need to know this setting when you install RapidComm Turn to Software Installation and Testing page 57 for detailed information about installing RapidComm registering ...

Страница 36: ...ws 95 Version 950b 1 When Windows restarts it should detect the modem see following screen image Insert the Connections CD and click Next NOTE If this screen does not appear go to the section titled Manual Modem Installation on page 49 2 When you see the following screen click Finish ...

Страница 37: ...r screen may show a different COM port Make a note of the COM port setting You will need this information later when you installing the software on the CD ROM Remove the CD from your CD ROM drive and click OK Windows will restart 4 Once Windows restarts you should verify that the modem installation was a success When your desktop returns click the Windows Start button and point to Settings Then cl...

Страница 38: ...NTERNAL MODEM INSTALLATION WITH WINDOWS 95 33 5 Double click the Modems icon circled in the screen image below 6 In the Modems Properties screen you should see Sportster 33600 Fax PC Plug and Play listed ...

Страница 39: ... section on page 49 7 Next click the Diagnostics tab at the top of the Modems Properties screen Write down the COM setting for your modem NOTE Your screen may show a different setting than that shown in the following screen You will need to know this setting when you install RapidComm Turn to Software Installation and Testing page 57 for detailed information about installing RapidComm registering ...

Страница 40: ...h Serial Cable to Buy Before you can begin installation you need to purchase an RS 232 serial modem cable This section will help you to determine which serial modem cable to purchase NOTE Your computer s rear panel may not be identical to the following diagrams However you should look for connectors that match the enlarged portions of the diagrams If you cannot locate the proper connector refer to...

Страница 41: ...nnector How to Connect the Modem to the Computer 1 Turn off your computer and any attached devices such as a printer 2 Connect the serial cable to the modem and to the computer When looking for the serial port label on the back of your computer look for ports labeled COM MODEM RS 232 or SERIAL DO NOT select AUX GAME LPT or PARALLEL 3 Plug the power adapter into the a standard wall outlet and inser...

Страница 42: ...ost homes Many office buildings have digital phone lines Be sure you know which type of line you have The modem will be damaged if you use a digital phone line 5 If you wish to use your modem and phone through the same phone wall jack plug your phone s cord into the modem s phone jack labeled with a phone icon on the bottom of the case NOTE You cannot use the modem and a phone at the same time if ...

Страница 43: ...ady to install the software on the Connections CD ROM included with your Sportster modem Turn to Software Installation and Testing page 57 for detailed information about installing the software registering the modem and trying out your modem by faxing U S Robotics ...

Страница 44: ...h Serial Cable to Buy Before you can begin installation you need to purchase an RS 232 serial modem cable This section will help you to determine which serial modem cable to purchase NOTE Your computer s rear panel may not be identical to the following diagrams However you should look for connectors that match the enlarged portions of the diagrams If you cannot locate the proper connector refer to...

Страница 45: ...er and any attached devices such as a printer 2 Connect the serial cable to the modem and to the computer When looking for the serial port on the back of your computer look for labels marked COM MODEM RS 232 or SERIAL DO NOT select AUX GAME LPT or PARALLEL 3 Plug the power adapter into a standard wall outlet and insert its plug into the power jack on the modem labeled with a power adapter icon on ...

Страница 46: ...modem will be damaged if you use a digital phone line 5 If you wish to use your modem and phone through the same phone wall jack plug your phone s cord into the modem s phone jack labeled with a phone icon on the bottom of the case NOTE You can not use the modem and phone at the same time if they share the same telephone line 6 Turn on your modem the power switch is located on the front panel Then...

Страница 47: ...o Installing Modem Drivers with Windows 95 Version 950b on page 44 Otherwise follow these instructions Installing Modem Drivers with Windows 95 Versions 950 and 950a 1 When Windows 95 restarts it should detect the modem If it does you will see the following screen Click Driver from disk provided by hardware manufacturer Then click OK ...

Страница 48: ... If your CD ROM drive has a different letter name type that letter instead of D Click OK Windows will load the modem s drivers 3 Once Windows 95 finishes loading the information from the CD ROM you should verify that the modem installation was a success When your desktop returns click the Windows Start button and point to Settings Then click Control Panel ...

Страница 49: ...ON WITH WINDOWS 95 44 4 Double click the Modems icon circled in the screen image below 5 In the Modems Properties screen you should see Sportster 33600 Fax Plug and Play listed This means the installation was a success Click OK ...

Страница 50: ...ick the Diagnostics tab at the top of the Modems Properties screen Write down the COM setting for your modem NOTE Your screen may show a different setting than that shown in the following screen You will need to know this setting when you install RapidComm later Turn to Software Installation and Testing page 57 for detailed information about installing RapidComm registering the modem and trying ou...

Страница 51: ...ws 95 Version 950b 1 When Windows restarts it should detect the modem see following screen image Insert the Connections CD and click Next NOTE If this screen does not appear go to the section titled Manual Modem Installation on page 49 2 When you see the following screen click Finish ...

Страница 52: ...r screen may show a different COM port Make a note of the COM port setting You will need this information later when you installing the software on the CD ROM Remove the CD from your CD ROM drive and click OK Windows will restart 4 Once Windows restarts you should verify that the modem installation was a success When your desktop returns click the Windows Start button and point to Settings Then cl...

Страница 53: ...ON WITH WINDOWS 95 48 5 Double click the Modems icon circled in the screen image below 6 In the Modems Properties screen you should see Sportster 33600 Fax Plug and Play listed This means the installation was a success Click OK ...

Страница 54: ... click the Diagnostics tab at the top of the Modems Properties screen Write down the COM setting for your modem NOTE Your screen may show a different setting than that shown in the following screen You will need to know this setting when you install RapidComm Turn to Software Installation and Testing page 57 for detailed information about installing RapidComm registering the modem and trying out y...

Страница 55: ...f you were directed to this section Plug and Play installation failed to work properly Follow these instructions to manually install your new Sportster modem 1 From the Windows 95 desktop double click My Computer 2 Double click Control Panel 2 Double click Add New Hardware 4 Click Next ...

Страница 56: ...MANUAL MODEM INSTALLATION 51 5 Click No and then click Next 6 Click Modem and then click Next ...

Страница 57: ...DEM INSTALLATION 52 7 When you see this screen de select the Don t detect my modem option if it s selected i e make sure there is not a check mark in the box next to the selection Then click Next 8 Click Change ...

Страница 58: ...k Have Disk 10 When you see this screen insert the Connections CD into your CD ROM drive Type D in the Copy manufacturer s files from field Then click OK NOTE If your CD drive has a letter name other than D type that letter in place of D ...

Страница 59: ...an internal modem or Sportster 33600 Fax Plug and Play if you installed an external modem Then click OK NOTE The following screen shows an internal 33 6 modem being selected 12 Write the COM port setting in the top line of the following screen here ____ NOTE The following screen shows information for an internal modem installed on COM 4 Your screen may show different information Click Next ...

Страница 60: ...LATION 55 13 When you see this screen click Finish 14 Now you should verify that the modem installation was a success When your desktop returns click the Windows Start button and point to Settings Then click Control Panel ...

Страница 61: ...he screen image below 16 In the Modems Properties screen you should see your modem listed NOTE The screen below shows an external 33 6 modem listed Your screen may show different information but you should verify that the description is accurate for the product you installed ...

Страница 62: ...sted in the preceding screen the installation was unsuccessful Please refer to the Troubleshooting and Online Help Resources section on page 113 Turn to Software Installation and Testing page 57 for detailed information about installing RapidComm registering the modem and trying out your modem by faxing U S Robotics ...

Страница 63: ...desktop You can build your own fax directory send faxes to specified groups of phone numbers request individual cover pages when necessary and send individual faxes without exiting your word processing program Additionally RapidComm software lets you connect to BBSs and other online data providers Take advantage of this access to enter a new world of information and entertainment NOTE The followin...

Страница 64: ... the Start button and then click Run 2 In the text box type D setup exe If your CD ROM drive has a letter name other than D type that letter in place of D 3 You will briefly see a screen that looks like this 4 When you are asked if you wish to run the Setup Wizard click Yes ...

Страница 65: ... screen After reading the screen click Next 6 When you see the following screen select your modem from the list verify that the COM port setting is correct and then click Next NOTE Check the COM port setting against the setting you wrote down during the hardware installation ...

Страница 66: ...TESTING 61 7 When you see the next two screens fill in the blank boxes with the appropriate information using the TAB key to move between fields Click Next on each screen when you have filled in all of the necessary information ...

Страница 67: ...find Netscape Navigator it searches for Microsoft s Internet Explorer If the Setup Wizard does not find Internet Explorer it will automatically install the application later in the Setup Wizard process 10 The next screen introduces the U S Robotics Registration Wizard After you read the screen click Next Read through each of the next two screens and verify or correct the information you typed earl...

Страница 68: ...ND TESTING 63 11 When you see this screen you are ready to register your new modem Click By Modem We recommend you choose the By Modem option because it s a great way to verify that your Sportster modem is correctly installed ...

Страница 69: ... does not dial the number properly you may need to insert a comma between the prefix and the 1 to force the modem to pause after dialing the prefix If you do not need to dial a prefix simply click Dial 13 You will see a screen indicating that the registration information has been sent see circled text in the screen below 14 The next screen indicates that the Setup Wizard is finished Click OK to la...

Страница 70: ...Explorer on your system earlier in the setup process it will launch the Internet Explorer installation utility after you click OK When you see the following screen click Install Internet Explorer and follow the on screen instructions to complete the installation of the software At the end of the installation process you will see the following screen Click Yes Windows 95 users Windows will restart ...

Страница 71: ...estart When your desktop reappears you will see a Connections icon shown below in the Connections program group Double click the icon to launch the CD 15 When the main Connections menu appears click Business Productivity on the left hand side of the screen circled below ...

Страница 72: ... RapidComm is the fax data software you can use to send faxes directly from your desktop transfer files electronically or dial into a BBS Click RapidComm 17 The next screen contains a menu on the right hand side of the screen Included on the menu is a Learn More Get Software button circled in the screen image below Click this button ...

Страница 73: ... left hand corner of the following screen image NOTE If you are using Netscape Navigator to view your Connections CD ROM you may be asked to save the application s installer to your computer when you click the Install button Note the installer s file name and its location on your computer To run the installer or demo find the file on your computer and double click it The installer will start ...

Страница 74: ... wish to copy the RapidComm files to a different directory type that location in the text box before clicking Install 20 You will see this screen as files are copied 21 When you see this screen click either Yes or No If you click Yes every document you print will be treated as a fax unless you change the printer selection in the program from which you are printing If you click No RapidComm will no...

Страница 75: ...end a fax you must select RapidComm as the printer in the program from which you are printing 22 This screen marks the end of the RapidComm installation Click OK 23 Click OK to return to Connections Click Exit circled in the following screen image ...

Страница 76: ...tton and pointing to Shut Down Click Restart the Computer on the Shut Down Windows screen Then click Yes 25 When your desktop appears click Windows Start Point to Programs Then click RapidComm 26 The following is the first RapidComm Setup Wizard screen After you read the screen click Next ...

Страница 77: ...When you see this screen verify the information shown and then fill in the Data box if you have a third phone number just for your modem and the Local Area Code box Then click Next 28 After you verify the information on this screen click Next ...

Страница 78: ...following screen Then click Next 30 When you see this screen If you want the RapidComm program to launch with every Windows startup select the Run RapidComm at Windows startup check box Then click Finish If you do not want RapidComm to start every time you start Windows simply click Finish ...

Страница 79: ...x machine Once you learn the basics of sending faxes you can learn more involved fax functions such as sending documents to groups of numbers at assigned times and how to transfer data files These more advanced functions are explained in the electronic RapidComm manual on your Connections CD This chapter will walk you through sending your first fax 1 Open an application in which you can create doc...

Страница 80: ...your application to indicate that you are ready to print in the Print dialog box 5 When you see the following screen fill in the necessary information in the text boxes For testing purposes send your tester document to the 3Com fax number 847 676 3559 NOTE If you need to enter a prefix such as 9 to dial a number outside your building type the prefix before the fax number in the Fax number field Wh...

Страница 81: ...n successfully transmitted you will see a screen that looks like this Congratulations you are now ready to start using your Sportster modem Go to the electronic RapidComm manual on your Connections CD for more detailed instructions on sending faxes and other things you can do using your Sportster modem and RapidComm software ...

Страница 82: ... of modem you are using Select a U S Robotics Sportster high speed modem If that selection is not listed pick Courier Dual Standard V 32bis or V 34 D KEY POINT Refer to the manual that came with your software for its installation instructions The software s installation program will ask you questions about the modem you are using Initialization String For hardware flow control a fixed serial port ...

Страница 83: ...ngs panel In this screen you should find the UART chip used the last item in each COM port column Match the UART type listed in MSD with the serial rate listed in the chart below Select this serial rate in any communications software you use Select this If this is your UART serial rate 16550 115 2 or 57 6 kbps 16450 38 4 kbps 8250 19 2 kbps All Sportster internal modems have a 16550 UART NOTE DO N...

Страница 84: ...tion Modem commands can be confusing and difficult to memorize Communications software often needs technical information about your modem You may want to tweak your modem for optimum performance You d rather be surfing the Internet Installing Modem Station If you did not install Modem Station when you first installed the Connections CD please follow these instructions 1 Insert the Connections CD i...

Страница 85: ...o install Modem Station Click Yes 7 Wait a few moments for the Installation Wizard to load 8 After reading the information on the Welcome screen click Next 9 When you see this screen click Next to accept the default directory or click Browse to change directories ...

Страница 86: ...fault program folder You can place Modem Station in an existing folder by selecting one from the list 11 When you see the following screen click Finish to complete the installation If this is the first time you ve installed Modem Station you may be asked to restart your computer ...

Страница 87: ... t start Modem Station from the Setup program please start it now 2 Click Windows Start button and then point to Programs Click U S Robotics Modem Station or the folder you selected during installation 3 Click the Modem Station icon This brings up the main menu ...

Страница 88: ... directly to your modem and displays the responses You can use Terminal to dial up BBSs In addition you can configure your modem using Terminal However it is much easier to use the Modem Configurator MODEM CONFIGURATOR Modem Configurator provides an easy to use interface for entering hard to remember commands Use Modem Configurator for troubleshooting initial configuration and tuning your modem fo...

Страница 89: ...ace to start You can download FAQs software and help files from our Web sites and BBS or receive individualized support via support usr com Type 0000 4 zeroes in the subject line of your e mail I Using Detect New Modems 1 Click Detect New Modems to bring up the following screen The screen consists of four columns one for each possible COM port on a PC You can scan a specific port s by selecting th...

Страница 90: ...odem Station will find the modem and display make and model information under the assigned port All currently active ports should display Port OK under the heading If a port displays a Port Error it usually means that the port is disabled in system setup NOTE Different systems and BIOSes use different methods of disabling COM ports As a result we cannot provide support for enabling COM ports Pleas...

Страница 91: ... detailed information about your modem previous connections firmware dates etc This next section details using the Terminal option Using Terminal You can access Terminal from either the Main menu or the Detect New Modems screen Clicking Terminal brings up the Terminal window In addition to allowing direct entry of modem commands the Terminal window also allows you to dial into Bulletin Boards list...

Страница 92: ...l featured Terminal program like the one provided in our RapidComm software On the lower part of the Terminal screen you will see the COM port your modem is currently using To select another modem simply click on the arrow and select that modem s assigned port To the right of the port settings are the port speed settings Port speed is the speed at which your computer sends data to the ...

Страница 93: ...et an outside line and whether the dialer should wait between dialing that digit and the rest of the number Once you provide this information simply enter the phone number as if you were dialing a telephone Click Dial Now to dial the number You can end a call by clicking Hang Up at the bottom of the screen When you are finished using Terminal click Exit to return to the screen you accessed it from...

Страница 94: ... Data Control screen The Data Control screen allows you to assign the following basic communications settings PORT SPEED PARITY STOP BITS WORD FLOW CONTROL SERIAL PORT RATE For information on using these settings please refer to the Glossary at the back of this manual Click Help for quick definitions of the terminology used in this screen In the upper left hand corner of the screen you will see th...

Страница 95: ...re tiny switches that control a few basic functions on some external modems On modems without DIP switches these functions are handled by modem commands Click Exit to return to the Modem Configurator menu CONNECTION CONTROL This is where you adjust your modem s connection and transmission settings Click Connection Control to bring up this screen In the upper left hand corner of this screen you wil...

Страница 96: ... sections of this manual TIP On external modems receiving a Data Terminal Ready signal causes the TR light to light up Click Help for quick definitions of terminology used in this screen Once you have configured your Connection Control settings click Save to Modem to save your settings Using Modem to Computer These settings control how your modem and computer communicate with each other They contr...

Страница 97: ...h your software and modem have Local Echo set to ON Turn Local Echo OFF on EITHER the modem or the software to solve this problem For details on using the commands in this screen refer to the Glossary or Technical Quick Reference sections of this manual Click Help to see quick definitions of terminology used in this screen This screen also includes a chart of the ways result codes can be displayed...

Страница 98: ...he screen you will see the current connection commands This screen allows you to configure the following settings MODULATIONS V 34 SYMBOL RATES SPEEDS Again once you have selected your settings click Save to Modem to save them When you are finished click Exit to return to the Modem Configurator menu Please refer to the main body of the manual and the Glossary for detailed information about the ter...

Страница 99: ...DIALING METHOD SPEAKER VOLUME TECHNICAL STUFF Negotiation is the noise we hear when two modems connect The modems exchange information about their respective protocols and configurations Once they agree on the fastest protocol they can both handle transmission begins STORED NUMBERS The Stored Numbers screen displays the phone numbers currently stored in your modem s memory Use this screen to edit ...

Страница 100: ...tored numbers by highlighting them and then typing the new numbers in their place Once you store your numbers you can dial them by entering this command from Terminal Mode ATDS0 ATDS1 ATDS2 etc Your U S Robotics modem comes with one phone number already stored in Position 0 If you haven t changed the default typing ATDS0 will automatically dial the U S Robotics BBS You will want to change this if ...

Страница 101: ...rmation about your modem Unfortunately some of this information is very complex We devote a separate section to the Extended Information screens so that we can explain what you ll see and why it is important to you as fully as possible There are a series of commands used to obtain detailed information from U S Robotics modems Extended Information provides a convenient way to get that important inf...

Страница 102: ...will have access to Dial Security information Click ROM Checksum to bring up the following screen Technicians use the ROM Checksum to verify information stored in the modem s Read Only Memory You can check the ROM Checksum from any Terminal program by typing ATI1 and pressing ENTER For information about the specific modem you are using click Product to bring up the next screen ...

Страница 103: ...s Only one can be active at any time To see information about the profile in use click Active Profile to bring up the next screen This screen contains information about your modem s current configuration Starting from the top you will see the make and model of your modem Directly below that you will see basic commands currently in use Below that are the current connection settings ...

Страница 104: ...his information by typing ATI4 in a Terminal program and pressing ENTER The next option displays the Stored Profile screen This screen shows the configuration stored in your modem s NVRAM special programmable memory Note that any stored phone numbers are displayed on this screen as well This is the equivalent of the ATI5 command The information displayed is in the same format as the Active Profile...

Страница 105: ...ory your modem has for processing commands and internal functions Supervisor Date or EPROM Date displays the version date of the firmware stored in the Supervisor chip The Supervisor chip contains the special software used to control your modem s functions If a support representative asks you for your Supervisor or EPROM date look here DSP Date is the date of the firmware that controls the DSP in ...

Страница 106: ...used as an aid in diagnosing connection failures but it also can provide information about connection speeds and phone line conditions Modulation displays the speed and type of connection Carrier Frequency displays the electrical frequency of the carrier signal Symbol Rate displays the speed of the transmission Trellis Code Nonlinear Encoding Shaping and Precoding all refer to methods of handling ...

Страница 107: ... clicking on VxD to view information on the Winmodem driver Please refer to your Winmodem manual for detailed information on the Winmodem drivers Courier modem users will see a display of current Dialback Security settings Refer to your Courier documentation for instructions on configuring these special features We hope that you enjoy exploring the world of information and entertainment your new S...

Страница 108: ... 56 K update FREE Fee for upgrades is subject to change NOTE You can obtain this software from our BBS 847 982 5092 or from our World Wide Web page www 3com com if you do not have a Connections CD ROM NOTE Complete the instructions in the Software Installation and Testing section of this manual before installing the Modem Update Wizard NOTE These instructions pertain to Windows 3 x and Windows 95 ...

Страница 109: ...point to Programs Point to U S Robotics Connections Then click Connections NOTE Windows 3 x users launch the CD ROM by clicking the Connections icon in the Connections program group 3 From the main Connections menu click Customer Support circled in the following screen shot ...

Страница 110: ...BOTICS MODEM UPDATE WIZARD 105 4 When the Customer Support menu appears click Modem Update Wizard circled in the following screen shot 5 Next click Learn More Get Software circled in the following screen shot ...

Страница 111: ...d to save the setup program for the Update Wizard to your hard drive Save the utility to your hard drive and exit Connections Run the utility to begin installation Then return to this page 7 This launches the U S Robotics Modem Update Wizard Installer The screen that follows is the welcome screen for the installer After you read this screen click Next ...

Страница 112: ...EM UPDATE WIZARD 107 8 The next screen indicates where the installer will store the files for the Update Wizard If the indicated location is acceptable click Next Otherwise click Browse to find an acceptable directory ...

Страница 113: ...ller creates the Modem Update Wizard program group 10 This screen indicates that the setup is complete Click OK Operation 1 Click the Windows Start button Point to Programs Then point to U S Robotics Modem Update Wizard Finally click Modem Update Wizard 2 After you read the Welcome screen click Next ...

Страница 114: ...the license agreement click Accept to continue 4 The software will now detect any modems installed on your system When the detection phase finishes you will see the following screen the modems shown on your screen may differ Click the modem you wish to upgrade and then click Next to continue ...

Страница 115: ...the following screen Click U S Robotics if your modem is a U S Robotics modem to learn more about your upgrade options Click Other to learn more about how to purchase a U S Robotics x2 modem Upgradable Modems If the modem IS software upgradable you will see the following screen Click Dial U S Robotics which should be the default selection in the pull down menu Click Upgrade to x2 Technology if you...

Страница 116: ...a screen that includes a credit card information query Users who are updating their modem s code will see a personal information query screen Fill in the screen with the appropriate information and then click Next 7 The following screen dials the U S Robotics Update Server Click Tone or Pulse dialing as necessary If you normally dial a prefix such as 9 to dial out on your phone line type that pref...

Страница 117: ...nload procedure NOTE Users purchasing a 56K upgrade are asked if the charge is acceptable see the following screen image Unless you have already been charged for an upgrade click Yes to continue If you have already been through this process once before DO NOT click Yes Click No and call Customer Support at 847 982 5151 The price of the upgrade is subject to change and includes applicable taxes ...

Страница 118: ...IZARD 113 NOTE If you do not have the most up to date inf file for your modem the file that helps Windows correctly identify your modem you will see the following screen as the Modem Update Wizard automatically downloads the file ...

Страница 119: ...ing file change to Upgrading or Updating depending on whether you are upgrading or updating your modem A new progress bar appears This indicates that your modem s code is being updated WARNING To avoid the risk of damaging your modem DO NOT turn off the modem while it is being updated 11 When updating is complete the progress bar will be full and an Update Upgrade Complete message appears Click Ne...

Страница 120: ...2 You will see a Congratulations screen Click Details 13 Click OK once you verify that the process was a success When you return to the Congratulations screen click Finished Congratulations Enjoy the benefits of your updated Sportster modem ...

Страница 121: ... it should power up when the computer is turned on Type in all upper case AT or lower case at Refer to your computer s manual for information concerning enabling COM ports usually involves altering the bios settings motherboard jumpers and the operating system WINDOWS 95 USERS Uninstall the modem from your computer In Device Manager determine what COM port and IRQ settings are free on your system ...

Страница 122: ...ur modem not both You can turn the local echo off on the modem by typing ATE0 and then pressing ENTER in your software s terminal mode To turn the local echo off in the software refer to its documentation Plugging your modem s phone cord into a digital phone line can damage the modem Call your phone company if you are unsure whether or not your phone line is digital The phone cord should be plugge...

Страница 123: ...the auto answer feature In RapidComm s Terminal mode type ATS0 1 and press ENTER NOTE You need to enable auto answer before every session unless you alter your software s initialization string to permanently enable auto answer Try placing the call again The phone company routes calls differently each time To verify a valid phone connection enter RapidComm s Terminal mode and type ATX3DT8479855092 ...

Страница 124: ...rol settings might not be enabled on your modem You can disable error control on your modem by typing AT M0 in terminal mode and pressing ENTER Now try placing the call to the remote modem again When finished reset your modem to enable the error control features In terminal mode type ATZ and press ENTER Note ATZ4 or AT F1 are often the best reset strings as they restore hardware flow control defau...

Страница 125: ... screen saver or virus scanner running in the background disrupting data communications Try placing the call again The phone company routes calls differently each time In terminal mode type AT F1 and press ENTER to load the optimum hardware flow control settings Lower the serial port rate in your communications software to 57 600 bps 38 400 bps or 19 200 bps NOTE The port rate for an x2 modem cann...

Страница 126: ...ckground disrupting data communications Your baud rate may be set too high You may be trying to fax a compressed file RapidComm s port settings may be incorrect Download to an uncompressed area on your hard drive In terminal mode type AT H3 I2 R2S7 90 and press ENTER This is an initialization string The standard string for faxing is AT F1S36 0 Disable any Terminate and Stay Resident TSR programs r...

Страница 127: ...ogram The software settings for the BBS are ANSI terminal emulation Data Bits 8 Parity None Stop Bits 1 2 Put RapidComm in Terminal mode by clicking on the Terminal button see the following screen image 3 Type ATDS0 and press ENTER NOTE ATDS0 automatically dials 1 847 982 5092 the U S Robotics BBS If this is your first time connecting to our BBS you will be asked to enter your name ...

Страница 128: ... will look like The BBS gives you access to customer and technical support documents and the BBS library The library contains hundreds of helpful files and tips to help simplify using your modem Downloading the Technical Reference Guide To download the Technical Reference Guide follow these steps 1 In the main menu type D for Download a file This is what the main menu will look like ...

Страница 129: ...Guide in a zipped Windows Help format 336_ASCI TXT The Guide in an uncompressed ASCII format 4 Protocol Type for Transfer Your selection depends on what your software supports If possible make Zmodem your first choice Xmodem should be your last choice since it is very slow 5 Depending on the software you are using you will either be prompted where you want the file placed or the file will be place...

Страница 130: ...index of available documents send a blank e mail to support usr com To have a document e mailed to you send the document s number as the subject World Wide Web A U S Robotics Home Page containing the same information as the Internet on Demand listing Log on to www usr com home online main htm CompuServe Access the same information as the Internet FTP site The U S Robotics forum address is GO USROB...

Страница 131: ... USR1 There is a 1 50 per minute charge which will appear on your local phone bill You must be 18 or older or have parental permission Service not available in Canada Are You Still Having Problems Review this manual Call or visit your modem dealer They may be able to assist you This is much more efficient and time saving than returning the modem to U S Robotics If your dealer can t help you contac...

Страница 132: ...er supply manuals CD ROM etc Include your SRO number name and address on the shipping label as well as inside the package If possible send the package via a courier capable of tracking the progress of the shipment Ship to the following address 3Com Attn RMA SRO 6201 W Oakton East Dock Morton Grove IL 60053 RapidComm Troubleshooting Tips PROBLEM The lights in the RapidComm software s modem light mo...

Страница 133: ...s the RapidComm software s ability to work properly at 115 2 kbps Removal of the disk compression software from your system will allow RapidComm to operate at 115 2 kbps A Note to User s with Older Versions of RapidComm on Their Systems You must uninstall older versions of RapidComm from your system before installing the most recent version contained on the CD ROM that came with your new 56K modem...

Страница 134: ...ariety of signals and wavelengths that can be transmitted over communications lines such as the sound of a voice over the phone line answer mode The mode used by your modem when answering an incoming call from an originating modem The transmit receive frequencies are the reverse of the originating modem which is in originate mode application A computer program designed to perform a specific task o...

Страница 135: ... be transmitted at set intervals start stop bits are used to mark the beginning and end of each character auto answer Sets the modem to pick up the phone line when it detects a certain number of rings See S register S0 in the Technical Quick Reference auto dial A process where your modem dials a call for you The dialing process is initiated by sending an ATDT dial tone or ATDP dial pulse command f...

Страница 136: ...ts or bits transmitted per second bps Communications channels using analog modems are established at set bit rates commonly 2400 4800 9600 14 400 28 800 and higher bits per second bps The bits binary digits per second rate Thousands of bits per second are expressed as kilobits per second kbps buffer A temporary memory area used as storage during input and output operations An example is the modem ...

Страница 137: ...protocols employ advanced techniques such as longer transmission frames and data compression to increase cps class 1 and 2 0 International standards used by fax application programs and faxmodems for sending and receiving faxes cyclic redundancy checking CRC An error detection technique consisting of a test performed on each block or frame of data by both sending and receiving modems The sending m...

Страница 138: ...tions or Circuit Terminating Equipment such as dial up modems that establish and control the data link via the telephone network default Any setting assumed at startup or reset by the computer s software and attached devices The computer or software will use these settings until changed by the user or other software detect phase In the ITU T V 42 error control protocol the first stage in establish...

Страница 139: ...minal or Terminating Equipment A computer that generates or is the final destination of data duplex Indicates a communications channel capable of carrying signals in both directions See half duplex full duplex Electronic Industries Association EIA Group which defines electronic standards in the U S error control Various techniques that check the reliability of characters parity or blocks of data V...

Страница 140: ...ormation attached The added information usually includes a frame number block size data error check codes and Start End indicators full duplex Signals can flow in both directions at the same time over one line In microcomputer communications may refer to the suppression of the online local echo half duplex Signals can flow in both directions but only one way at a time In microcomputer communicatio...

Страница 141: ...erica is observed internationally as ITU T V 22 For 2400 bps communication most U S manufacturers observe V 22 bis LAPM Link Access Procedure for Modems An error control protocol defined in ITU T Recommendation V 42 Like the MNP protocols LAPM uses cyclic redundancy checking CRC and retransmission of corrupted data ARQ to ensure data reliability local echo A modem feature that enables the modem to...

Страница 142: ...ser programmable random access memory whose data is retained when power is turned off On the Sportster modem it includes four stored phone numbers and the modem settings off on hook Modem operations that are the equivalent of manually lifting a phone receiver taking it off hook and replacing it going on hook online fall back fall forward A feature that allows high speed error control modems to mon...

Страница 143: ...l in order to exchange data The format of the data readiness to receive or send error detection and error correction are some of the operations that may be defined in protocols RAM Random Access Memory Memory that is available for use when the modem is turned on but that clears of all information when the power is turned off The modem s RAM holds the current operational settings a flow control buf...

Страница 144: ...ts The signaling bits attached to a character before and after the character is transmitted during asynchronous transmission terminal A device whose keyboard and display are used for sending and receiving data over a communications link Differs from a microcomputer or a mainframe in that it has little or no internal processing capabilities terminal mode Software mode that allows direct communicati...

Страница 145: ...rd specification that covers the initial handshaking process V 17 fax An ITU T standard for making facsimile connections at 14 400 bps 12 000 bps 9 600 bps 7 200 bps V 21 An ITU T standard for modems operating in asynchronous mode at speeds up to 300 bps full duplex on public switched telephone networks V 22 An ITU T standard for modem communications at 1200 bps compatible with the Bell 212A stand...

Страница 146: ...00 bps V 32 An ITU T standard for modem communications at 9600 bps and 4800 bps V 32 modems fall back to 4800 bps when line quality is impaired V 32 bis An ITU T standard that extends the V 32 connection range 4800 7200 9600 12 000 and 14 400 bps V 32 bis modems fall back to the next lower speed when line quality is impaired fall back further as necessary and also fall forward switch back up when ...

Страница 147: ...c domain and are available from many bulletin board services XON XOFF Standard ASCII control characters used to tell an intelligent device to stop resume transmitting data Ymodem An error checking protocol that can send several files of data at a time in 1024 byte 1K blocks This protocol can use either checksums or CRC for error checking Ymodem G Similar to Ymodem except it includes no error check...

Страница 148: ...TECHNICAL QUICK REFERENCE 143 This section includes information about Front Panel Lights Command Summary DIP Switches S Registers The Serial Interface cable information ...

Страница 149: ... RD Received Data Flashes when modem sends result codes or passes received data bits from remote SD Send Data Flashes when computer sends a data bit to the modem TR Data Terminal Ready ON if modem receives a DTR signal from computer Always ON modem ignores DTR if the DTR override is ON D0 CS Clear to Send ON until modem lowers CTS when Transmit Data hardware flow control is enabled H1 H3 ARQ Error...

Страница 150: ...c options and you don t include a number zero is assumed For example if you type ATB the command ATB0 is assumed Every command except A and must begin with the AT prefix and be entered by pressing ENTER The maximum command length is 58 characters The modem doesn t count the AT prefix carriage returns or spaces NOTE All defaults are based on the F1 Hardware Flow Control template loaded in NVRAM whe...

Страница 151: ...t require the AT prefix or a Carriage Return Any key Aborts off hook dial answer operation and hangs up AT Required command prefix except with A and Use alone to test for OK result code Bn U S ITU T answer sequence B0 ITU T answer sequence B1 U S answer tone Dn Dials the specified phone number Includes the following L Dials the last dialed number P Pulse rotary dial R Originates call using answer ...

Страница 152: ...one number Exclamation point Flashes the switch hook Delays for 125 ms before proceeding with dial string W Wait for second dial tone X2 or X4 linked to S6 register Dials waits for quiet answer and continues X3 or higher Displays a list of Dial commands En Sets local echo E0 Echo OFF E1 Modem displays keyboard commands Fn Sets online local echo of transmitted data ON OFF F0 Local echo ON Modem sen...

Страница 153: ...off hook In Displays the following information I0 Four digit product code I1 Results of ROM checksum I2 Results of RAM checksum I3 Product type I4 Current modem settings I5 Nonvolatile memory NVRAM settings I6 Link diagnostics I7 Product configuration Ln Controls speaker volume internals only L0 Low volume L1 Low volume L2 Medium volume L3 High volume Mn Operates speaker M0 Speaker always OFF ...

Страница 154: ...s that don t support touch tone dialing Qn Displays suppresses result codes Q0 Displays result codes Q1 Quiet mode no result codes Q2 Displays result codes only in Originate mode Sr b n Sets bit b of register r to n 0 OFF or 1 ON Sr n Sets register r to n Sr Displays contents of S Register r S Displays a list of the S Registers T Sets tone dial Vn Displays verbal numeric result codes V0 Numeric co...

Страница 155: ...ING 3 NO CARRIER 4 ERROR 5 CONNECT 1200 6 NO DIAL TONE 7 BUSY 8 NO ANSWER 9 Reserved 10 CONNECT 2400 11 RINGING 13 CONNECT 9600 18 CONNECT 4800 20 CONNECT 7200 21 CONNECT 12000 25 CONNECT 14400 43 CONNECT 16800 85 CONNECT 19200 91 CONNECT 21600 99 CONNECT 24000 103 CONNECT 26400 107 CONNECT 28800 151 CONNECT 31200 155 CONNECT 33600 ...

Страница 156: ...TECHNICAL QUICK REFERENCE 151 Xn continued Xn Result Codes cont X0 X1 X2 X3 X4 Adaptive Dialing Wait for 2nd Dial Tone W Wait for Answer Fast Dial Requires in dial string replaces NO CARRIER ...

Страница 157: ... Y command or dip 7 Z1 Resets modem to NVRAM profile 0 Z2 Resets modem to NVRAM profile 1 Z3 Resets modem to factory default profile 0 F0 Z4 Resets modem to factory default profile 1 F1 Z5 Resets modem to factory default profile 2 F2 Displays a list of ampersand commands A Enables disables additional result code subsets see Xn A0 ARQ result codes disabled A1 ARQ result codes enabled A2 V 32 modula...

Страница 158: ...ort rate B0 Variable follows connection rate B1 Fixed serial port rate B2 Fixed in ARQ mode variable in non ARQ mode Cn Controls Carrier Detect CD signal C0 CD override C1 Normal CD operations Dn Controls Data Terminal Ready DTR operations D0 DTR override D1 DTR toggle causes online Command mode D2 Normal DTR operations D3 Resets on receipt of DTR ...

Страница 159: ...trol template Gn Sets Guard Tone G0 No guard tone U S and Canada G1 550 Hz guard tone some European countries requires B0 setting G2 1800 Hz guard tone U K requires B0 setting Hn Sets Transmit Data TD flow control see also Rn H0 Flow control disabled H1 Hardware flow control Clear to Send CTS H2 Software flow control XON XOFF H3 Hardware and software flow control ...

Страница 160: ...emote system I2 XON XOFF signals to your modem only Kn Enables disables data compression K0 Data compression disabled K1 Auto enable disable K2 Data compression enabled K3 MNP5 compression disabled Mn Sets Error Control ARQ for connections at 1200 bps and higher M0 Normal mode error control disabled M1 Reserved M2 Reserved M3 Reserved M4 Normal ARQ M5 ARQ mode ...

Страница 161: ...dem will hang up Sets ceiling connect speed if Un is greater than 0 See Un N0 Variable rate N1 300 bps N2 1200 bps N3 2400 bps N4 4800 bps N5 7200 bps N6 9600 bps N7 12 000 bps N8 14 400 bps N9 16 800 bps N10 19 200 bps N11 21 600 bps N12 24 000 bps N13 26 400 bps N14 28 800 bps N15 31 200 bps N16 33 600 bps ...

Страница 162: ...TS R2 Received Data to computer only on RTS Sn Controls Data Set Ready DSR operations S0 DSR override always ON S1 Modem controls DSR Tn Begins test modes used in conjunction with s register 18 T0 Ends testing T1 Analog Loopback T2 Reserved T3 Local Digital Loopback T4 Enables Remote Digital Loopback T5 Prohibits Remote Digital Loopback T6 Initiates Remote Digital Loopback T7 Remote Digital with s...

Страница 163: ...t speed See Nn U0 Disabled U1 300 bps U2 1200 bps U3 2400 bps U4 4800 bps U5 7200 bps U6 9600 bps U7 12 000 bps U8 14 400 bps U9 16 800 bps U10 19 200 bps U11 21 600 bps U12 24 000 bps U13 26 400 bps U14 28 800 bps U15 31 200 bps U16 33 600 bps Wn Writes current configuration to NVRAM templates W0 Modifies the NVRAM 0 template Y0 W1 Modifies the NVRAM 1 template Y1 ...

Страница 164: ...umber string s to NVRAM at position n n 0 3 Zn L Writes last executed dial string to NVRAM at position n n 0 3 Zn Displays the phone number stored at position n n 0 3 ZL Displays the last executed dial string CID n Controls Caller ID feature CID 0 Caller ID disabled CID 1 Caller ID enabled CID 2 Caller ID enabled with extended information including caller s name Escapes to online command mode ...

Страница 165: ...F Data Terminal Ready DTR Override OFF Normal DTR operations computer must provide DTR signal for the modem to accept commands dropping DTR terminates a call ON Modem ignores DTR Override 2 OFF Verbal Numeric Result Codes OFF Verbal word results ON Numeric results 3 ON Result Code Display OFF Suppresses result codes ON Enables result codes 4 OFF Command Mode Local Echo Suppression OFF Displays key...

Страница 166: ...nother modem drops CD on disconnect ON CD always ON Override 7 OFF Power on and ATZ Reset Software Defaults OFF Loads Y or Y1 configuration from user defined nonvolatile memory NVRAM ON Loads F0 Generic template from read only memory ROM 8 ON AT Command Set Recognition OFF Disables command recognition Dumb Mode ON Enables recognition Smart mode ...

Страница 167: ...AutoAnswerisdisabled S1 0 Countsandstoresthenumberofringsfromanincomingcall S0mustbegreater than0 S2 43 StorestheASCIIdecimalcodefortheescapecodecharacter Defaultcharacteris Avalueof128 255disablestheescapecode S3 13 StorestheASCIIcodefortheCarriageReturncharacter Validrangeis 0 127 S4 10 StorestheASCIIdecimalcodefortheLineFeedcharacter Validrangeis 0 127 S5 8 StorestheASCIIdecimalcodefortheBacksp...

Страница 168: ...conds forthepause optionintheDialcommand S9 6 Setstherequiredduration intenthsofasecond oftheremotemodem scarrier signalbeforerecognitionbytheSportstermodem S10 7 Setstheduration intenthsofasecond thatthemodemwaitstohangupafterloss ofcarrier Thisguardtimeallowsthemodemtodistinguishbetweenaline disturbancefromatruedisconnect hangup bytheremotemodem Whilewedon trecommendconnectingthemodemtoalinewith...

Страница 169: ...durationandspacing inmilliseconds fortonedialing S12 50 Setstheduration infiftiethsofasecond oftheguardtimefortheescapecode sequence S13 0 Bit mappedregister Selectthebit s youwantonandsetS13tothetotalofthe valuesintheValuecolumn Forexample ATS13 17enablesbit0 valueis1 and bit4 valueis16 Bit Value Result 0 1 Reset when DTR drops 1 2 Reset non MNP transmit buffer from 1 5K to 128 bytes 2 4 Set back...

Страница 170: ... slower modems keep data you re sending from scrolling off their screens When remote users send your computer an XOFF Ctrl S and you stop transmitting the data in transit from your modem s buffer doesn t exceed the size of their screen This is also very helpful in situations when a remote modem printer application is losing characters S15 0 Bit mappedregistersetup Tosettheregister seeinstructionsf...

Страница 171: ...rved 1 2 Reserved 2 4 Touch tone test 4 8 Use internal test pattern S18 0 Testtimerfor Tloopbacktesting Setsthetimeinsecondsoftestingbeforethe modemautomaticallytimesoutandterminatesthetest Whensetto0 thetimeris disabled Validrangeis1 255 S19 0 Setstheduration inminutes fortheinactivitytimer Thetimeractivateswhenthere isnodataactivityonthephoneline attime outthemodemhangsup S19 0 disablesthetimer ...

Страница 172: ...runningunderolderoperatingsoftware S27 0 Bit mappedregistersetup Tosettheregister seeinstructionsforS13 Bit Value Result 0 1 Enables ITU T V 21 modulation at 300 bps for overseas calls in V 21 mode the modem answers both overseas and domestic U S and Canada calls but only originates V 21 calls Default Bell 103 1 2 Enables unencoded non trellis coded modulation in V 32 mode 2 4 Disables V 32 modula...

Страница 173: ...patibilities Some software may not accept 7200 12 000 and 14 400 bps or greater result codes S28 0 EliminatestheV 32answertonesforafasterconnection 8 Defaultitem alltimesareintenthsofseconds 255 DisablesallconnectionsexceptV 32at9600bps S29 20 Setstheduration intenthsofasecond oftheV 21answermodefallbacktimer S30 Reserved S31 Reserved S32 2 Bit mappedregistersetup Tosettheregister seetheinstructio...

Страница 174: ...ister seetheinstructionsforS13 Bit Value Result 0 1 Disable 2400 symbol rate 1 2 Disable 2743 symbol rate 2 4 Disable 2800 symbol rate 3 8 Disable 3000 symbol rate 4 16 Disable 3200 symbol rate 5 32 Disable 3429 symbol rate 6 64 Reserved 7 128 Disable shaping S34 0 Bit mappedregistersetup Tosetregisters seeinstructionsforS13 Bit Value Result 0 1 Disable 8S 2D trellis encoding 1 2 Disable 16S 4D tr...

Страница 175: ... 16 Disable non linear coding 5 32 Disable TX level deviation 6 64 Disable Pre emphasis 7 128 Disable Pre coding S35 0 Bit mappedregistersetup Tosetregisters seeinstructionsforS13 Bit Value Result 0 2 1 7 Limit back channel rate 1 28800 max 2 26400 max 3 24000 max 4 21600 max 5 19200 max 6 16800 max 7 14400 max 3 8 Force RBS operation 4 7 12 128 Reserved ...

Страница 176: ...a remotemodemtoacknowledgereceiptofalltransmitteddatabeforeitis disconnected ThemodemimmediatelyhangsupwhenDTRdrops Thisoption onlyappliestoconnectionsterminatedbydroppingDTR Ifthemodemreceivesthe ATHcommand itignoresS38andimmediatelyhangsup S39 S40 Reserved S41 0 Bit mappedregistersetup Tosetregisters seeinstructionsforS13 Bit Value Result 0 1 Distinctive ring enabled 1 7 2 128 Reserved ...

Страница 177: ...transmitted between the devices over a shielded serial cable with a 25 pin male DB 25 connector to the modem and a 25 pin 9 pin 8 pin or custom built connector to the computer FCC regulations require the use of a shielded cable when connecting a modem to a computer to ensure minimal interference with radio and television Pin assignments are factory set in the Sportster modem to match the standard ...

Страница 178: ...m 1 AA Chassis Ground Both 2 3 BA Transmitted Data Computer 3 2 BB Received Data Modem 4 7 CA Request to Send Computer 5 8 CB Clear to Send Modem 6 6 CC Data Set Ready Modem 7 5 AB Signal Ground Both 8 1 CF Carrier Detect Modem 12 SCF Speed Indicate Modem 20 4 CD Data Terminal Ready Computer 22 9 CE Ring Indicate Modem ...

Страница 179: ...ed operations Part 68 This equipment complies with FCC Rules Part 68 Located on the bottom of the modem is the FCC Registration Number and Ringer Equivalence Number REN You must provide this information to the telephone company when requested The REN is used to determine the number of devices you may legally connect to your telephone line In most areas the sum of the REN of all devices connected t...

Страница 180: ...us set out in the interference causing equipment standard entitled Digital Apparatus ICES 003 of Industry Canada Cet appareil numérique respecte les limites de bruits radioélectriques applicables aux appareils numériques de Classe B préscrites dans la norme sur le matériel brouilleur Appareils Numériques NMB 003 édictée par l Industrie Canada UL Listing CUL Listing This information technology equi...

Страница 181: ...ification of the business or other entity or other individual sending the message and the telephone number of the sending machine or of such business other entity or individual The telephone number provided may not be a 900 number or any other number for which charges exceed local or long distance transmission charges In order to program this information into your Sportster modem refer to the Rapi...

Страница 182: ...ntenna for televisions with antenna reception only or cable input device Relocate the computer with respect to the receiver Relocate the computer and or the receiver so that they are on separate branch circuits If necessary consult your dealer or an experienced radio television technician for additional suggestions You may find the following booklet prepared by the Federal Communications Commissio...

Страница 183: ...nside wiring associated with a single line individual service may be extended by means of a certified connector assembly telephone extension cord The customer should be aware that compliance with the above conditions may not prevent degradation of service in some situations Currently telecommunication companies do not allow users to connect their equipment to jacks except in precise situations tha...

Страница 184: ...um of the Ringer Equivalence Numbers of all the devices does not exceed 5 The Ringer Equivalence Number is located on the bottom of the modem s case external modems or on the modem s circuit board internal modems WARRANTY AND REPAIR SERVICE CENTER Keating Technologies 25 Royal Crest Court Suite 200 Markham ONT L3R 9X4 AVIS L étiquette de Industrie Canada identifie le matériel homologué Cette étiqu...

Страница 185: ...t Pour sa propre protection l utilisateur doit s assurer que tous les fils de mise à la terre de la source d énergie électrique des lignes téléphoniques et des canalisations d eau métalliques s il y en a sont raccordé ensemble Cette précaution est particulièrement importante dans les régions rurales Avertissment L utilisateur ne doit pas tenter de faire ces raccordements lui même il doit avoir rec...

Страница 186: ...ase During the limited warranty period and upon proof of purchase the product will be repaired or replaced with the same or a similar model which may be a refurbished model at 3Com s option without charge for either parts or labor This limited warranty shall not apply if the product is modified tampered with misused or subjected to abnormal working conditions including but not limited to lightning...

Страница 187: ...may have others which vary from state to state Some states do not allow limitations on duration of an implied warranty or the exclusion or limitation of incidental or consequential damages so the above exclusion or limitation may not apply to you To obtain service under this limited warranty contact the 3Com Technical Support Department at 847 982 5151 or by mail at 3Com 7770 N Frontage Road Attn ...

Страница 188: ... send anything but the modem do not send back the power supply CD ROM documentation etc If possible send the modem via a courier capable of tracking the progress of the shipment Include proof of the date of purchase IMPORTANT If you send your unit pack it securely and be sure that your SRO number is visible on the outside of the package ...

Страница 189: ...pport and ARQ See Automatic Repeat reQuest ASCII American Standard Code for Information Interchange 127 asynchronous transmission 127 AT commands 140 152 auto answer 128 auto answer AA light 138 auto dial 138 Automatic Repeat reQuest ARQ light 138 B baud rate 130 BBS U S Robotics 119 120 binary digit 128 bit rate 128 bits per second bps 128 buffer 128 byte 128 C carrier 129 carrier detect CD light...

Страница 190: ...ics online support and 122 Connections CD ROM Modem Station 77 100 Modem Update Wizard 101 112 software installation 57 74 CRC See Cyclic Redundancy Checking Cyclic Redundancy Checking CRC 117 118 129 D data compression table 129 data mode 130 data terminal terminating equipment DTE 130 data terminal ready TR light 138 default settings 130 detect phase 130 dictionary 130 digital loopback 130 digit...

Страница 191: ...ms and faxing 72 74 hardware installation Windows 3 x 33 36 Windows 95 37 48 and serial cable 33 34 37 38 F facsimile fax 131 fax mode 131 fax operations FAX light 138 faxing with RapidComm software 72 74 flow control 75 76 116 117 131 frame 131 front panel lights summary 138 FTP U S Robotics online support and 122 full duplex 131 G glossary 127 136 H half duplex 131 hertz Hz 132 ...

Страница 192: ...expansion slots 14 22 ITU T See International Telegraph and Telephone Consultative Committee J jumper pins 4 11 12 20 jumper shunts 4 11 12 20 L LAPM See Link Access Procedure for Modems Link Access Procedure for Modems LAPM 132 local echo 132 turning off 114 M Microcom Networking Protocol MNP 132 MNP See Microcom Networking Protocol Modem Station 77 99 installing 77 79 using 80 99 Modem Update Wi...

Страница 193: ...d Play installation 4 19 20 protocol 133 R RAM random access memory 133 random access memory See RAM RapidComm software faxing with 72 74 installing 57 74 troubleshooting 124 125 read only memory ROM 134 received data RD light 138 remote digital loopback 133 remote echo 133 S s registers 155 164 send data SD light 138 serial cable purchasing 33 34 37 38 serial interface 165 166 pin definitions 166...

Страница 194: ...121 terminal mode 114 119 134 Terminate and Stay Resident programs errors and 117 118 throughput 134 troubleshooting 113 125 RapidComm software 124 125 TSR See Terminate and Stay Resident programs U UART 76 upgrading updating modems 101 112 U S Robotics BBS 119 120 online help resources 119 126 Technical Reference Guide downloading 120 121 Technical Support Hotline 123 V V 17 fax transmissions err...

Страница 195: ...Index 190 W Windows 95 determining your version 2 World Wide Web WWW U S Robotics online support and 122 X x2 technology 2 101 112 Xmodem 136 xon xoff 136 Y Ymodem 136 Ymodem G 136 Z Zmodem 136 ...

Отзывы: