


Assembly Instructions Beta Prusa Standard & Deluxe
01/07/14
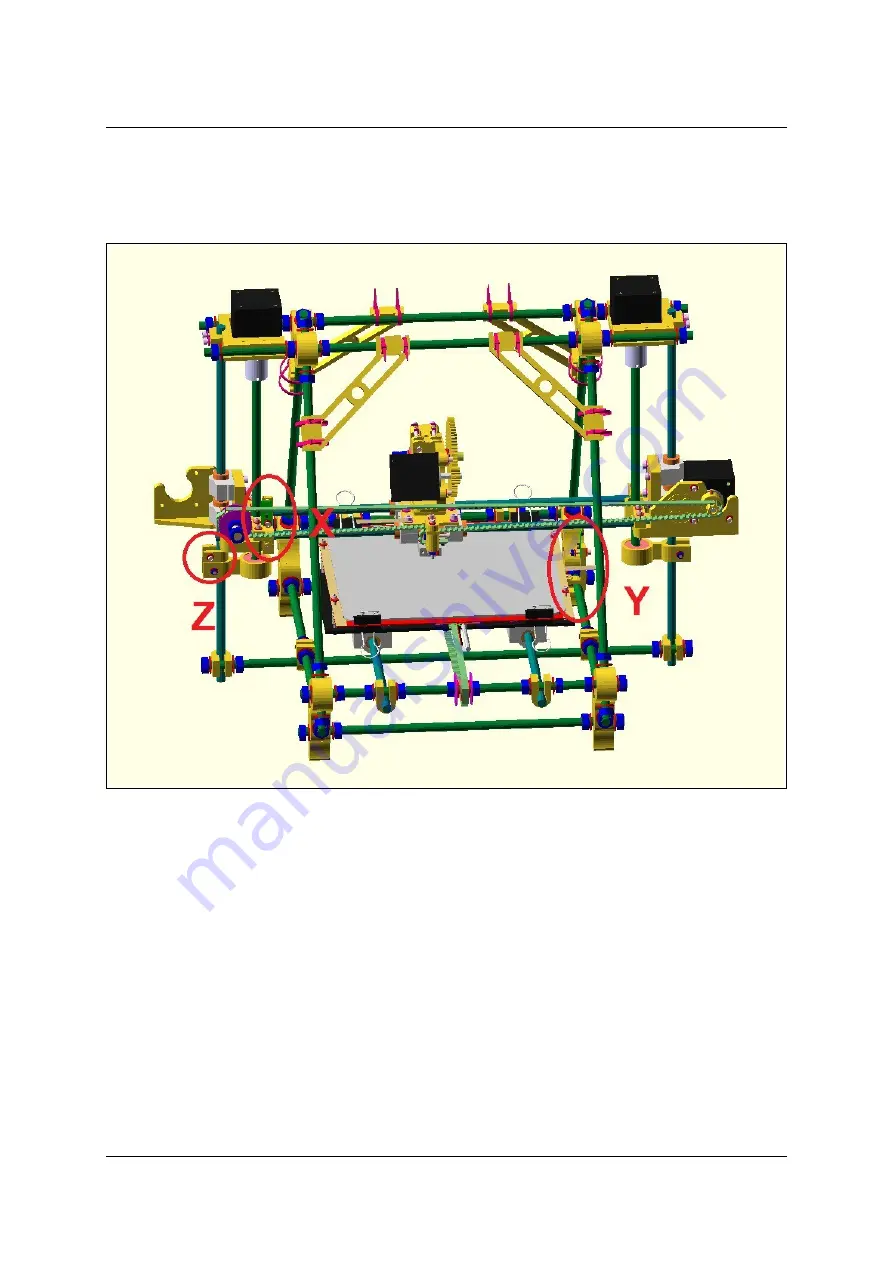
Then attach the last metal flag at the x carriage with one of the M4 screws securing the linear
bearing.
Bend and cut the flag until it goes into the end-stop without any problems, when the x-axis is
moved fully to one side.
Position of the endstops
Page 52/ 67
Содержание Beta Prusa Deluxe
Страница 5: ...Assembly Instructions Beta Prusa Standard Deluxe 01 07 14 Chapter I Assembly of the Frame Page 5 67 ...
Страница 18: ...Assembly Instructions Beta Prusa Standard Deluxe 01 07 14 Chapter II Assembly of the Axes Page 18 67 ...
Страница 34: ...Assembly Instructions Beta Prusa Standard Deluxe 01 07 14 Page 34 67 ...
Страница 35: ...Assembly Instructions Beta Prusa Standard Deluxe 01 07 14 Chapter III Assembly of the extruder Page 35 67 ...
Страница 49: ...Assembly Instructions Beta Prusa Standard Deluxe 01 07 14 Chapter V Assembly of the Electronics Page 49 67 ...


