


Assembly Instructions Beta Prusa Standard & Deluxe
01/07/14
Remove the protective plastic from the y-carriage. Then sit the y carriage onto the linear
bearings on the smooth rods and make sure the side with the additional hole is pointing to
the y motor. Screw the linear bearings onto the plate, but don't fasten the screws fully. Then
adjust the smooth rods with the rod clamps until the Y carriage sits exactly in the middle of
the frame and can be moved without problems. The smooth rods should now be exactly
parallel and should have the same distance to the threaded rods on both sides of the frame.
Now carefully fasten the bar clamps until the smooth rods can't be moved any more. Now
fasten the screws on the linear bearings and check again that the y carriage runs smoothly.
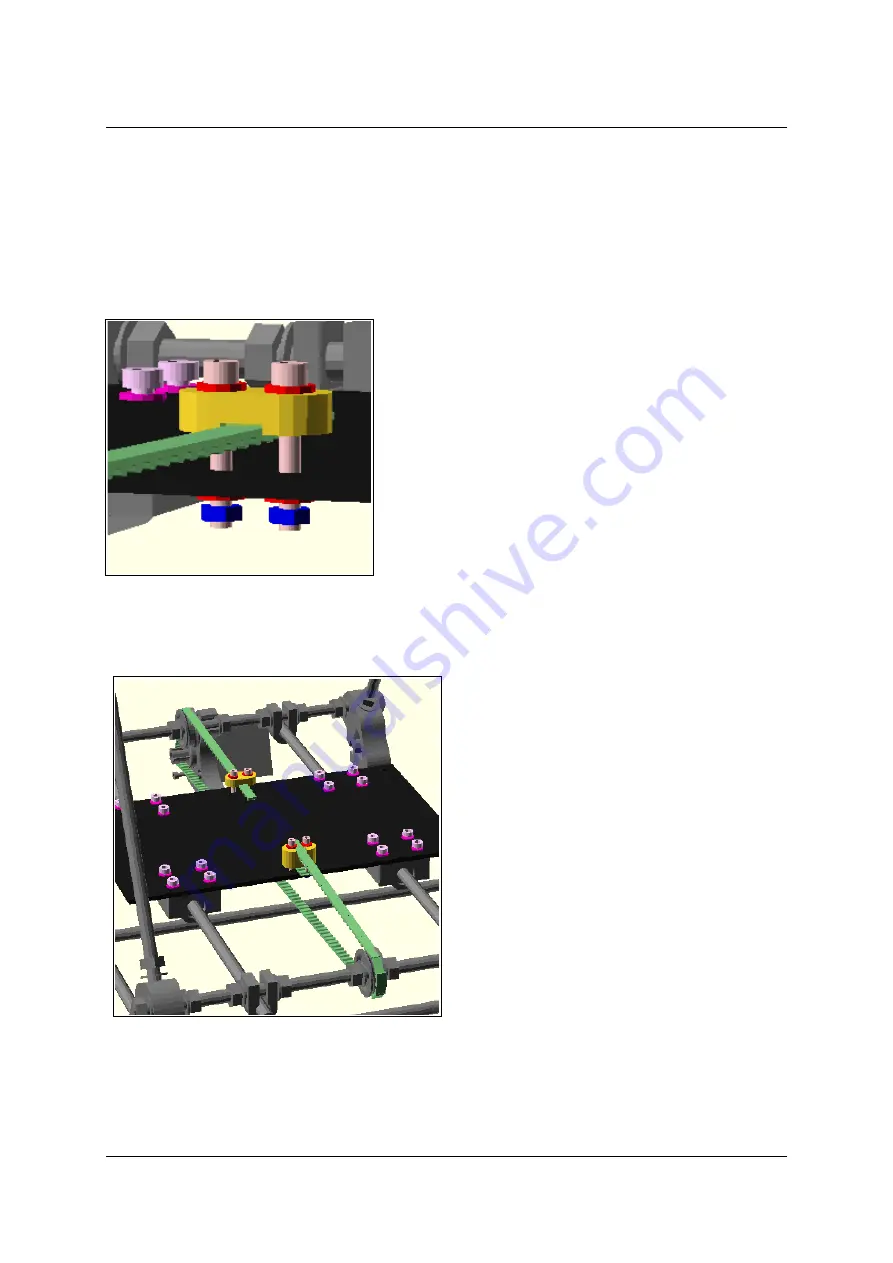
Assembly of the belt
Screw a belt clamp without channel with two M3 x 16 mm screws, washers and nuts onto
one side of the Y carriage and use it to secure one side of the belt. Make sure the teeth of
the belt are looking downwards.
Assembly of the belt
Loop the belt around the belt guide, around the gear on the other side and over the other belt
guide back to the carriage, as shown in the picture above.
Page 22/ 67
Содержание Beta Prusa Deluxe
Страница 5: ...Assembly Instructions Beta Prusa Standard Deluxe 01 07 14 Chapter I Assembly of the Frame Page 5 67 ...
Страница 18: ...Assembly Instructions Beta Prusa Standard Deluxe 01 07 14 Chapter II Assembly of the Axes Page 18 67 ...
Страница 34: ...Assembly Instructions Beta Prusa Standard Deluxe 01 07 14 Page 34 67 ...
Страница 35: ...Assembly Instructions Beta Prusa Standard Deluxe 01 07 14 Chapter III Assembly of the extruder Page 35 67 ...
Страница 49: ...Assembly Instructions Beta Prusa Standard Deluxe 01 07 14 Chapter V Assembly of the Electronics Page 49 67 ...


