background image


-  10  - 


3.


Follow the steps in the wizard (reading and agreeing to the EULA agreement, 
defining the path, etc.). 

4.


Define VPortal Server IP address

 dialog prompts you to enter the IP address and 

port of your VPortal server (se

VPortal installation

). If you don't need or know the 

IP address at this stage, you can define it later (click the 

Define later

 button). The 

VPortal Server is not normally used for small installations. 

5.


The

 Define data folders

 dialog prompts you to define folders for documents:  


input – for documents you bring in to the Zignature Pad 


output – for signed documents 


backup folders – for additional copies of the input and output documents 


the 

Advertisement Box

 folder – for commercials 

A default location for these folders is suggested. The folders must have read/write 
file access enabled for all users. 

6.


When prompted, choose between the USB and network connections (see below). 

7.


Click 

Save

. If you selected USB in the previous step, you will be prompted to connect 

the Zignature Pad to the computer (se

2. Installing the Hardware

).  

8.


If 

Start 10ZiG VPort

 is selected, when you exit the installation, the Zignature Pad 

software tries to establish a connection with the Zignature Pad.  

9.


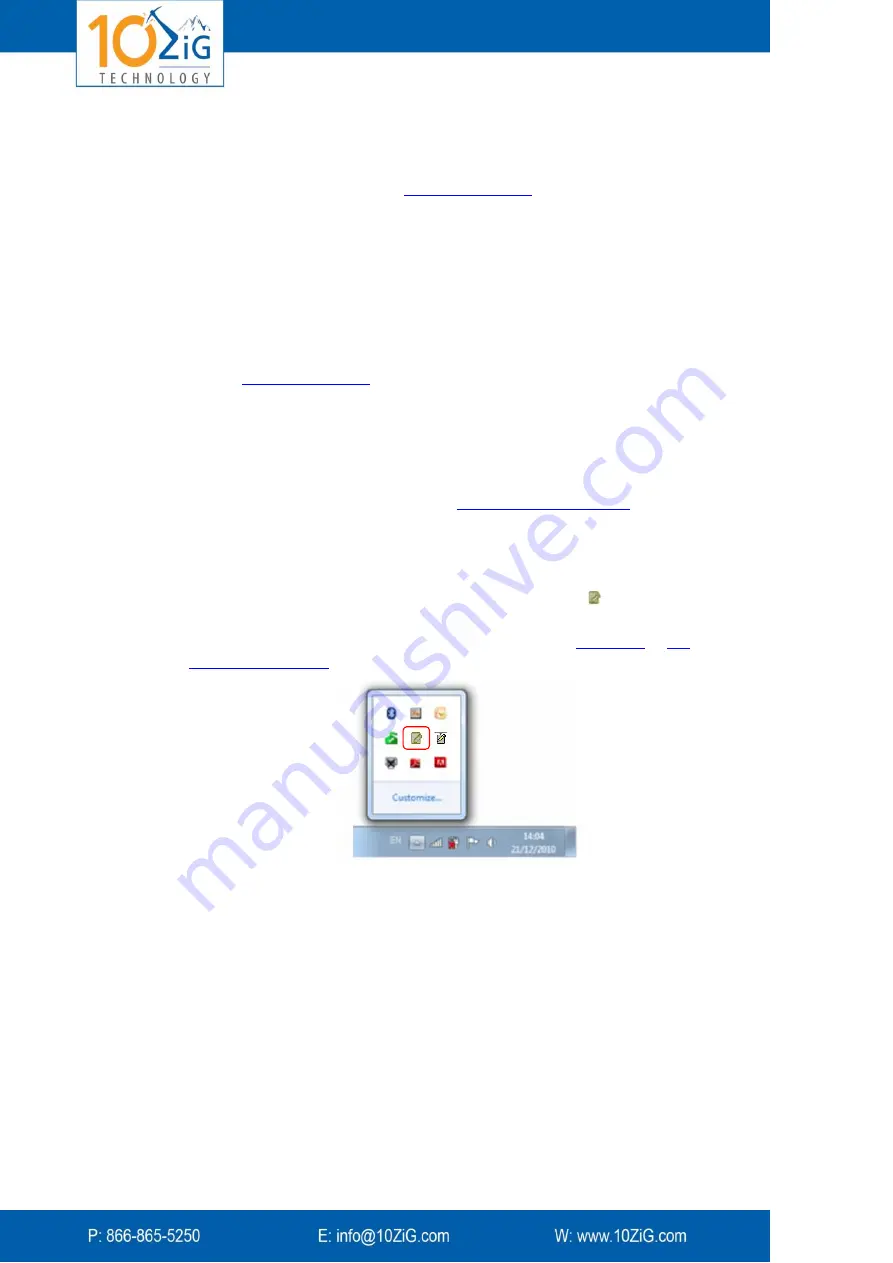
The 

VPort Agent

 icon in the Windows notification area shows the current 

connection status. Right click the 

Zignature Pad Agent

 icon   and select 

Configure

Click the 

Quick Print Document

 tab and select the printer installed in Windows 

where you want documents printed out (for example, via 

auto-print

 o

last 

un/signed document

)


If you are setting up Zignature Pad for a network:  

1.


Define an IP address for the Zignature Pad. It is highly recommended that this be a 
static address. 

2.


Connect the Zignature Pad via USB to any computer on the network, such as an 
administrator computer.  

3.


In the Windows notification area, right click the 

VPort Agent

 tab and select 

Configure

. In the 

Network Connection

 tab, ensure that 

Use Network connection to 

10ZiG Zignature Pad

 is not selected. If you made a change, click 

Apply

4.


In the Windows notification area, right click the 

VPort Agent

 tab and select 

Network 

Discovery

. The 

VPort Device Manager

 opens. In the 

Auto Discovery

 tab, view the 

Zignature Pad settings. Click 

Settings:


Содержание ZiGnature Pad 1410

Страница 1: ...i...

Страница 2: ...2 Controlling the View Document Monitor 14 3 Signing a Document 14 4 Storing the Document 15 System Configuration 17 Storage and Backup Options 17 Display Options 20 Signature Options 23 Print Options...

Страница 3: ...on techniques to store all modifications to the document as PDFs or TIFFs with time stamps in a tamper evident environment Related Publications Refer to the following documentation for more informatio...

Страница 4: ...Citrix client software A PC or thin client with Windows XP 3 or Windows 7 32 or 64 bit running Citrix online plug in or Citrix Receiver Terminal Services Other client server software NOTE Please read...

Страница 5: ...re 1 Items in box Before setting up your Zignature Pad carefully remove the items from the box If any items are missing from your package contact your reseller Use only the included AC adapter or an a...

Страница 6: ...1 5 USB B port 6 Not in use Right View Figure 3 Right view 1 USB A port Not in use 2 Smartcard reader Not in use 3 On Off button Top View Figure 4 Top view 1 Pen holder 2 LCD display 3 Zignature Pad f...

Страница 7: ...e Move to previous or next page Page Up and Page Down keys on your keyboard also work when the Document Manager is in focus Moves X of 1 Jump to a particular page Jumps Zoom out Zoom in Change the zoo...

Страница 8: ...cription Effect on Zignature Pad Edit configuration Edit the VPort configuration settings None until changes are applied If some of these buttons are not visible they may be hidden To show them see Cu...

Страница 9: ...t your authorized Zignature Pad service representative To update your software see Updating Software on page 32 VPort Single User Setup The VPort setup described here is applicable for single user ins...

Страница 10: ...computer see 2 Installing the Hardware 8 If Start 10ZiG VPort is selected when you exit the installation the Zignature Pad software tries to establish a connection with the Zignature Pad 9 The VPort A...

Страница 11: ...case of failure WebVPortal Installation WebVPortal is a web service that you must install on the network It allows you to track the number of documents and pages printed via Zignature Pad for the pay...

Страница 12: ...ave a USB cable Connect USB B shown in Figure 1 to the rear of the Zignature Pad Connect USB A to a USB port on the host computer it is recommended to use a USB port that is close to the motherboard o...

Страница 13: ...ce objects on the Zignature Pad or the power adaptor Looking after your Zignature Pad Do not place the Zignature Pad near a heat source or in direct sunlight Do place the Zignature Pad on a level soli...

Страница 14: ...14 At this stage you must establish contact between VPort and your ERP system refer to your system administrator...

Страница 15: ...irtual channel 2 Controlling the View Document Monitor The Document Monitor on your computer allows you to change the view of your document on the host side to send the document to a printer to close...

Страница 16: ...check mark and Cancel button if enabled in the VPort Agent tab To delete the most recent signature right click the Document Monitor and select Undo signature To cancel all work with the current docum...

Страница 17: ...rint the document In the Document Monitor click the Print last unsigned document button or the Print last signed document button If you get an error message you can resolve it Viewing the Log After Zi...

Страница 18: ...in the Windows notification area and selecting Configure and then the VPort Agent tab on the left This section describes configuration options grouped as follows Storage and Backup Display Signature P...

Страница 19: ...k Apply Once communication is re established the document will reappear on the Zignature Pad Changing the Storage Location VPort automatically stores the documents in the OutBox location you specified...

Страница 20: ...y have identical file names 2 Click Apply Viewing All Stored Documents on the Computer You can examine documents processed as input to the system documents saved as output documents and BMP files used...

Страница 21: ...notification area and selecting Configure Viewing the Document After Saving By default VPort does not display the document after it is signed and sealed as PDF or TIFF To change the default so you ca...

Страница 22: ...e Document Monitor window expands to fill the entire screen Display the page on the Document Monitor o Keep the width of the actual page default You may have to shift the page to the right and left to...

Страница 23: ...nts are always shown on the Zignature Pad Turning off Zignature Pad after Idle Time You can save electricity and wear on the Zignature Pad By default the screen stays bright even when idle but if the...

Страница 24: ...ment Monitor Viewing VPort Agent Activities To continuously show the VPort Agent GUI 1 In the VPort Agent tab deselect Run VPort Agent log minimized 2 Click Apply To take a quick look at the GUI when...

Страница 25: ...ertificates click Certificate Details the Trust tab Add to Trusted Identities and OK Defining Signature Areas for Expert Users The default method for using the Signature Wizard on the fly is the novic...

Страница 26: ...ncel document or click the Cancel button on the Zignature Pad The document closes and the Zignature Pad returns to displaying the logo or commercials Print Options NOTE You can change most of the prin...

Страница 27: ...figuration tab For example for high print quality select 300x300 dots per inch NOTE To improve the quality of printing signed PDF documents in Adobe Reader click File Print Advanced select Print As Im...

Страница 28: ...d send it a printout in PCL5 or PCL6 format from your printing source pcl6 871 exe will be activated At your workstation 1 Make a note of the IP address 2 Allow port 515 through the firewall in both d...

Страница 29: ...CL5 or PCL6 print drivers that are part of the OS or already installed on the OS if that OS allows it Recommended drivers HP LaserJet 4000 series and HP Color LaserJet 2700 series which are installed...

Страница 30: ...16 your_bmp_file_name Example VP24to16 File1 bmp Add one line for each BMP file 4 Run the runme bat file The file is converted in place 5 Ensure the Zignature Pad configuration Document Folders tab po...

Страница 31: ...iles will be either located in one AdvBox folder or folder_name file_name structure can be used if some files are located in AdvBox sub folders The AdvBox can be located in a network folder It is not...

Страница 32: ...orized Zignature Pad service representative may ask you to access To view past events navigate to these locations o C Program Files x86 10ZiG VPort logview exe OR o C Program Files 10ZiG VPort logview...

Страница 33: ...Batteries To replace batteries 1 Remove the battery compartment cover 2 Install one AAA battery with the positive facing up 3 Replace the battery compartment cover Warning Do not attempt to open the...

Страница 34: ...age Areas To clean out the backup folders occasionally and make room on the computer 1 In the Document Folders tab click Explore InBox 2 Click the Backup folder 3 Highlight the folders corresponding t...

Страница 35: ...d not stop in time Fix Continue the installation uncheck Run 10ZiG VPort on the last screen and re run the setup After Installing Unable to Load LIBUSB DLL Error Symptom After installing the 10ZiG Sof...

Страница 36: ...ture Pad printer properties were possibly changed in such a way that prevents creating TIFF files compatible with Zignature Pad Open Printer Properties click the Additional tab Additional Properties T...

Страница 37: ...the USB driver on the VPort installation CD browse to Support Fix 7 Under Start right click Computer and select Manage Under Computer Management select Device Manager Under 10ZiG Zignature Pad device...

Страница 38: ...tion Solution One or the other or steps 1 In the Task Manager check if VPDAgent exe with user SYSTEM is running If not check if the VPDAgent service in the list of Windows services is started If not s...

Страница 39: ...he Windows notification area and select Calibrate from the right click menu 4 Fix the calibration 5 If this doesn t help contact an authorized Zignature Pad service representative Documents Loading Sl...

Страница 40: ...ick Yes on seeing the restart prompt and try to print again For earlier versions upgrade to the more recent software and firmware versions or define 300 DPI in the VPrint configuration tab Digital Pen...

Страница 41: ...data Fix None this is normal behavior Output is Displayed Incorrectly or Negative response Message Symptom Large documents may cause the Negative response message to appear or VPort may display your d...

Страница 42: ...TURE PAD_IP_ADDRESS Missing Buttons on Document Monitor Symptom Specific toolbar buttons are not visible on the Document Monitor Cause They are disabled Fix See Configuring the Toolbar No Cancel Butto...

Отзывы: