Toolbox User Manual
11/23/17 10:32 AM
Copyright 1010music LLC 2017
Digital Heart – Analog Soul
P. 14
outputs. When a MIDI stop signal is received, the module stops playback and passes this signal along to the MIDI
outputs.
Toolbox can also drive a clock signal to other modules in a few different ways. You can use the four MIDI outputs to
output the MIDI clock to other modules. You can also use a Gate Sequencer to configure your own custom clock
signal that will go out the corresponding Gate output jack. In this way you could create a repeating sequence of
1/16
th
notes to generate an analog clock.
Preset Management
A preset is a set of pre-configured sequences, function generators and modulators. You can use the 1010music
presets or create your own presets to save your work.
Select a Preset
To select a preset:
6.
Press the
HOME
button to display the Main screen if needed.
7.
Cycle through the presets by touching the
+
and
–
buttons at the top of the Touch
Screen on either side of the name of the preset (e.g.
STABS
in Figure 2: Main
Screen Overview above).
8.
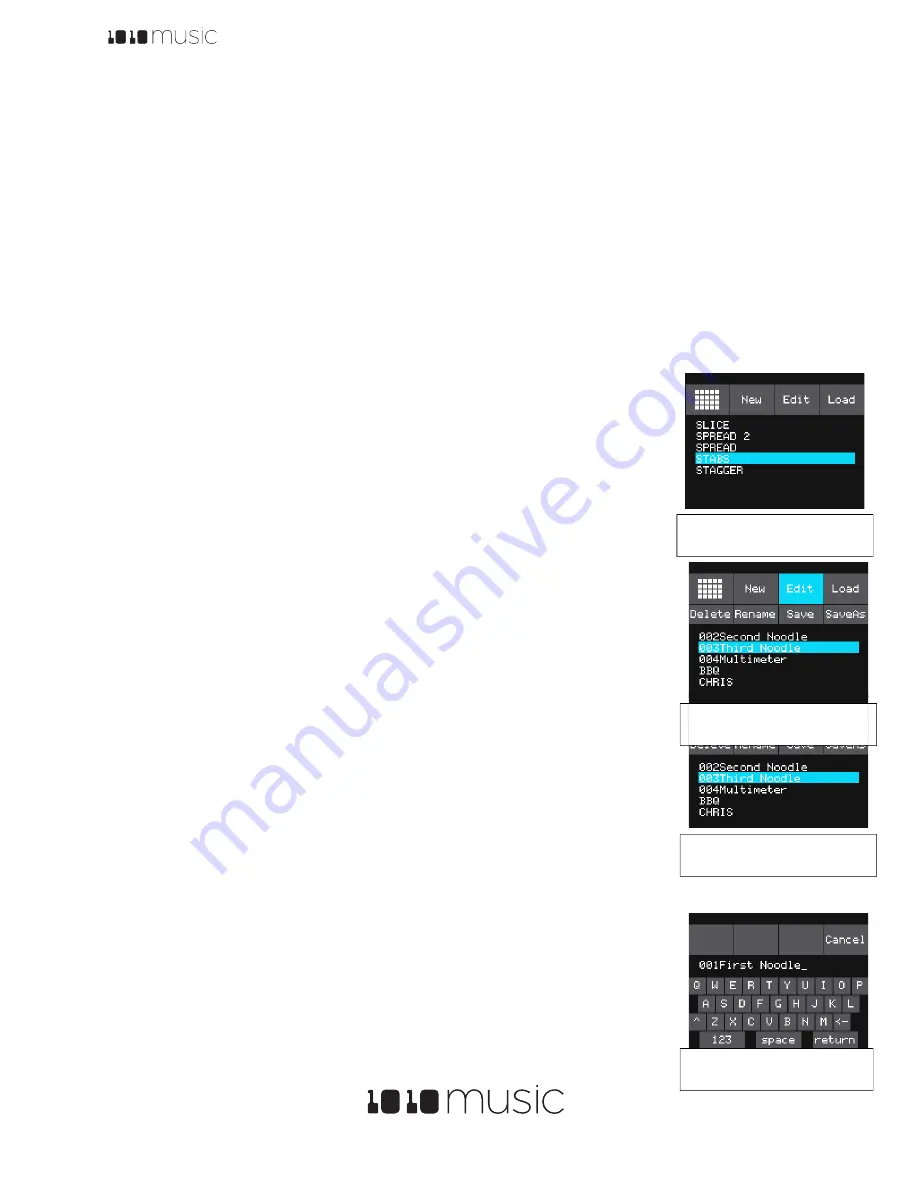
Alternatively, you can touch the name of the preset or the space above it to display
the Preset Selection screen.
9.
Turn a Control Knob to select the desired preset.
10.
Touch
Load
to load the selected preset and go back to the Main screen.
Save a Preset
Toolbox does not automatically save your changes to presets. You have to manually save by
following these steps:
4.
From the Main screen, touch the preset name to display the Preset Selection screen.
5.
Touch
Edit
to display the Preset Edit Submenu.
6.
Touch
Save
to save the changes to the preset and return to the Main screen.
Copy a Preset
If you prefer not to start with a blank slate, you can copy an existing preset.
1.
From the Main screen, touch the preset name at the top of the grid to display the
Presets
screen.
2.
Touch the
Edit
button at the top of the
Touch Screen
to display the
Preset
Edit
menu.
3.
Use a
Control Knob
to select the preset you want to copy, and then touch the
Copy
button. Toolbox creates a copy of the preset that appears above the source
preset in the list. The name of the copy is the name of the source preset with “ 2”
appended to the end.
Rename a Preset
Here’s how to give a preset a new name:
1.
From the
Presets
screen, touch the
Edit
button at the top of the
Touch
Screen
to display the
Preset
Edit
menu.
2.
Use a
Control Knob
to select the preset you want to rename, and then touch the
Rename
button. Toolbox displays a touch screen keyboard you can use to enter a
new name. Touch the
return
button to save the changes and go back to the
Presets
screen.
Figure 20: Preset
Naming Keyboard
Figure 19: Preset Edit
Menu
Figure 17: Preset
Selection Screen
Figure 18: Preset Edit
Submenu


