


Copyright 2020 by 1010music LLC
Page 3
Page 2
Copyright 2020 by 1010music LLC
ADJUST OUTPUT LEVELS
Push MAIN to access the output controls. The left two knobs adjust the output levels to CUE (PHONES)
and OUT2. The right two knobs both control the MAIN output level. Touch MUTE to mute the signal to
that output.
Push B to access some advanced options. Turn a top knob to select a parameter, and turn a bottom
knob to select a value for that parameter. Be sure to scroll down to see the Compressor options. Here
are a few of the configuration options available here:
Output Option
Description
Values
CUE Source
Choose which signal to send to the PHONES output.
Custom
: the CUE mix
Main
: the Main mix
CUE Mix
OUT2 Mix
FX1 Mix
FX2 Mix
Controls whether the corresponding signal levels are sent
pre- or post-fader
Pre-Fader
Post-Fader
Compressor
Is the compressor applied to the MAIN Output
On
Off
FOCUS ON ONE TRACK
1. Push TRACK and then touch a track in the meter bridge to select it. The controls on the bottom half of
the screen are now controlling only the selected track.
2. Turn the knobs to adjust the four controls with the pink highlight.
3. Push A to toggle the knob focus to the other set of controls, or tap a control panel to give it focus.
4. Touch and drag to change the value of a knob. Slide your finger up and down or left and right to
adjust the value.
5. Touch the REC, MUTE or SOLO button to toggle the state for the current track.
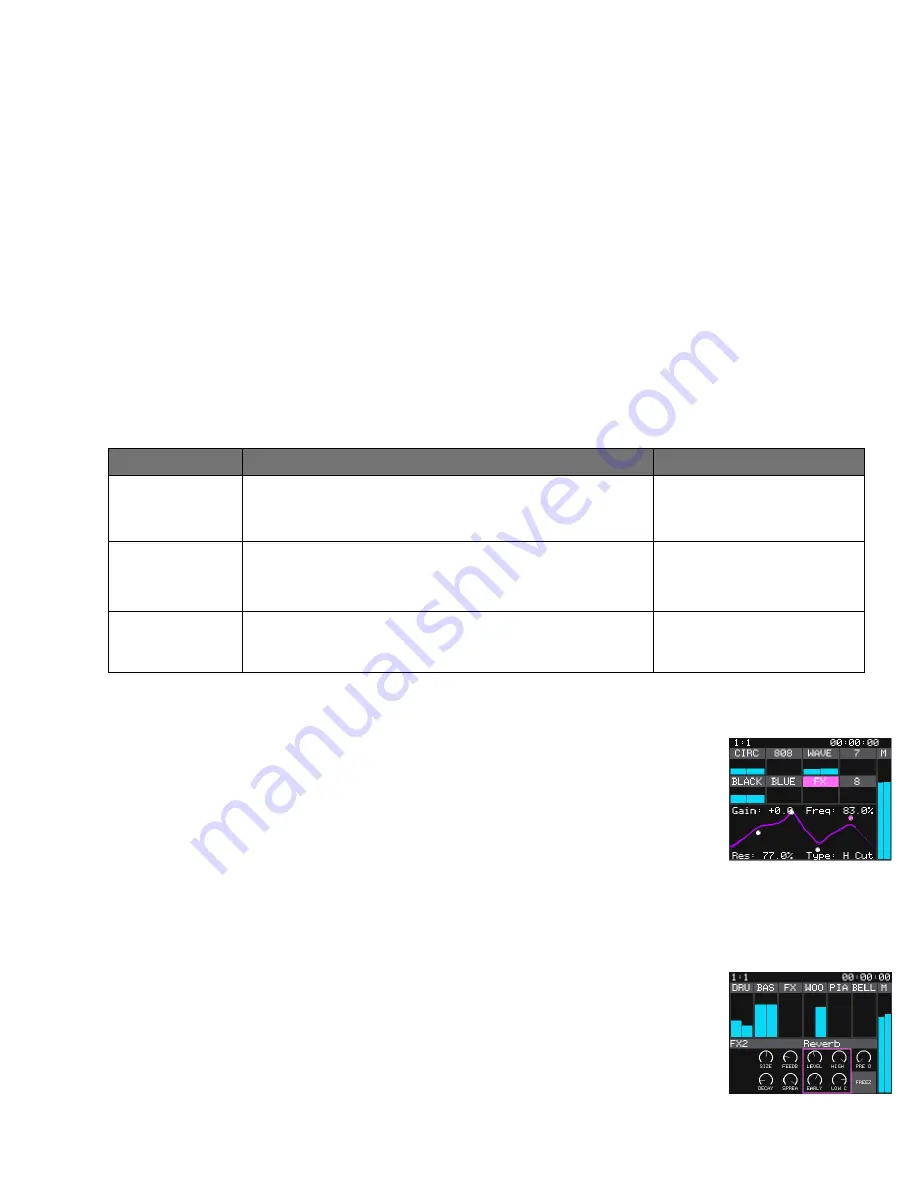
ADJUST THE EQ
1. Push EQ and touch a track or the Main meter to select it.
2. Turn the bottom right knob to select the node behavior, and then turn the
other knobs to adjust the parameters. You can also use touch or drag to
adjust the currently active node.
3. Push A to cycle the selection through the 4 different EQ nodes per track or
output.
4. Press EQ to toggle the display of the meter bridge and display the graphic EQ
in full screen mode.
APPLY DELAY AND REVERB EFFECTS
1. Adjust the effects sends for each track using the Track or Mixer control mode.
2. Push FX and then turn a knob or use touch gestures to adjust the effect
parameters.
3. Push FX again to cycle between the following FX Screens: FX1-Delay, FX2-
Reverb small, FX2- Reverb large, XY Grid.
4. Push A to to advance the knob focus.


