ZOMEWORKS Track Rack UTRF-072, Assembly Instructions Manual
The ZOMEWORKS Track Rack UTRF-072 is a high-quality roof rack system designed for transporting heavy loads. Ensure easy and correct assembly by downloading the free Assembly Instructions Manual from manualshive.com. This manual provides step-by-step guidance for installing and using the track rack effectively. Get yours today!
Share
Download


Reviews:
No comments
Related manuals for Track Rack UTRF-072

MD106
Brand: Ballard Designs Pages: 6

105-2670
Brand: Rack Solutions Pages: 8

HP 29-1 L
Brand: Transmedia Pages: 2
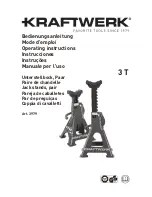
3979
Brand: KRAFTWERK Pages: 8

NREPB1
Brand: Panduit Pages: 2

RE668
Brand: Rivers Edge Treestands Pages: 20

StayBright 91055LO
Brand: GE Pages: 2

Dual J Series
Brand: CHIEF Pages: 6

FFFP01568
Brand: M.F. Blouin Pages: 3

00132002
Brand: THOMSON Pages: 29

RHSTGRK
Brand: RightHand Pages: 2

RLI8050WBK
Brand: CONEN Pages: 7

TY-ST65P20
Brand: Panasonic Pages: 1

TY-ST65P11-K
Brand: Panasonic Pages: 6

TY-ST58-K
Brand: Panasonic Pages: 7

TY-ST65P11-K
Brand: Panasonic Pages: 9

TY-ST42P600W
Brand: Panasonic Pages: 12

TY-ST42D1-WG
Brand: Panasonic Pages: 12


