DS1054-074B
EN
MD3300MRP
5454801
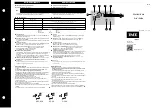
Radio: Load manager POWER
The complete instruction booklets in French, Spanish, German,
Nederlands, Danish / Norwegian and the device configuration
booklets via the Yokis PRO App can be downloaded by scanning the
following QR-Code.
1. GENERAL DESCRIPTION
The
MD3300MRP
device is designed to control electrical loads so as to
prevent, in case of simultaneous switching on of several devices, an overload
that may cause the maximum electrical energy consumption allowed by the
supplier to be exceeded and consequently the mains power supply to be
disconnected. For proper operation of the device it is necessary to:
•
assign one or more MTR2000ERP(X) or MTR2000MRP(X) radio receiver
relays to the MD3300MRP device (up to 7 relays directly connected or
more than 7 using the RADIO BUS);
•
make the assignment between the receiver modules and the device
channels (max 8 channels, each with a different priority: channel 1 = priority
1 = highest priority), so as to indicate to the MD3300MRP load manager
which receiver modules are to be piloted according to the priorities.
It is possible to assign more than one receiver module to each
channel in order to disconnect several loads at the same time. This
also allows simultaneous control of phase and neutral on the same
load, where this is deemed necessary.
If the absorbed power exceeds the set threshold continuously for the
pre-alarm time (Ton), the MD3300MRP load manager provides the loads
disconnection (receivers), starting from the lowest priority, as long as the
value of the absorbed power does not result lower than the activation
threshold. Once the alarm reset time (Toff) has elapsed, the device provides
the loads connection (receivers) in reverse order. The load manager and
the actuators communicate exclusively via radio.
RADIO RANGE
POWER Range:
•
Inside 100 m² apartments with perpendicular crossing of main wall or
ceiling.
•
250m in open range.
Range may be reduced by presence of metallic elements, crossing of
walls or partitions.
2. INSTALLATION
Precautions for the installer
•
The device must only be installed by qualified personnel in a closed
and adequately protected electrical panel, in accordance with national
installation standards.
•
Before performing the installation operations, check that the devices
and conductors are not live.
•
In order to comply with the safety regulations, the device must be connected
to an electrical line protected upstream by a magnetothermic switch (curve
C) with a current suitable for the load.
•
Do not power on or connect the device if any part of it is damaged
.
•
After installation, inaccessibility to the connection terminals without
appropriate tools must be guaranted.
•
The device can be used in environments with category of measurement
III and pollution degree 2.
For proper operation, the MD3300MRP load manager must measure the
same current as the general energy meter. For this reason the ideal position
for the device connection is immediately downstream of the general switch.
3. WIRING
RADIO: LOAD MANAGER
Wires with cross-section area of 0.5 mm
2
or larger must comply with
IEC 60332-1-2; wires with cross section area smaller than 0.5 mm
2
must
comply with IEC 60332-2-2.
It is necessary to wire and power the MTR2000ERP(X) or MTR2000MRP(X)
receiver before the assignment with the MD3300MRP load manager.
Always make sure that the MTR module is configured with the default
values.
The MTR used for load control must manage electrical sockets. In this case, in
rest conditions, the MD3300MRP load control device periodically carries out
an automatic check of all the MTR modules, in order to restart them in a time
that can vary between 5 minutes and 40 minutes “.
4. FIRMWARE RELEASE
Press and hold the keys
and
for more than 3 seconds to display the
firmware release of the device.
5. RESET TO FACTORY SETTINGS
If you want to delete all the settings made and restore the factory values, press
the keys
and
simultaneously for more than 3 seconds. The display will
show “RESET”. Factory values:
- Setpoint: 3.3 kW
- Ton: 60 seconds
- Toff: 120 seconds
CAUTION!: Resetting to the factory settings does not delete the radio
assignments made on the MD3300MRP device. To delete radio assignments,
see in detail chapter “REMOVING ALL RADIO ASSIGNMENTS”.
6. TECHNICAL SPECIFICATIONS
Power supply: 230V~ (+10% -15%) - 50 Hz
Maximum own consumption: 4 VA
Direct current connection until 32A
Settable power threshold range: 0.8 ÷ 7 kW
Pre-alarm time range Ton: 10 ÷ 9999 seconds
Disconnection time range Toff: 10 ÷ 9999 seconds
Blocks for cables with maximum section of 6 mm
2
Radio frequency band: 2400 - 2480 MHz
Maximum radio power transmitted: 10mW
Operating temperature: -10°C ÷ +45°C
Operating humidity: 10% ÷ 90% non condensing
Storage temperature: -10°C ÷ +65°C
Container: 2 DIN modules
Overvoltage category: II
Operating altitude: below 2000 m (from 0 to 6560 ft)
Protection degree: IP20 / IP40 (on the front panel)
Indoor usage only, non-wet location
Insulation: reinforced between accessible parts (front panel) and all other terminals
Dimensions (H x L x D): 87,5 x 35,6 x 65 mm
7. KEY TO SYMBOLS
Symbol
Description
~
Alternating input voltage
See the installation manual of the device
8. SIMPLIFIED EU DECLARATION OF CONFORMITY
Hereby, FDI Matelec SA., declares that the radio equipment type:
MD3300MRP load manager (code 5454801)
is in compliance with Directive
2014/53/EU. The full text of the EU declaration of conformity is available at the
following internet address:
www.Yokis.com
RADIO ASSIGNMENT BETWEEN AN MTR RECEIVER MODULE AND THE
MD3300MRP LOAD MANAGER
For correct operation, it is essential to configure a radio assignment between
the MD3300MRP load manager and the MTR2000ERP(X) or MTR2000MRP(X)
radio receiver relays. The MD3300MRP device is able to manage up to 7
receiver modules directly connected. If you wish to manage more than 7
modules, it is necessary to create a radio bus to allow communication between
the MD3300MRP device and the subsequent modules.
Only one MD3300MRP device can be configured on each system.
▶
On the MD3300MRP device, access the RADIO configuration menu by
simultaneously pressing keys
and
(for approx. 3 seconds) until the
display shows “
bind.r1
”.
You can cancel the assignment operation by pressing
key.
▶
Press
key on the device to perform radio assignment.
▶
While “
InProG
” is flashing (for 30 seconds), press briefly with a sharp,
properly insulated tool into the “Connect” hole on the receiver module.
▶
The MD3300MRP device will briefly display the message “PASS” if the
assignment has been successful. The receiver module is now correctly
assigned to the MD3300MRP device.
▶
If the device displays the message “
Err. 03
” the assignment has not been
successful. Repeat the operation and make sure to press into the “Connect”
hole on the receiver module within the 30 seconds in which the MD3300MRP
load manager displays the message “
InProG
”.
In some cases, if the receiver is out of radio range, it is possible that the
load manager is unable to communicate with the receiver and displays
the message “Err. 03”. In this case, refer to paragraph “Extending the
range”.
▶
It is necessary to repeat the entire assignment procedure for each receiver
module you wish to assign directly to the MD3300MRP device.
REMOVING ONE SINGLE RADIO ASSIGNMENT
It is possible to remove an assignment between an MTR receiver module and
the MD3300MRP load manager.
▶
On the MD3300MRP device, access the RADIO configuration menu by
simultaneously pressing keys
and
(for approx. 3 seconds) until the
display shows “
bind.r1
”.
▶
Press the arrow key
or
until “
dEL .r6
” is displayed.
You can cancel the assignment operation by pressing
key.
▶
Press
to remove the assignment.
▶
While “
InProG
” is flashing (for 30 seconds), press briefly with a sharp,
properly insulated tool into the “Connect” hole on the receiver module.
▶
The MD3300MRP load manager will briefly display the message “
PASS
” if
the receiver module assignment removal has been successful.
▶
If the device displays the message “
Err. 03
” the assignment removal has
not been successful. Repeat the operation and make sure to press into the
“Connect” hole on the receiver module within the 30 seconds in which the
MD3300MRP load manager displays the message “
InProG
”.
>3s
Radio assignment
Removing a
radio assignment
Removing all
radio assignments
Procedure completed
Procedure failed
>4 sec.
>4 sec.
Scan
DEVICE SCAN FOR YOKIS PRO APP
The scanning operation allows the MD3300MRP device to be detected by
the Yokis Pro App in order to subsequently carry out the assignment to the
channels and the parameter configuration (Paragraphs 10 and 11) directly
from the App.
▶
On the MD3300MRP device, access the RADIO configuration menu by
simultaneously pressing keys
and
(for approx. 3 seconds) until the
display shows “
bind.r1
”.
▶
Press the arrow key
or
until “
SCAn
” is displayed.
You can cancel the scan by pressing
key.
▶
Press the key
to start the detection.
▶
While “InProG” is flashing (for 30 seconds), start the device search on the
Yokis Pro App and select it.
▶
The MD3300MRP load manager briefly displays the message “
PASS
” if
the device has been detected and selected by the Yokis Pro App.
▶
If the device displays the message “
Err. 03
” the detection has not been
successful. Repeat the operation and make sure to start the device search
on the Yokis Pro App within the 30 seconds in which the MD3300MRP
load manager displays the message “
InProG
”.
For more details on channel assignment and configuration of the
MD3300MRP device through the Yokis Pro App, scan the QR Code
at the beginning of the booklet to download the booklet.
REMOVING ALL RADIO ASSIGNMENTS
It is possible to remove all assignments between the various receiver
modules and the MD3300MRP load manager.
▶
On the MD3300MRP load manager, access the RADIO communication
menu by simultaneously pressing keys
and
(for approx. 3 seconds)
until the display shows “
bind.r1
”.
▶
Press the arrow key
until “
CLEAr
” is displayed.
▶
Press the key
to delete all assignments.
▶
The MD3300MRP device will briefly display the message “
PASS
”. All
assignments with receiver modules have been removed.
EXTENDING THE RANGE
All YOKIS radio receivers also work as signal repeaters. The addition of one
or more modules allows extending the radio range by creating a Radio Bus
between the various modules on the system.
1) Creating the Radio Bus
▶
Press once
the
Connect button of A module
(the LED of A module starts
flashing), then
press once
the
Connect button of B
module (connection
between A and B is created and the 2 modules stop flashing).
▶
The two buttons must be pressured within a maximum of
30
seconds.
▶
Perform the same operation between B and C modules and so on with
the other modules.
Directive 2012/19/EU of the European Parliament and of the Council of 4 July 2012
on waste electrical and electronic equipment (WEEE)
The symbol of the crossed-out wheeled bin on the product or on its packaging indicates that
this product must not be disposed of with your other household waste. Instead, it is your
responsibility to dispose of your waste equipment by handing it over to a designated collection
point for the recycling of waste electrical and electronic equipment. The separate collection and recycling
of your waste equipment at the time of disposal will help to conserve natural resources and ensure that
it is recycled in a manner that protects human health and the environment. For more information about
where you can drop off your waste equipment for recycling, please contact your local city office, your
household waste disposal service or the shop where you purchased the product.
9. RADIO CONFIGURATION MENU
Wiring via MTR2000ERP(X)
230V
50Hz
L
N
C1 N
C2
BP
L
5454801
5454462
Two-pole
thermo-magnetic
circuit breaker
Wiring via MTR2000MRP(X)
230V
50Hz
L
N
5454801
5454464
Two-pole
thermo-magnetic
circuit breaker
>3 seconds