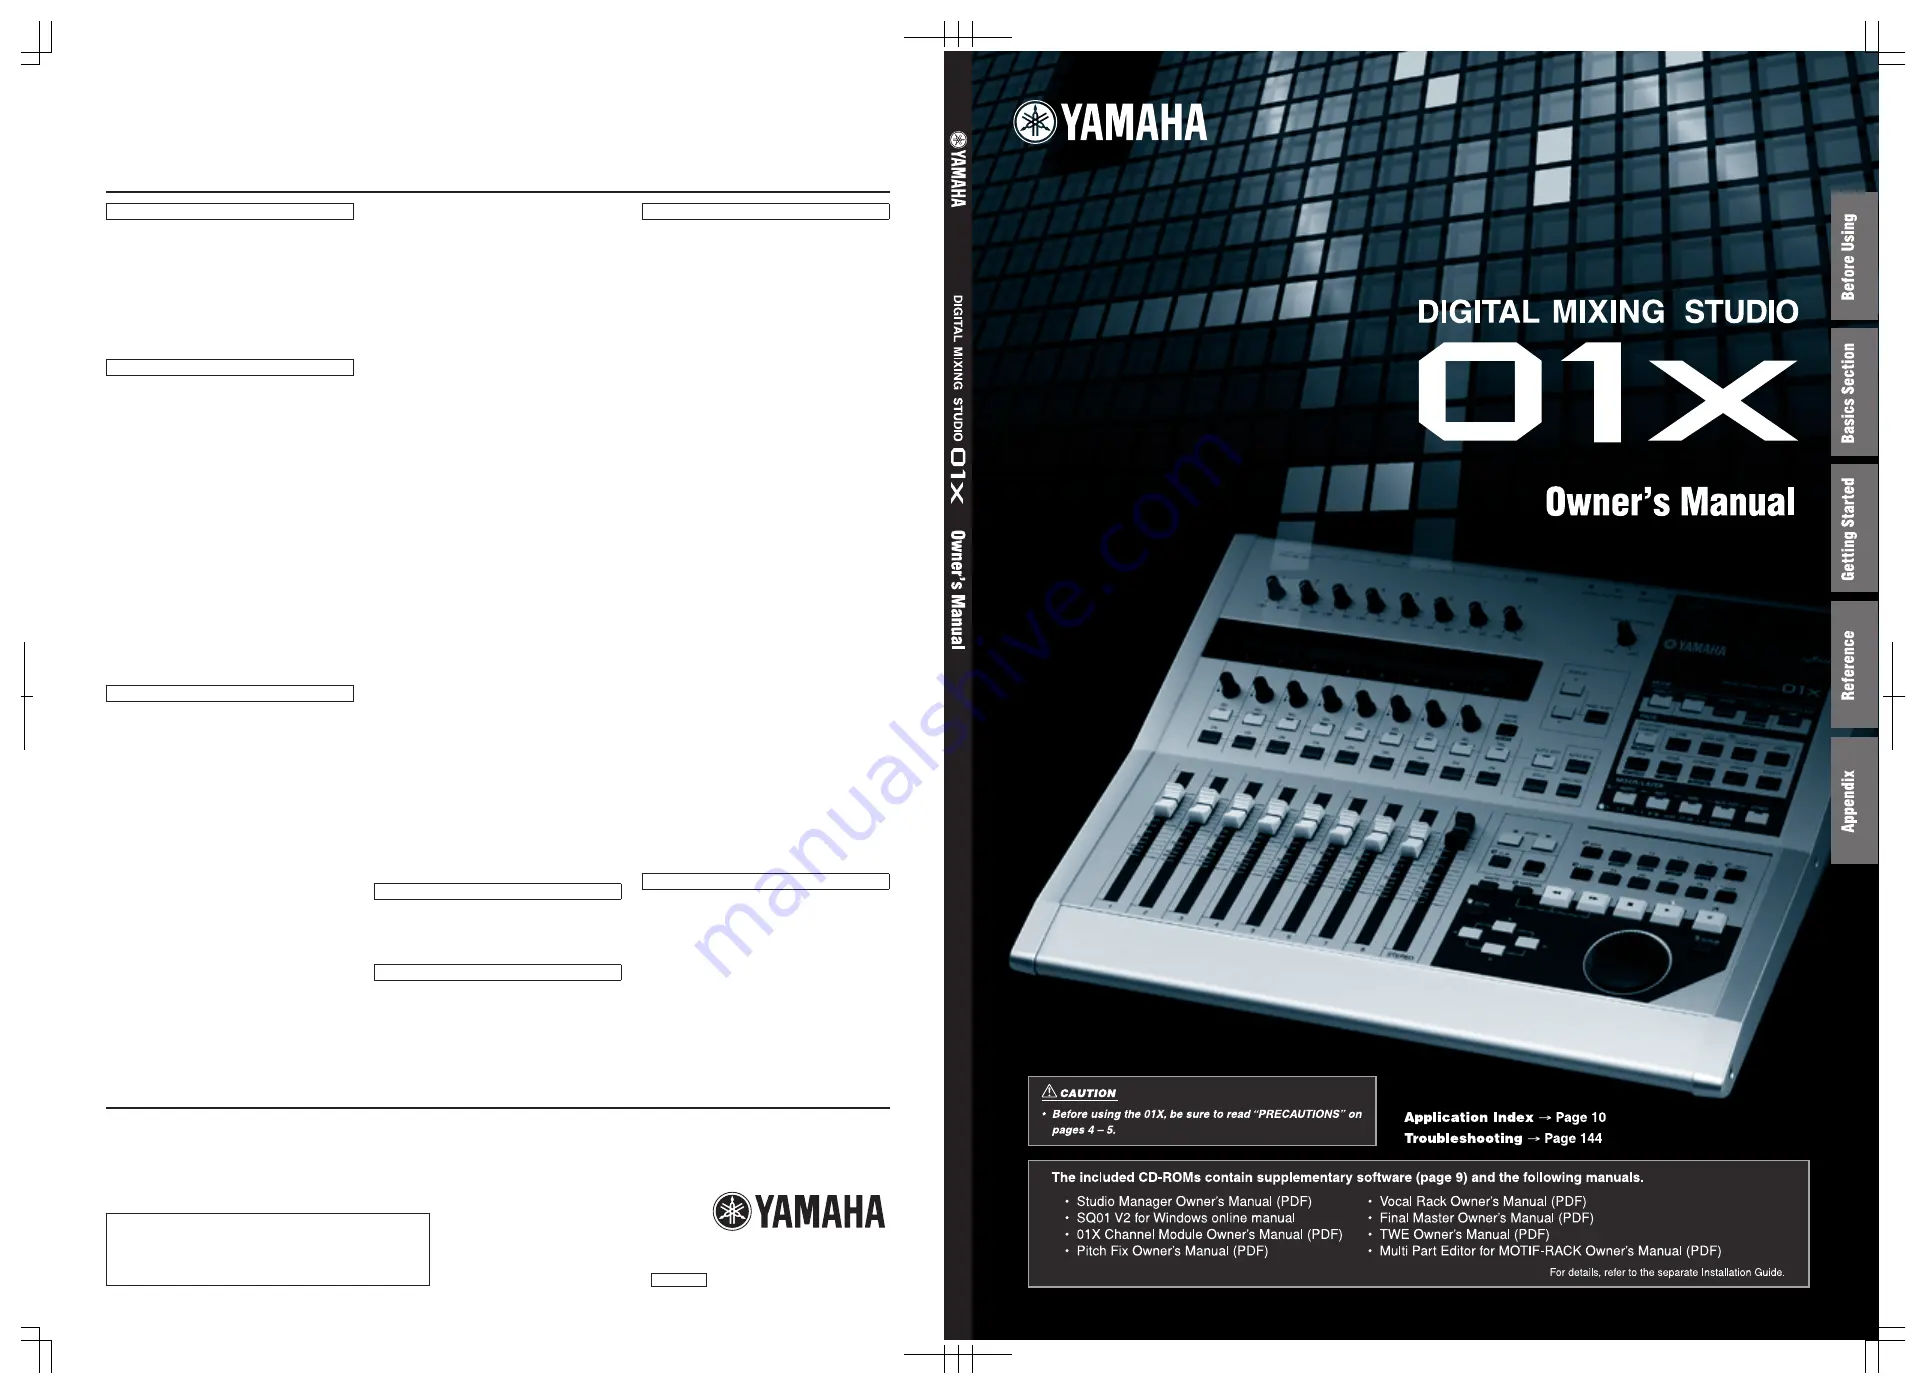
background image

For details of products, please contact your nearest Yamaha  
representative or the authorized distributor listed below.

Pour plus de détails sur les produits, veuillez-vous adresser à Yamaha ou 
au distributeur le plus proche de vous figurant dans la liste suivante.

Die Einzelheiten zu Produkten sind bei Ihrer unten aufgeführten 
Niederlassung und bei Yamaha Vertragshändlern in den jeweiligen 
Bestimmungsländern erhältlich.

Para detalles sobre productos, contacte su tienda Yamaha más cercana 
o el distribuidor autorizado que se lista debajo.

CANADA

Yamaha Canada Music Ltd.

135 Milner Avenue, Scarborough, Ontario,
M1S 3R1, Canada
Tel: 416-298-1311

U.S.A.

Yamaha Corporation of America 

6600 Orangethorpe Ave., Buena Park, Calif. 90620, 
U.S.A.
Tel: 714-522-9011

MEXICO

Yamaha de Mexico S.A. De C.V.,
Departamento de ventas

Javier Rojo Gomez No.1149, Col. Gpe Del 
Moral, Deleg. Iztapalapa, 09300 Mexico, D.F.
Tel: 55-5804-0600 

BRAZIL

Yamaha Musical do Brasil LTDA.

Av. Rebouças 2636, São Paulo, Brasil
Tel: 011-3085-1377

ARGENTINA

Yamaha Music Latin America, S.A. 
Sucursal de Argentina

Viamonte 1145 Piso2-B 1053, 
Buenos Aires, Argentina
Tel: 1-4371-7021

PANAMA AND OTHER LATIN 
AMERICAN COUNTRIES/
CARIBBEAN COUNTRIES 

Yamaha Music Latin America, S.A.

Torre Banco General, Piso 7, Urbanización Marbella, 
Calle 47 y Aquilino de la Guardia, 
Ciudad de Panamá, Panamá 
Tel: +507-269-5311

THE UNITED KINGDOM

Yamaha-Kemble Music (U.K.) Ltd.

Sherbourne Drive, Tilbrook, Milton Keynes, 
MK7 8BL, England
Tel: 01908-366700

IRELAND

Danfay Ltd.

61D, Sallynoggin Road, Dun Laoghaire, Co. Dublin
Tel: 01-2859177

GERMANY

Yamaha Music Central Europe GmbH

Siemensstraße 22-34, 25462 Rellingen, Germany
Tel: 04101-3030

SWITZERLAND/LIECHTENSTEIN

Yamaha Music Central Europe GmbH, 
Branch Switzerland

Seefeldstrasse 94, 8008 Zürich, Switzerland
Tel: 01-383 3990

AUSTRIA

Yamaha Music Central Europe GmbH, 
Branch Austria

Schleiergasse 20, A-1100 Wien, Austria
Tel: 01-60203900

THE NETHERLANDS

Yamaha Music Central Europe, 
Branch Nederland

Clarissenhof 5-b, 4133 AB Vianen, The Netherlands
Tel: 0347-358 040

BELGIUM/LUXEMBOURG

Yamaha Music Central Europe GmbH, 
Branch Belgium

Rue de Geneve (Genevastraat) 10, 1140 - Brussels, 
Belgium
Tel: 02-726 6032

FRANCE

Yamaha Musique France 

BP 70-77312 Marne-la-Vallée Cedex 2, France
Tel: 01-64-61-4000

ITALY

Yamaha Musica Italia S.P.A. 
Combo Division

Viale Italia 88, 20020 Lainate (Milano), Italy 
Tel: 02-935-771

SPAIN/PORTUGAL

Yamaha-Hazen Música, S.A.

Ctra. de la Coruna km. 17, 200, 28230 
Las Rozas (Madrid), Spain
Tel: 91-639-8888

GREECE

Philippos Nakas S.A. The Music House

147 Skiathou Street, 112-55 Athens, Greece
Tel: 01-228 2160

SWEDEN

Yamaha Scandinavia AB

J. A. Wettergrens Gata 1
Box 30053
S-400 43 Göteborg, Sweden
Tel: 031 89 34 00

DENMARK

YS Copenhagen Liaison Office

Generatorvej 8B 
DK-2730 Herlev, Denmark
Tel: 44 92 49 00

FINLAND

F-Musiikki Oy

Kluuvikatu 6, P.O. Box 260, 
SF-00101 Helsinki, Finland
Tel: 09 618511

NORWAY

Norsk filial av Yamaha Scandinavia AB 

Grini Næringspark 1
N-1345 Østerås, Norway 
Tel: 67 16 77 70

ICELAND

Skifan HF

Skeifan 17 P.O. Box 8120
IS-128 Reykjavik, Iceland
Tel: 525 5000

OTHER EUROPEAN COUNTRIES

Yamaha Music Central Europe GmbH

Siemensstraße 22-34, 25462 Rellingen, Germany
Tel: +49-4101-3030

Yamaha Corporation, 
Asia-Pacific Music Marketing Group

Nakazawa-cho 10-1, Hamamatsu, Japan 430-8650
Tel: +81-53-460-2312

TURKEY/CYPRUS

Yamaha Music Central Europe GmbH

Siemensstraße 22-34, 25462 Rellingen, Germany
Tel: 04101-3030

OTHER COUNTRIES

Yamaha Music Gulf FZE

LB21-128 Jebel Ali Freezone 
P.O.Box 17328, Dubai, U.A.E.
Tel: +971-4-881-5868

THE PEOPLE’S REPUBLIC OF CHINA

Yamaha Music & Electronics (China) Co.,Ltd.

25/F., United Plaza, 1468 Nanjing Road (West),
Jingan, Shanghai, China
Tel: 021-6247-2211

HONG KONG

Tom Lee Music Co., Ltd.

11/F., Silvercord Tower 1, 30 Canton Road,
Tsimshatsui, Kowloon, Hong Kong
Tel: 2737-7688

INDONESIA

PT. Yamaha Music Indonesia (Distributor)
PT. Nusantik

Gedung Yamaha Music Center, Jalan Jend. Gatot Sub-
roto Kav. 4, Jakarta 12930, Indonesia
Tel: 21-520-2577

KOREA

Yamaha Music Korea Ltd.

Tong-Yang Securities Bldg. 16F  23-8 Yoido-dong, 
Youngdungpo-ku, Seoul, Korea
Tel: 02-3770-0660

MALAYSIA

Yamaha Music Malaysia, Sdn., Bhd.

Lot 8, Jalan Perbandaran, 47301 Kelana Jaya, 
Petaling Jaya, Selangor, Malaysia
Tel: 3-78030900

PHILIPPINES

Yupangco Music Corporation

339 Gil J. Puyat Avenue, P.O. Box 885 MCPO, 
Makati, Metro Manila, Philippines
Tel: 819-7551 

SINGAPORE

Yamaha Music Asia Pte., Ltd.

No.11 Ubi Road 1, No.06-02, 
Meiban Industrial Building, Singapore
Tel: 747-4374

TAIWAN

Yamaha KHS Music Co., Ltd. 

3F, #6, Sec.2, Nan Jing E. Rd. Taipei.
Taiwan 104, R.O.C.
Tel: 02-2511-8688

THAILAND

Siam Music Yamaha Co., Ltd.

121/60-61 RS Tower 17th Floor, 
Ratchadaphisek RD., Dindaeng, 
Bangkok 10320, Thailand
Tel: 02-641-2951

OTHER ASIAN COUNTRIES 

Yamaha Corporation,
Asia-Pacific Music Marketing Group

Nakazawa-cho 10-1, Hamamatsu, Japan 430-8650
Tel: +81-53-460-2317

AUSTRALIA

Yamaha Music Australia Pty. Ltd.

Level 1, 99 Queensbridge Street, Southbank, 
Victoria 3006, Australia
Tel: 3-9693-5111

NEW ZEALAND

Music Houses of N.Z. Ltd.

146/148 Captain Springs Road, Te Papapa, 
Auckland, New Zealand
Tel: 9-634-0099

COUNTRIES AND TRUST 
TERRITORIES IN PACIFIC OCEAN

Yamaha Corporation,
Asia-Pacific Music Marketing Group

Nakazawa-cho 10-1, Hamamatsu, Japan 430-8650
Tel: +81-53-460-2312

NORTH AMERICA

CENTRAL & SOUTH AMERICA

EUROPE

AFRICA

MIDDLE EAST

ASIA

OCEANIA

SY32

HEAD OFFICE

Yamaha Corporation, Pro Audio & Digital Musical Instrument Division

Nakazawa-cho 10-1, Hamamatsu, Japan 430-8650
Tel: +81-53-460-2445

This document is printed on chlorine free (ECF) paper with soy ink.

Yamaha Web Site (English only)

http://www.yamahasynth.com

Yamaha Manual Library

http://www2.yamaha.co.jp/manual/english/

U.R.G., Pro Audio & Digital Musical Instrument Division, Yamaha Corporation

© 2003 Yamaha Corporation

 311POCP38.2-01A0   Printed in Japan

WB29310

Summary of Contents for 01x

Page 1: ...49 00 FINLAND F Musiikki Oy Kluuvikatu 6 P O Box 260 SF 00101 Helsinki Finland Tel 09 618511 NORWAY Norsk filial av Yamaha Scandinavia AB Grini Næringspark 1 N 1345 Østerås Norway Tel 67 16 77 70 ICELAND Skifan HF Skeifan 17 P O Box 8120 IS 128 Reykjavik Iceland Tel 525 5000 OTHER EUROPEAN COUNTRIES Yamaha Music Central Europe GmbH Siemensstraße 22 34 25462 Rellingen Germany Tel 49 4101 3030 Yamah...

Page 2: ...relating to how a function or effect works when the unit is operating as designed are not covered by the manufacturer s warranty and are therefore the owners responsibility Please study this manual carefully and consult your dealer before requesting service ENVIRONMENTAL ISSUES Yamaha strives to produce products that are both user safe and environmentally friendly We sincerely believe that our pro...

Page 3: ...ual may cause interference harmful to the opera tion of other electronic devices Compliance with FCC regula tions does not guarantee that interference will not occur in all installations If this product is found to be the source of inter ference which can be determined by turning the unit OFF and ON please try to eliminate the problem by using one of the following measures Relocate either this pro...

Page 4: ...lace it in a position where anyone could walk on trip over or roll anything over it Do not open the instrument or attempt to disassemble the internal parts or modify them in any way The instrument contains no user serviceable parts If it should appear to be malfunctioning discontinue use immediately and have it inspected by qualified Yamaha service personnel Do not expose the instrument to rain us...

Page 5: ...ot insert a finger or hand in any gaps on the instrument Never insert or drop paper metallic or other objects into the gaps on the panel or keyboard If this happens turn off the power immediately and unplug the power cord from the AC outlet Then have the instrument inspected by qualified Yamaha service personnel Do not place vinyl plastic or rubber objects on the instrument since this might discol...

Page 6: ...f your new 01X and its sophisticated functions we suggest you read through this manual thoroughly Also keep it in a safe convenient place so that you can regularly refer to it when necessary Accessories Check to see that you have everything listed here AC Adaptor PA 300 CD ROM x 2 Installation Guide Owner s Manual mLAN cable Quick Reference for Playback Recording User s Card containing the serial ...

Page 7: ...ents for the 01X and supplementary software mLAN setup Remote Control Setup as well as information how to play the demo song and computer software that can be controlled from the 01X Copying of commercially available music sequence data and or digital audio files for any purpose other than your own per sonal use is strictly prohibited This product incorporates and bundles computer programs and con...

Page 8: ...ulti channel full band setups With the mLAN connection and the audio interface features see below all you need is a laptop computer and the 01X and you ve got a full featured recording studio you can take on the road Audio MIDI interface for computer The 01X also functions as a sophisticated high quality audio front end for your computer Simply a connect a standard IEEE 1394 FireWire i Link cable ...

Page 9: ...ive fix it in mix pitch editing for vocals Final Master Mastering effect w multi band compressor limiter and soft clip feature Studio Manager for 01X This stand alone virtual mixer software is a convenient direct link between the 01X and your computer Utilizing the mLAN connection it provides virtual channel strips for all 01X channels with faders pan controls and real time stereo metering and let...

Page 10: ...ecording Playing back Determining the number of mLAN audio transmission reception channels Auto Connector Installation Guide Setting the sampling rate wordclock when using mLAN Auto Connector Installation Guide Determining the latency how quickly the data is processed Basic settings made in mLAN Driver mLAN Driver Setup Latency Installation Guide Settings made in relevant application ASIO mLAN Con...

Page 11: ...recording Can also be set to no time out or constant recording REMOTE AUTOMATION SETUP page 88 Remote control of the Multi Part Editor by using the SHIFT REMOTE buttons SHIFT REMOTE pages 37 87 Switching between remote control and internal mixer operation Modes Mode List page 37 Miscellaneous operations Speeding up adjustment of numeric values when using the knobs SHIFT Channel knob page 17 Switch...

Page 12: ...hange MIDI CHANNEL page 94 Determining whether Program Change messages are transmitted received or not PROGRAM CHANGE page 94 Setting a specific Program Change number to be transmitted when a Scene is recalled PROGRAM CHANGE ASSIGN TABLE page 94 Using incoming Program Change messages to change Scenes PROGRAM CHANGE ASSIGN TABLE page 94 Others Distinguishing among different 01X units when using Stu...

Page 13: ...nternal Effects 56 Using external effects 60 Input and Output Patching 61 Groups 64 Creating and Recalling Scenes 65 Recording Playback Remote Control 66 Setting up 66 Working in the Project window 73 Working in the Mixer window 75 Working in an Editor window 76 Automation 77 Editing EQ settings 79 Editing Effect settings 80 Other control features 82 Reference 84 Function Tree Function List 84 Rem...

Page 14: ... bus L R These combine the signals from the channel inputs ste reo input and mLAN inputs and send them via the REC bus output channel to the rear panel jacks for example STEREO AUX OUT mLAN as selected by Output Patch Channel A signal routing unit through which a sound that is input to the mixer section is adjusted by volume and pan and then output The mixer section of the 01X provides a total of ...

Page 15: ...ng just as the layer groups 1 8 9 16 and 17 24 are selected on the 01X For details refer to the Remote Function List on page 104 Moving faders This describes faders that automatically move to recorded positions as they are recalled for example when select ing a different mixing layer channel group or recalling a Scene from memory On the 01X all nine faders includ ing the ST channel are moving fade...

Page 16: ... INPUT over a range of 4 dB to 46 dB These are always set to control the level of the MIC LINE inputs 1 8 regardless of the MIXER LAYER selection The settings cannot be stored saved as a Scene Library w Display This backlit LCD liquid crystal display displays various information for operation of the 01X or DAW digital audio workstation In most of the displays this indicates the functions and param...

Page 17: ... By setting the Timeout parameter page 88 to an appropriate value a touch out function for the faders can be emulated See also 2 AUTO EDIT button i NAME VALUE button Switches the display type between a channel parameter value multi function display or one that shows only the parameter values By holding down the SHIFT button and pressing the NAME VALUE button you can also enable and change the mete...

Page 18: ...r names 8 SCENE button This button selects the Scene mode enabling you to store and recall Scenes page 85 9 UTILITY button This button selects the UTILITY mode enabling you to set the global settings for the entire system page 86 Press ing UTILITY from any of the Utility pages automatically calls up the Menu Select display page 87 0 MONITOR A B button This indicates and can be used to set the bala...

Page 19: ...nnel mode the Multi Channel mode has only Dynamics on off switches 6 GROUP button This button calls up the display for assigning multiple channels to fader or mute groups and for pairing adjacent faders page 101 7 EFFECT button This button calls up the display for the effect settings of each channel page 102 8 MIXER LAYER buttons In the Internal mode these are used to switch among input layers pag...

Page 20: ...d button is On record ing will begin By connecting an optional Foot Switch page 23 you can also control this by foot 1 Record button Enables recording standby Pressing this again cancels recording standby 2 MARKER button To enter a marker at a selected location in the song turn this button on and press the WRITE button Move to the next marker location by using MARKER and the f Forward button Move ...

Page 21: ...ack unbalanced The nominal input level is 46 to 4dB An instrument with high output impedance such as an electric guitar or bass with passive type pickups can be connected here This jack corre sponds to AD8 of the Input Patch settings pages 27 61 88 w STEREO AUX OUT jacks These are 1 4 phone output jacks unbalanced that output the signals of the stereo bus rec bus or AUX bus 1 2 e MONITOR OUT jacks...

Page 22: ...DI A IN OUT terminals MIDI B IN OUT terminals These terminals are for connection to external MIDI devices They allow you to transfer MIDI data between an mLAN connected computer and MIDI devices connected to the 01X making the 01X a convenient dual port MIDI interface for your computer The MIDI A terminal corre sponds to mLAN MIDI port 2 and the MIDI B terminal device corresponds to mLAN MIDI port...

Page 23: ...gital audio processing circuits inside each digital audio device are not synchronized with each other Wordclocks are signals that enable digital audio processing circuits to synchronize with each other In a typical digital audio system one device operates as the wordclock master transmitting wordclock signals and the other devices operate as wordclock slaves synchronizing to the wordclock master I...

Page 24: ...any other devices make sure that all volume settings are turned down all the way to zero then turn on the every device in your setup in the order of MIDI masters senders MIDI slaves receivers then audio equipment mixers amplifiers speakers etc This ensures smooth signal flow from the first device to the last first MIDI then audio Before beginning installation of mLAN Driver for Windows switch off ...

Page 25: ...O IN 17 18 9 10 Monitor Input mLAN OUT 1 24 1 16 STEREO Select RECBUS AUX 1 2 AUX 3 4 STI 1 AUX 3 STI 2 AUX 4 STEREO AUDIO STEREO Select RECBUS AUX 1 2 AUX 3 4 AUDIO mLAN Audio IN OUT mLAN MIDI IN OUT Remote Control Remote Control mLAN Audio IN OUT mLAN AUDIO mLAN MIDI IN OUT Remote Control of Multi Part Editor or Program Change Scene Selection Port 5 Remote Control of DAW Port 1 Remote Control mL...

Page 26: ...TEREO AUX OUT MONITOR OUT PHONES mLAN Connectors 1 2 Remote Control of DAW Port 1 mLAN Driver MIDI Audio Effects Remote Control mLAN Audio Audio conversion 3 3 3 AUDIO AUDIO AUDIO AUDIO AUDIO AUDIO Mixer mLAN IN 1 16 1 8 mLAN STEREO IN 17 18 9 10 mLAN OUT 1 24 1 16 STEREO Select RECBUS AUX 1 2 AUX 3 4 STI 1 AUX 3 STI 2 AUX 4 STEREO AUDIO STEREO Select RECBUS AUX 1 2 AUX 3 4 AUDIO mLAN Audio IN OUT...

Page 27: ...only Symbol Indications Amplifier stage Value change via knob Value change via fader On off switch button Phase Connected Unconnected AD Analog Digital converter DA Digital Analog converter Sampling rate converter Switches or faders connected with dotted line mean the set ting value for one is linked to the other AD DA SRC INPUT 1 8 ST IN 1 2 48V MIC LINE INPUT AD INPUT 1 2 PHANTOM LINE MIC INPUT ...

Page 28: ...US L RECBUS BUS R STEREO STEREO BUS L STEREO STEREO BUS R AUX 1 AUX 2 AUX 3 FX1 AUX 4 FX2 AUX PAN LEVEL PRE POST ON Mono in X 8 ON AUX PAN LEVEL PRE POST ON Mono in X 16 96kHz 88 2kHz X 8 ATT DIRECT OUT1 8 INPUT 9 24 1 mL1 mL16 2 4BAND EQ 4BAND EQ DY NAMICS ON INSERT INSERT ATT DY NAMICS DIRECT OUT9 24 1 INPUT SELECT INPUT PATCH mLAN IN 1 16 2 mLAN INPUT IEEE 1394 16 2 2 mLAN IN METER METER Gain R...

Page 29: ...N channel 1 to AUX 3 a feedback loop is created Since stereo input channels 1 2 are stereo adjacent odd numbered even numbered signals will be assigned to them when MIC LINE inputs are selected as the input signals Also if DIGITAL STEREO IN is selected both L and R signals will be assigned Digital cascade connection The input signal from the rear panel DIGITAL STEREO IN connector can be cascade co...

Page 30: ...XER LAYER is seleced in Internal mode Getting Started page 62 Output patch Reference page 90 Output Patch is the section where output signals are assigned to mLAN channels 1 2 through 23 24 DIGITAL STEREO OUT jack and STEREO AUX OUT jack The following output signals can be selected Stereo bus The output signal of the stereo bus routed through the stereo output channel Rec bus AUX bus 1 2 AUX bus 3...

Page 31: ...ch as reverb and delay modulation type effects such as chorus and flanger and guitar type effects such as distortion and amp simula tion These effects can be used via Aux send the level cor responds to the master level of the stereo input channels or inserted into a desired channel If 88 2kHz 96kHz operation is enabled only one internal effect block is available Effect 1 Aux 3 For details about ea...

Page 32: ...ong data and have them reflected automatically in the 01X faders providing full mixer automation For details on the functions in the Remote mode see the Remote Function List page 104 Depending on your particular DAW not all control features may be implemented and some buttons may be assigned different functions Refer to the owner s manual of your particular DAW for specific instructions and setups...

Page 33: ...ect MIDI or audio devices that do not have mLAN connectors or capability The following conversion is possible mLAN MIDI signal to from MIDI signal 2 ports mLAN MIDI IN OUT Port 2 3 of mLAN connectors to from MIDI IN OUT A B jack mLAN audio signal to from analog audio signal mLAN audio signal to from digital audio signal Analog audio signal to from digital audio signal ...

Page 34: ...he 01X while tracking alternately switching between INTERNAL and REMOTE as needed The 01X also gives you control over the audio mixer in the sequencer includ ing the plug in instruments as well as detailed parameter control over the plug in effects Recording mixer features Naturally the 01X gives you simultaneous eight channel input with full mixing control level adjustment Dynam ics and four band...

Page 35: ...ith the 01X are used to link mixing and processing operations between the 01X and your computer The result is a transparent exceptionally easy to use hardware software combination The panel controls on the 01X and the controls of Studio Manager on the computer are linked directly adjusting a parameter on one changes that of the other The Studio Manager has conventional channel strips that you can ...

Page 36: ...e 100 Output Patch 33 page 91 Default settings 00 01 32 Effect 1 2 128 page 103 Settings that apply to both 1 and 2 effect units Channel 129 page 103 Backup 1 page 86 Utility The current Scene Channel EQ Dynamics Effect Input Patch Output Patch Preset Destination for Store operation Studio Manager 01X Channel Module 01 40 41 128 01 43 44 128 02 01 00 Settings are compatible See the Studio Manager ...

Page 37: ...CENE lights Scene settings Saving or recalling the mixer effect parameters SCENE C 85 UTILITY UTILITY lights Global settings for the entire system remote control UTILITY D 86 MONITOR MONITOR lights unlights Switches between Monitor A and B To sets the output balance between the DAW audio and the audio of the 01X itself hold down the MONITOR button and turn knob 5 for A or 7 for B These settings ca...

Page 38: ... LIBRARY SCENE PATCH LIBRARY ASSIGN UTILITY MENU SELECT REMOTE PATCH W CLK D I O OSC MIDI PREF MONI UTILITY REMOTE AUTOMATION SETUP 3 3 GENERAL LOGIC CUBASE SONAR D PERF UTILITY SHIFT REMOTE FUNCTION GNRL RMT 2 3 UTILITY REMOTE SELECT GENERAL 1 3 GENERAL LOGIC CUBASE SONAR D PERF UTILITY INPUT PATCH IN1 4 1 8 AD1 IN1 AD2 IN2 AD3 IN3 AD4 IN4 UTILITY MONITOR A LED ON B LED OFF 1 1 INT 0 126 DAW INT ...

Page 39: ...1 OFF 0 2 0 11 125 2 1 LEVEL LEVEL LEVEL LEVEL LEVEL LEVEL LEVEL LEVEL 6 3 3 05 3 95 6 6 4 85 3 05 3 65 3 6 EQ ON ATT EQL Q EQL F EQL G SEL CH1 OFF 0 2 0 11 125 2 1 SEL CH3 SEL CH2 EQ LOW SEL CH1 EQ ON ATT EQL Q EQL F EQL G SCENE Selected Channel G Effect Multi Channel F Page Ex EQ LOW Channel knob Fader Fader Channel knob Fader Fader e t e y w t y w t y w t t y w e e e t t o o q Channel Module Na...

Page 40: ...ing the LAYER buttons and the parameters you can control using the channel strips on each layer The STEREO SEL button ON button and STEREO fader always control the Stereo Out signal regardless of the Layer settings LAYER buttons Channel Strips Display Channels can be operated 1 8 lights 1 8 CH1 CH8 Input Channels 1 8 9 16 lights 1 8 mL1 mL8 Input Channels 9 16 mLAN1 mLAN8 17 24 lights 1 8 mL9 mL16...

Page 41: ...tch Library page 89 Output Patch Library page 91 EQ Library page 99 Dynamics Library page 100 Effect Library page 103 Channel Library page 103 The instructions below apply to naming of any of the Libraries Library titles are named after the Libraries themselves have been stored This operation only saves the data of the Library name Other setting data is not saved until you actually store the Libra...

Page 42: ...e not overwriting any important data You should backup any important data to your computer beforehand by using Studio Manager For more details on using Studio Manager see page 47 and the Studio Manager PDF man ual q Turn the power of the 01X off Then while holding down the SCENE and UTILITY buttons turn the power back on The display prompts you for confirma tion To cancel the operation press chann...

Page 43: ...ure you use the right con nector for each Inputs 1 and 2 feature balanced XLR connectors for microphones with a phantom power switch Inputs 3 to 8 are TRS balanced phone jacks for line sources such as keyboards and tone generators There s even a Hi Z input on channel 8 for connecting an electric guitar or bass Set up your monitor If you re monitoring via headphones or the monitor out puts turn up ...

Page 44: ...oth chan nels as well as EQ Dynamics and other settings except pan and phase Pan the sounds page 55 Not only does panning allow you to create a more interest ing stereo sound field it lets you create more sonic space for each instrument in the mix There are no hard and fast guidelines here but generally pan to center the bass which is non directional anyway and the lead vocal Anything you ve track...

Page 45: ... 65 This powerful feature sometimes called snapshot automa tion lets you save all settings in a mix and call them up whenever you need them Not only is it ideal for instantly switching between different projects and songs it allows you to create mixing templates for different recording applications and even set up different trial mixes for a sin gle song and later choose the best one Computer reco...

Page 46: ... and slowly bring up the levels starting with the gain Adjust the gain then the STEREO master fader and finally the channel fader Make sure that the level is enough to make the meter bar move but not so much that the meter bar is pinned to the right Adjust the level carefully so that the input level is not distorting When PRE EQ is selected as the INPUT METER POINT see the illustration at right th...

Page 47: ...LAN refer to page 22 and the separate Installation Guide e Start Studio Manager To use Studio Manager with the 01X the mLAN port must be set to 4 See page 95 r Studio Manager automatically detects the connected 01X and after a short pause prompts you to select the type of link synchronization for your computer and the 01X Click on Console PC here t Set the levels on the 01X Follow the same procedu...

Page 48: ... all channels For instructions on selecting the Display Modes refer to page 38 EQ Tips Keep in mind EQ has three main uses in recording and mixing Optimizing the sound for recording reducing unwanted noise and hum compensating for poor fre quency response reducing leakage between instru ments etc Optimizing the balance in mixdown cutting the low frequencies in a keyboard part to have it blend bett...

Page 49: ... EQ HIGH MID Q 0 70 0 90 0 56 EQ ON OFF ON ON EQ HIGH MID SEL CH1 EQ ON ATT EQHM Q EQHM F EQHM G EQ ON ATT EQHM Q EQHM F EQHM G SEL CH1 ON 0 0 0 70 4 00k 0 0 To check the Q value press NAME VALUE button EQ parameters ranges Gain Determines the amount of level boost or cut in the sig nal at the frequency specified below Range 18 0 18 Frequency Determines the central frequency at which the signal is...

Page 50: ...ies overall it will give you a cleaner mix We recommend that you use the HPF on every sound source in your mix except for kick drum bass guitar and synth bass This will take out those bass frequencies you don t need to hear and give the ones you want to hear more sonic room and make them sound more crisp and punchy You might also want to do the opposite put LPF on bass sounds to cut out unnecessar...

Page 51: ... different channels you can mute all three to hear a drum less mix Moreover you can use Mute with the Group feature page 101 to instantly mute several grouped channels all at the same time If while mixing you cannot hear one or more channels make sure you haven t inadvertently used Mute or Solo For a quick visual check make sure that all channel LEDs are lit and that the SOLO button is off Mute Op...

Page 52: ...dynamics loudness process ing and affects the dynamic range of a signal in other words the difference between the softest and loudest sounds of the signal Other dynamics processors include gates expanders and limiters A compressor squeezes the dynamic range of a sound making the soft parts louder and the loud parts softer For this reason it is ideal for smoothing out wild fluctuations in level suc...

Page 53: ...plied Keep in mind that this is related to yet different from Attack above The Hard hard knee setting abruptly while the settings 1 to 5 give smoother loga rithmic increases in processing soft knee resulting a more natural and less obvious compression Range Hard 1 5 For details on the Dynamics parameters including other Dynam ics types see pages 121 124 About Compression settings Keep in mind that...

Page 54: ...ient function lets you link two adjacent chan nels as a stereo pair ideal for stereo sources such as a synthesizer rhythm machine or CD player This links the faders and most of the mix parameters for the channels including EQ Dynamics Group assignments and Effects Parameters not affected by pairing include Input Patch Pan and Phase q Hold down the SEL button of one of the channels and simultaneous...

Page 55: ... The Selected Channel mode lets you see and edit all Pan parameters for the selected channel The Multi Channel mode on the other hand lets you see and edit one selected parameter for all channels r a From the Selected Channel mode adjust the desired Pan parameter by turning the corresponding knob The Recording Bus Stereo Bus and Phase parame ters do not concern us now in Panning If you re interest...

Page 56: ...nd fully integrated Setting up and using the internal effects is essentially a three stage process 1 Set up the effect send routing 2 Select the effect type and edit it if needed 3 Set the master return level and adjust the send level for each channel Once you ve determined what effects to use and how to route them step 3 is all you need to worry about during a mix session Applying the effect to a...

Page 57: ...PLAY Up Down buttons This is the last page of the Effect 1 pages and you ll probably have to press the DISPLAY Down button five times to get there You can also hold down PAGE SHIFT and press the DIS PLAY Down button to jump through the top pages in each group in which case you can get to the Library page in two DISPLAY Down button presses w Select the desired effect type Use knob 1 to select the t...

Page 58: ...may want to go back to the section above and tweak the effect settings or even select a different effect type We ll assume in these instructions that the SELECTED CHANNEL button isn t lit in other words you ll be viewing editing all channels at once Operation q Press the MASTER button in the MIXER LAYER section This selects the Master mixer for the stereo master output The faders may move to refle...

Page 59: ...level to an appropriate value Remember that you can also select the other channels mLAN inputs 9 16 and 17 24 by pressing the appropriate button in the MIXER LAYER section For more about the mLAN inputs see page 28 For step 5 try pressing the FLIP button and using the faders to adjust the send levels instead of the knobs See page 19 If you have little experience in mixing and using effects you sho...

Page 60: ...ce has digital inputs you may want to use these instead to avoid sound degradation Con nect the DIGITAL STEREO OUT jack on the 01X to the digital input on the device Fig 3 w Connect the output s of the effect unit to the MIC LINE input s on the 01X Again if you are using a digital effect device connect the digital output on the device to the DIGITAL STE REO IN jack on the 01X e Route the desired c...

Page 61: ... see pages 23 and 92 As you ll see below the hardware inputs 1 8 are assigned to the same numbered channel inputs by default Nor mally you won t need to change these However here we ll set the digital stereo input to feed input channels 3 and 4 Operation q Connect the digital source to the DIGITAL STEREO IN jack on the rear panel The digital connectors on the 01X are S PDIF make sure the source yo...

Page 62: ... knob 2 to call up the Patch parameters r Select page 6 with the DISPLAY Up Down buttons Page 6 contains Output Patch settings for the DIGITAL STEREO OUT and STEREO AUX OUT jacks t Use knob 1 to change the assignment to the DIGITAL STEREO OUT jack If you want to use the digital output as an aux send set this to AUX1 2 Using the Aux 1 2 sends for external effects lets you retain the Aux 3 4 sends f...

Page 63: ...air for each audio bus For example to send the Aux 1 2 signals to mLAN channels 9 and 10 turn knob 6 until 9 10 is selected for the Aux 1 2 settting If desired save this setting also to the Output Patch Library for future recall See page 91 Storing your custom patch setups Once you create a Patch setup you ll probably want to save it for future use That s what the Input and Output Patch Libraries ...

Page 64: ...display in the Group pages here For details see page 102 Mute Groups Channels assigned to the same Mute Group can all be turned on and off together simultaneously simply by pressing the ON button of one of the assigned channels Operation q Press the GROUP button repeatedly if necessary to call up the Group Enable display w Make sure that the Groups you intend to assign are all enabled The four Mut...

Page 65: ...all the desired mixer settings Virtually every setting you make on the mixer can be stored to a Scene This includes the channel ON but tons the level settings including the fader positions EQ Pan Aux Send levels Dynamics Effects Group Fader and Mute assignments Input Output Patch set tings and channel pairs For a detailed list of Scene data see page 85 Remember that Scene data does not include the...

Page 66: ...eatures are available for the other supported sequencers as well If you re familiar with the concepts and basic functions covered here and are aware how they apply to your own particular sequencer you should have no problem learning from these instruc tions no matter what sequencer you use Keep in mind that not all control features are implemented on all of the compatible software programs For exa...

Page 67: ...LAN serves not only as a control surface for Cubase SX but also as a MIDI and audio interface you ll need to make the appropriate MIDI and audio settings in Cubase SX MIDI setup q From the Devices menu select Device Setup w Select Default MIDI Ports from the list e Click on the Setup tab if necessary r Set the MIDI Input and Output ports Click on the arrow to call up the pop up menu If you wish to...

Page 68: ...y From the Setup tab disable mLAN MIDI In Ports 1 and 4 8 Port 1 is the unnumbered selection Make sure the set tings correspond to the example above Ports 2 and 3 should remain active Yes while Ports 1 and 4 8 should be inactive No u Click OK to finish Audio setup q From the Devices menu select Device Setup w Select VST Multitrack from the list e Click on the Setup tab if necessary r Specify the A...

Page 69: ... VST Inputs w Activate all the inputs you intend to use Click on the power button to activate a desired input Up to 24 inputs refer to the mLAN Auto Connector explanation of the separate Installation Guide can be activated simultaneously The channel numbers that are actually in effect mirror the set tings of mLAN Auto Connector see the separate Installation Guide When the 01X is set to 96kHz 88 2k...

Page 70: ...om of the channel strip and select Bus 1 from the pop up menu u Click the Show Master button shown below to display the stereo master output channel strip i Set the master outputs to the last two available channels the last two numbered channels specified with mLAN Auto Connector refer to the separate Installation guide For example when you ve specified sixteen channels with mLAN Auto Connector at...

Page 71: ...he 01X to Internal operation by pressing the INTERNAL button the lamp lights 6 Enable Monitor B Press the MONITOR A B button so that the lamp is off This enables monitoring of the individual mLAN out puts from the DAW computer It also enables you to independently mix and process the individual DAW audio tracks from the 01X Keep in mind that this monitor setting can be changed page 96 The instructi...

Page 72: ...tion 3 Set up Cubase SX for recording an audio track Use an existing audio track in the song or create a new audio track if necessary 4 Enable the desired input for the track Click on the Input box at the top of the channel fader and select the desired channel from the pop up menu Also set the desired output bus If you are using the same output scheme as the simple one described on page 69 set thi...

Page 73: ...e the separate Installation Guide w Start your sequencer program Once your sequencer is up and running and a song has been loaded the 01X reads the data of the song track names level pan settings etc and reconfigures the entire mixer accordingly This means that the faders may move into position and the track names up to six characters appear in the display Working in the Project window In Cubase S...

Page 74: ...e WRITE button A new marker is set for the current postion Cycle playback In Cubase SX you can loop playback between the left and right locators To turn this on off press the LOOP but ton Selecting and arming tracks There are two ways below to select a track remotely Notice that selecting a track also automatically arms enables it for recording Use the Up Down cursor buttons Press these to select ...

Page 75: ...izontally as desired w Zoom can be used in the main Project view or in any of the editors Working in the Mixer window Mixer control using the faders and knobs q Hold down SHIFT and press the MIXER F2 but ton to call up the Mixer window w While the song is playing move one of the faders Notice that the corresponding channel fader in Cubase SX moves as well The response of the fader in the display i...

Page 76: ...e the Left Right cursor buttons to select a part in the track These buttons let you jump between the Track list and the event display showing the recorded parts Notice that as you press the buttons each successively selected part is highlighted Once you ve selected a part in this way you can also move verti cally through the parts of other tracks by using the Up Down cursor buttons e Press the EDI...

Page 77: ...ures of the 01X Not only does it let you automate your sequencer mixes in coordination with the 01X all physical fader moves are completely automated as well moving along with the song playback The following is a brief explanantion on how to use the 01X to record and play back volume automation on a spe cific track Except where indicated all control button ref erences are to the 01X panel What par...

Page 78: ... in mind that you can also adjust the pan setting at the same time by using the channel knob If you want you can record automation for any of the other parameters For example pressing one of the EQ buttons calls up the EQ parameters from which you can change and write settings See page 79 Just remember to select the desired parameter page BEFORE starting playback in step 3 above y As soon as you r...

Page 79: ...el Settings window You can also select plug in instrument channels for EQ process ing See the Hint Controlling effects for plug in instruments on page 81 r Press one of the EQ buttons to call up EQ control Pressing any one of the EQ buttons will call up the same menu t Use the DISPLAY Up Down buttons to change display pages Page 1 contains the Frequency and Gain knobs for bands 1 4 and Page 2 cont...

Page 80: ...e track then click the e button in the track s box w Select the desired effects Do this within Cubase Press F6 for the Send Effects or press F7 for the Master Effects then click the black box in the effect slot to call up the pop up menu of the effect types and select the desired effect Also click the power button to turn on the effect and click the e Edit button to call up the edit window for the...

Page 81: ...2 of the Send parameters with the DIS PLAY Up Down buttons then use the corre sponding knob to turn the effect 1 8 for the channel on or off Select other pages in the Send parameters with the DISPLAY Up Down buttons and make the appropriate settings as needed Page 3 Pre Post Page 4 FX bus 3 Change the effect settings q Press the EFFECT button Each press of the EFFECT button toggles between MFX Mas...

Page 82: ... separate functions with connected footswitches Assigning the Function buttons 1 From the Devices menu select Device Setup 2 Select Mackie Control from the list 3 In the chart next to the button you wish to assign click the Category cell From the pop up menu select the desired Category For details on the available Categories and Com mands refer to the Cubase SX documentation 4 Next click the Comma...

Page 83: ... last edit made and restore the previous condition of the song You can also execute Redo from the 01X Simply hold down the SHIFT button and press UNDO The last edit you made will be repeated cancelling the just made Undo Saving your song You can also conveniently save your song from the 01X panel by simply pressing the SAVE button For more information on the Remote Functions refer to the Remote Fu...

Page 84: ...pressing DISPLAY or B Indicates the channel knob button to be used For circled numbers ex q turn the knob to change the parameter For boxed numbers ex z press the knob to change the parameter In some cases both operations can be used The knob indicated in parentheses is used to change the parameter when the SELECTED CHANNEL lamp is lit C Display indication parameter ranges settings D Indicates whe...

Page 85: ...t parameter settings for all channels and is stored to internal memory in the Scene Library Up to 99 Scenes can be stored The confirmation prompt can be turned on off as desired See Store Confirma tion on page 95 You can turn write protect on for specific important Scenes that you wish to keep from inadvertently overwriting or deleting See Protect on page 86 Any and all data in the destination Sce...

Page 86: ... a Scene Set the channel s you wish to keep unchanged to ENABLE To set the stereo master channel press the SEL button of the STEREO channel and press knob 8 To return to normal selection press any one of the channel SEL buttons The Recall Safe settings are stored with the Scene The parameters affected by Recall Safe are channel fader level channel on off pan EQ Dynamics Aux Send on off Aux Send Pr...

Page 87: ... remote control Yes 104 x LOGIC Selects the sequencer software Logic for remote control Yes 106 c CUBASE Selects the sequencer software Cubase Nuendo for remote control Yes 108 v SONAR Selects the sequencer software SONAR for remote control Yes 110 b DP Digital Performer Selects the sequencer software Digital Performer for remote control Yes 112 2 SHIFT REMOTE FUNCTION x c GENERAL REMOTE The 01X l...

Page 88: ...l routing for input channels 1 8 This allows you to route a specific hardware source MIC LINE INPUTS 1 8 or DIGITAL STEREO IN L R to a desired channel input Turning the knob immediately changes the routing The settings AD1 AD8 correspond to MIC LINE INPUTS 1 8 while DIN L and DIN R correspond to the DIGITAL STEREO IN signals To disable input for the desired channel select NONE As the default setti...

Page 89: ...Determines the Library number Preset Patch numbers are indicated by aster isks in the display and cannot be changed Library number 00 is read only and contains the default settings for the Patch By using Recall below to call up this Patch you can restore Input Patch settings to their initial default state No z v Title Edit Determines the title name of the Patch Library No b RECALL For calling up t...

Page 90: ...t below is cancelled if the corresponding output channel is assigned to a bus here The Output Patch settings made here can be stored to the Output Patch Library page 91 No 8 30 62 3 r RECBUS 1 2 23 24 17 18 23 24 are available in 48kHz 44 1kHz mode only No 8 30 62 y AUX1 2 1 2 23 24 17 18 23 24 are available in 48kHz 44 1kHz mode only No 8 30 62 i AUX3 4 1 2 23 24 17 18 23 24 are available in 48kH...

Page 91: ...2 4 r ST BUS RECBUS AUX1 4 ST AUXOUT No 5 7 OUTPUT PATCH DIRECT OUT POSITION u i PRE EQ PRE FADER POST FADER Determines the Direct Out signal source position for mLAN Out from the fol lowing three options PRE EQ Immediately before Input Channel EQ PRE FADER Immediately before Input Channel fader POST FADER Immediately after Input Channel fader No 28 5 8 OUTPUT PATCH LIBRARY q 00 32 Library number ...

Page 92: ...Changing the wordclock settings on any of the devices in your digital audio system may produce noise in some of the devices For this rea son make sure to turn down the level of your amp speaker system to avoid damage to your speakers and ears With this setting the 01X uses its own internal clock Press the appropriate knob below to enter the display for selecting the desired sampling frequency If y...

Page 93: ...ther the Digital Stereo Out For example you can apply dithering to the 01X stereo mix data and record to a 16 bit DAT recorder Dithering is effective only when the resolution of the receiving device is lower than that of the 01X The sound quality may be less than optimum if this is not set properly No 6 OSC Oscillator UTILITY Channel knob 5 1 OSCILLATOR b ON OFF The 01X features an Oscillator you ...

Page 94: ...ge Assign Table below No 87 4 PROGRAM CHANGE ASSIGN TABLE w PGM Program Change Number 1 128 This determines the assignment of program change number to Scene number In other words it allows you to specify which MIDI program change number sent via an external device selects which Scene on the 01X When a Scene is recalled on the 01X the Program Change number assigned to that Scene is transmitted Prog...

Page 95: ...eneral Remote No PREFER Preference UTILITY Channel knob 7 1 STORE RECALL CONFIRMATION v ON OFF Determines whether a confirmation prompt is shown or not for the Store and Recall operations When this is set to OFF the corresponding operation is executed immediately without confirmation No ON OFF No 2 DIGITAL OUT COPYRIGHT ON OFF This setting specifies whether SCMS Serial Copy Management System copy ...

Page 96: ...t balance between the DAW audio and the audio of the 01X itself and let you switch between two of these assignments using the MONITOR button Monitor A the lamp lights or Monitor B the lamp is off These settings can also be made by holding the MONITOR button and turning the knob 5 for A or 7 for B INT 0 126 DAW 100 DAW audio no audio from internal mixer INT 126 0 DAW 100 internal mixer audio no aud...

Page 97: ...GH buttons simultaneously resets all band parameters gain frequency and Q for the selected channel No EQ LOW MID FREQUENCY EQML F q i t 21 2Hz 20 0kHz Adjusts the frequency No EQ LOW Q EQL Q q i r 10 0 0 10 Determines the bandwidth of the EQ processing No EQ ON OFF z z ON OFF Turns the EQ on or off The L and R settings of the ST IN channel s EQ are linked together No u ATT Attenuate Selected Chann...

Page 98: ... 18 0dB Adjusts the gain level When Q is set to LPF this turns the filter on or off Pressing the EQ LOW and EQ HIGH buttons simultaneously resets all band parameters gain frequency and Q for the selected channel No EQ HIGH FREQUENCY EQH F q i t 21 2Hz 20 0kHz Adjusts the frequency No EQ HIGH Q EQH Q q i r LPF 10 0 0 10 H SHELF Determines the bandwidth of the EQ processing When Q is set to LPF the ...

Page 99: ... Pressing the SEL button of ST IN channels repeatedly toggles between the left and right channels for independent opera tion You can also apply the pan setting to a pair of Bus channels When the Stereo Out ST is selected it is used to set the balance No 1 RECBUS REC bus assign q i e ON When this is set to on the corresponding input channel signal is sent to the Rec Bus No 1 ST BUS Stereo bus assig...

Page 100: ... e u PRE POST Determines the Aux Sends signal source points The PRE sends pre fader sig nals and the POST sends post fader signals No 2 ON OFF Selected Channel only q t ON OFF Determines whether Aux Send is on or off The channel is muted with the Off setting No 3 DYNAMICS INTERNAL SELECTED CHANNEL DYNAMICS ON OFF q i q Determines whether Dynamics is on or off Parameters depend on the Dynamics Type...

Page 101: ... to a group the pair partner is automat ically added to the group You can also select a channel on another Layer by switching Layers You can temporarily disable a Fader group in order to make adjustments to individual faders by operating the fader while holding down its SEL but ton No MUTE GROUP MT GRP q i w GRP E F G H Input Channel or Output Channel ON buttons can be grouped There are four E thr...

Page 102: ... stereo in channel 1 2 for the output destination and if FX1 FX2 are selected for the stereo input channel 1 2 page 89 this can be used as a conventional effect send return If you select a particular channel such as the input channels REC bus stereo out it can be used as an insertion effect If effects are inserted in channels you cannot use those effects via Aux Sends or insert them into other cha...

Page 103: ...ers are indicated by asterisks in the display and cannot be changed The following presets are available 00 Reset dB This preset memory resets all parameters of the cur rently selected channel to their initial values and sets the channel fader level to dB 01 Reset 0dB This preset memory resets all parameters of the cur rently selected channel to their initial values and sets the channel fader level...

Page 104: ...off on mute unmute status as the channel whose button was pressed Pressing it again turns all channels excepting the master channel on or off simultaneously Applies to the Channel Mod ule and Software Synthesizer Module lights goes out 1 ON when SOLO lamp is on Turns the Solo function of each channel on or off Applies to the Channel Module Soft ware Synthesizer Module lights goes out 2 SHIFT ON wh...

Page 105: ...xt Marker Press to stop recording or playback Pressing this when playback is stopped goes to the top of the song Press to start playback from the current point lights FOOT SWITCH 1 Playback Stop or FOOT SWITCH 2 Press this to enter exit from the Recording Standby The Play and Rec lamp are turned on during recording lights ZOOM Turns Zoom on and off lights Cursor ZOOM goes out Moves the cursor indi...

Page 106: ...s the function of the ON button to the REC RDY function lights AUTO R W Changes the function of the ON button to the AUTO R W function lights AUDIO Makes the Global View mode active and displays theAudio track with the Multi Channel view Pressing this again restores the normal track display lights 9 INST Makes the Global View mode active and displays the Audio Instrument track with the Multi Chann...

Page 107: ...f them Knobs 1 8 pressing Parameters other than Mode selection Resets the edited parameter to the default value EQ mode EQ LOW EQ LOW MID EQ HIGH MID EQ HIGH Multi Channel View EQ LOW EQ LOW EQ LOW MID EQ LOW MID EQ HIGH MID EQ HIGH MID EQ HIGH EQ HIGH Track Parameter View lights 10 28 DISPLAY Cursor Multi Channel View Changes the parameter to be edited DISPLAY Cursor Track Parameter View Switches...

Page 108: ... mode flashes 5 SEL in normal status Selects a channel lights goes out 2 SEL SEL flashes Fader touch out page 15 flashes goes out SEL AUTO EDIT lights Fader touch in page 15 flashes ON in normal status Turns each channel off or on mutes unmutes the signal lights goes out 2 SHIFT ON in normal status Turns all the channels on lights 2 12 13 ON SOLO lights Sets Solo for each channel to on or off ligh...

Page 109: ... Press this to start song recording The Play and Rec lamp are turned on dur ing recording lights ZOOM Cursor Zoom FOOT SWITCH 1 USER A as defined in Cubase NUENDO FOOT SWITCH 2 USER B as defined in Cubase NUENDO SCRUB NUENDO only Turns Scrub on and off When Scrub is on the dial can be used for Scrub playback When Scrub is off the dial is used to move the song position lights PAN mode PAN MULTI CHA...

Page 110: ... touch in lights SOLO Changes the function of the ON button to the Solo function lights REC RDY Changes the function of the ON button to the REC RDY function lights AUTO R W ON This arms or activates fader automation lights 2 AUTO R W Knob This arms or activates the parameters assigned to the respective knobs This is not indi cated on the 01X AUDIO Assigns a Track to a Fader INST Assigns a Track t...

Page 111: ...ressing For editing parameters Resets the parameter value to its default 22 PAN mode PAN PAN PAN Selected Channel mode of PAN SURROUND lights Knobs 1 8 turning For editing parameters 18 Knobs 1 8 pressing For editing parameters Resets the parameter value to its default 22 SEND mode SEND SEND SEND Selected Channel mode lights 31 Knobs 1 8 turning For editing parameters 18 Knobs 1 8 pressing For edi...

Page 112: ...GROUP Assigns the selected channels to a Group AUDIO INSTRUMENT MIDI BUS AUX OTHER Displays the Mixer window BANK Scrolls through the track indication every eight channels SHIFT BANK Scrolls through the track indication channel by channel LOOP Turns Loop on or off F1 F8 No function SHIFT F1 Displays the Track Overview SHIFT F2 Displays the Mixer window SHIFT F3 Displays the Event List window for t...

Page 113: ...ects an output bus for a track Effect mode SHIFT DYNAMICS or SHIFT PAN Knob DYNAMICS lights 34 Knobs 1 8 turning Selects a Plug in Effect for each track DISPLAY Cursor Changes the Effect Number 11 35 Knobs 1 8 pressing Turns the Effect Bypass on or off When the bus is turned on X is indicated above the Effect name 19 EQ LOW EQ LOW MID EQ HIGH MID EQ HIGH Knobs 1 8 pressing Assigns the Parametric E...

Page 114: ...ing on the effect type there are some effects whose parameters cannot be edited 22 This is ignored for parameters whose default values are not set 23 This is invalid in the Effect mode and Effect Edit mode 24 The MIDI Edit window of the top TRACK in the Track View window opens 25 This sometimes may not function properly 26 The edited data does not appear in the 01X display 27 The plug in effect mu...

Page 115: ...rded in stereo 39 Fine EQ Cass Add clarity when recording to or from cassette tape 40 Narrator Ideal for recording narration No Preset Name Description No Preset Name Description 1 Bass Drum 1 Emphasizes the low range of a bass drum and the attack created by the beater 2 Bass Drum 2 Creates a peak around 80 Hz producing a tight stiff sound 3 Snare Drum 1 Emphasizes snappy and rimshot sounds 4 Snar...

Page 116: ... 950 Hz 4 00 kHz 12 5 kHz Q 0 1 8 4 5 12 Syn Bass 2 PEAKING PEAKING PEAKING H SHELF G 2 5 dB 0 0 dB 1 5 dB 0 0 dB F 125 Hz 180 Hz 1 12 kHz 12 5 kHz Q 1 6 8 2 2 13 Piano 1 L SHELF PEAKING PEAKING H SHELF G 6 0 dB 0 0 dB 2 0 dB 4 0 dB F 95 Hz 950 Hz 3 15 kHz 7 50 kHz Q 8 0 9 14 Piano 2 PEAKING PEAKING PEAKING H SHELF G 3 5 dB 8 5 dB 1 5 dB 3 0 dB F 224 Hz 600 Hz 3 15 kHz 5 30 kHz Q 5 6 10 0 7 15 E G...

Page 117: ...le Parameter LOW LOW MID HIGH MID HIGH 33 Bass Drum 3 PEAKING PEAKING PEAKING PEAKING G 3 5 dB 10 0 dB 3 5 dB 0 0 dB F 118 Hz 315 Hz 4 25 kHz 20 0 kHz Q 2 10 0 4 0 4 34 Snare Drum 3 L SHELF PEAKING PEAKING PEAKING G 0 0 dB 2 0 dB 3 5 dB 0 0 dB F 224 Hz 560 Hz 4 25 kHz 4 00 kHz Q 4 5 2 8 0 1 35 Tom tom 2 L SHELF PEAKING PEAKING H SHELF G 9 0 dB 1 5 dB 2 0 dB 0 0 dB F 90 Hz 212 Hz 5 30 kHz 17 0 kHz ...

Page 118: ...fferent styles 18 A Guitar COMP Compressor for acoustic guitar stroke or arpeggio style backing 19 Strings1 COMP Compressor for use with strings 20 Strings2 COMP A variation on preset 19 intended for violas or cellos 21 Strings3 COMP A variation on preset 20 intended for string instruments with a very low range such as cellos or contrabass 22 BrassSection COMP Compressor for brass sounds with a fa...

Page 119: ...shold dB 8 Ratio 1 1 7 Attack ms 11 Out gain dB 0 0 Width dB 10 Release ms 128 10 A Dr Tom EXPAND Threshold dB 20 Ratio 1 2 Attack ms 2 Out gain dB 5 0 Knee 2 Release ms 749 11 A Dr OverTop COMPAND S Threshold dB 24 Ratio 1 2 Attack ms 38 Out gain dB 3 5 Width dB 54 Release ms 842 12 E B Finger COMP Threshold dB 12 Ratio 1 2 Attack ms 15 Out gain dB 4 5 Knee 2 Release ms 470 13 E B Slap COMP Thres...

Page 120: ...2 5 Attack ms 26 Out gain dB 1 5 Knee 3 Release ms 331 30 Chorus COMP Threshold dB 9 Ratio 1 1 7 Attack ms 39 Out gain dB 2 5 Knee 2 Release ms 226 No Title Type Parameter Value 31 Click Erase EXPAND Threshold dB 33 Ratio 1 2 Attack ms 1 Out gain dB 2 0 Knee 2 Release ms 284 32 Announcer COMPAND H Threshold dB 14 Ratio 1 2 5 Attack ms 1 Out gain dB 2 5 Width dB 18 Release ms 180 33 Limiter1 COMPAN...

Page 121: ...elease 6 ms 46 1 s 160 points 44 1 kHz 5 ms 42 3 s 160 points 48 kHz 3 ms 23 0 s 160 points 88 2 kHz 3 ms 21 2 s 160 points 96 kHz Compander S Threshold 54 dB to 0 dB 0 1 dB step Ratio x 1 x 1 1 1 1 3 1 5 1 7 2 2 5 3 3 5 4 5 6 8 10 20 15 points Out gain 18 dB to 0 dB 0 1 dB step Width 1 dB 90 dB 1 dB step Attack 0 ms 120 ms 1 ms step Release 6 ms 46 1 s 160 points 44 1 kHz 5 ms 42 3 s 160 points 4...

Page 122: ... level signal appears and it will be com pressed incorrectly Out Gain GAIN sets the compressor s output signal level Compression tends to reduce the average signal level Out Gain can be used to counter this level reduction and set an appropri ate level for the next stage in the audio path Knee sets the transition of the signal at the threshold With a hard knee the transition between uncompressed a...

Page 123: ...evel are attenuated by the amount specified using the Ratio parameter Ratio controls the amount of companding the change in out put signal level relative to change in input signal level With a 2 1 ratio for example a 10 dB change in input level above the threshold results in a 5 dB change in output level The hard compander CPH has a fixed ratio of 5 1 for expansion and the soft compander CPS has a...

Page 124: ...dge of percussive sounds Too slow an attack time makes some signals sound backwards For ducking this controls how soon the signal is ducked once the duck has been triggered With a fast attack time the signal is ducked almost immediately With a slow attack time ducking fades the signal Too fast an attack time may sound abrupt Hold sets how long the gate stays open or the ducking remains active once...

Page 125: ...6 stage stereo phase shifter 17 Auto Pan Auto panner 18 Tremolo Tremolo 19 HQ Pitch Mono pitch shifter producing stable results 20 Dual Pitch Stereo pitch shifter 21 Rotary Rotary speaker simulation 22 Ring Mod Ring modulator 23 Mod Filter Modulated filter No Preset Name Types Description 24 Distortion Distortion 25 Amp Simulate Guitar amp simulation No Preset Name Types Description 26 Dyna Filter...

Page 126: ...THRU Low pass filter cutoff frequency GATE LVL OFF 60 to 0 dB Level at which gate kicks in ATTACK 0 120 ms Gate opening speed HOLD 1 Gate open time DECAY 2 Gate closing speed Parameter Range Description TYPE S Hall L Hall Random Revers Plate Spring Type of early reflection simulation ROOMSIZE 0 1 20 0 Reflection spacing LIVENESS 0 10 Early reflections decay characteristics 0 dead 10 live INI DLY 0...

Page 127: ...k HI RATIO 0 1 1 0 High frequency feedback ratio HPF THRU 21 2 Hz 8 00 kHz High pass filter cutoff frequency LPF 50 0 Hz 16 0 kHz THRU Low pass filter cutoff frequency Parameter Range Description DELAY 0 0 2725 0 ms Delay time FB GAIN 99 to 99 Feedback gain plus values for normal phase feedback minus values for reverse phase feedback HI RATIO 0 1 1 0 High frequency feedback ratio FREQ 0 05 40 00 H...

Page 128: ...0 kHz High pass filter cutoff frequency LPF 50 0 Hz 16 0 kHz THRU Low pass filter cutoff frequency Parameter Range Description FREQ 0 05 40 00 Hz Modulation speed AM DEPTH 0 100 Amplitude modulation depth PM DEPTH 0 100 Pitch modulation depth MOD DLY 0 0 500 0 ms Modulation delay time WAVE Sine Tri Modulation waveform LSH F 21 2 Hz 8 00 kHz Low shelving filter frequency LSH G 12 0 to 12 0 dB Low s...

Page 129: ... 00 354 38 degrees Left and right modulation phase balance STAGE 2 4 6 8 10 12 14 16 Number of phase shift stages LSH F 21 2 Hz 8 00 kHz Low shelving filter frequency LSH G 12 0 to 12 0 dB Low shelving filter gain HSH F 50 0 Hz 16 0 kHz High shelving filter frequency HSH G 12 0 to 12 0 dB High shelving filter gain Parameter Range Description FREQ 0 05 40 00 Hz Modulation speed DEPTH 0 100 Modulati...

Page 130: ...e PAN 1 L63 to R63 Channel 1 pan LEVEL 2 100 to 100 Channel 2 level plus values for normal phase minus values for reverse phase PAN 2 L63 to R63 Channel 2 pan DELAY 1 0 0 1000 0 ms Channel 1 delay time FB G 1 99 to 99 Channel 1 feedback gain plus values for normal phase feedback minus values for reverse phase feedback DELAY 2 0 0 1000 0 ms Channel 2 delay time FB G 2 99 to 99 Channel 2 feedback ga...

Page 131: ...tput level Parameter Range Description DST TYPE DST1 DST2 OVD1 OVD2 CRUNCH Distortion type DST distortion OVD overdrive DRIVE 0 100 Distortion drive MASTER 0 100 Master volume TONE 10 to 10 Tone N GATE 0 20 Noise reduction Parameter Range Description AMP TYPE 1 Guitar amp simulation type DST TYPE DST1 DST2 OVD1 OVD2 CRUNCH Distortion type DST distortion OVD overdrive DRIVE 0 100 Distortion drive M...

Page 132: ...ilter frequency HSH G 12 0 to 12 0 dB High shelving filter gain Parameter Range Description SENSE 0 100 Sensitivity DIR UP DOWN Upward or downward frequency change DECAY 1 Decay speed OFFSET 0 100 Lowest phase shifted frequency offset FB GAIN 99 to 99 Feedback gain plus values for normal phase feedback minus values for reverse phase feedback STAGE 2 4 6 8 10 12 14 16 Number of phase shift stages L...

Page 133: ...fore reverb begins HI RATIO 0 1 1 0 High frequency reverb time ratio DIFF 0 10 Spread DENSITY 0 100 Reverb density HPF THRU 21 2 Hz 8 00 kHz High pass filter cutoff frequency LPF 50 0 Hz 16 0 kHz THRU Low pass filter cutoff frequency REV FLG 0 100 Reverb and flange balance 0 all reverb 100 all flange FREQ 0 05 40 00 Hz Modulation speed DEPTH 0 100 Modulation depth MOD DLY 0 0 500 0 ms Modulation d...

Page 134: ...ter Range Description REV TIME 0 3 99 0 s Reverb time INI DLY 0 0 500 0 ms Initial delay before reverb begins HI RATIO 0 1 1 0 High frequency reverb time ratio DIFF 0 10 Spread DENSITY 0 100 Reverb density HPF THRU 21 2 Hz 8 00 kHz High pass filter cutoff frequency LPF 50 0 Hz 16 0 kHz THRU Low pass filter cutoff frequency REV BAL 0 100 Reverb and symphonic reverb balance 0 all symphonic reverb 10...

Page 135: ...000 0 ms Right channel delay time FB DLY 0 0 1000 0 ms Feedback delay time FB GAIN 99 to 99 Feedback gain plus values for normal phase feedback minus values for reverse phase feedback HI RATIO 0 1 1 0 High frequency feedback ratio HPF THRU 21 2 Hz 8 00 kHz High pass filter cutoff frequency LPF 50 0 Hz 16 0 kHz THRU Low pass filter cutoff frequency DLY BAL 0 100 Delay and early reflected delay bala...

Page 136: ...cy reverb time ratio DIFF 0 10 Spread DENSITY 0 100 Reverb density Parameter Range Description DST TYPE DST1 DST2 OVD1 OVD2 CRUNCH Distortion type DST distortion OVD overdrive DRIVE 0 100 Distortion drive MASTER 0 100 Master volume TONE 10 to 10 Tone control N GATE 0 20 Noise reduction DELAY 0 0 2725 0 ms Delay time FB GAIN 99 to 99 Feedback gain plus values for normal phase feedback minus values ...

Page 137: ...id band level HI GAIN 96 0 to 12 0 dB High band level PRESENCE 10 to 10 For positive values the threshold of the high band is lowered and the threshold of the low band is increased For negative values the opposite will occur When set to 0 all three bands are affected the same CMP THRE 24 0 to 0 0 dB Compressor threshold CMP RAT 1 1 to 20 1 Compressor ratio CMP ATK 0 120 ms Compressor attack CMP RE...

Page 138: ... 37 37 38 38 39 39 40 40 41 41 42 42 43 43 44 44 45 45 46 46 47 47 48 48 49 49 50 50 51 51 52 52 53 53 54 54 55 55 56 56 57 57 58 58 59 59 60 60 61 61 62 62 63 63 64 64 65 65 66 66 67 67 68 68 69 69 70 70 71 71 72 72 73 73 74 74 75 75 76 76 77 77 78 78 79 79 80 80 81 81 82 82 83 83 84 84 85 85 86 86 Program Change No Initial Scene No User Scene No 87 87 88 88 89 89 90 90 91 91 92 92 93 93 94 94 95...

Page 139: ...CH3 CH4 InsertOut CH4 CH5 InsertOut CH5 CH6 InsertOut CH6 CH7 InsertOut CH7 CH8 InsertOut CH8 mL1 CH9 InsertOut mL1 CH9 mL2 CH10 InsertOut mL2 CH10 mL3 CH11 InsertOut mL3 CH11 mL4 CH12 InsertOut mL4 CH12 mL5 CH13 InsertOut mL5 CH13 mL6 CH14 InsertOut mL6 CH14 mL7 CH15 InsertOut mL7 CH15 mL8 CH16 InsertOut mL8 CH16 mL9 CH17 InsertOut mL9 CH17 mL10 CH18 InsertOut mL10 CH18 mL11 CH19 InsertOut mL11 C...

Page 140: ...display may differ depending on the channel name Studio Manager settings Disabled when Wordclock is set to 96kHz 88 2kHz DIGITAL STEREO OUT STEREO AUX OUT mLAN OUT mLAN DIRECT OUT When ST BUS RECBUS AUX1 4 is unassigned to mLAN Out CHANNEL NAME D OUT ST BUS ST AUX OUT ST BUS ST BUS RECBUS AUX1 2 AUX3 4 Direct Out 1 2 mLAN Out 1 2 Fixed Direct Out 3 4 mLAN Out 3 4 Fixed Direct Out 5 6 mLAN Out 5 6 ...

Page 141: ...led according to the settings of the Program Change Assign Table Transmitting When PROGRAM CHANGE TX is on recalling a Library Scene transmits data via the set transmit channel accord ing to the settings of the Program Change Assign Table STATUS 1100nnnn Cn Program change DATA 0nnnnnnn nn Program number 0 127 4 2 Active Sensing FE Receiving If no Active Sensing messages are received within 400 ms ...

Page 142: ... OMNI on Memorized Mode Messages x x Altered x Note x x Number True voice x Velocity Note ON x x Note OFF x x After Key s x x Touch Ch s x x Pitch Bend x x Prog o 0 127 o 0 127 Assignable Change True 0 99 System Exclusive x x Song Pos x x Common Song Sel x x Tune x x System Clock x x Real Time Commands x x Aux Local ON OFF x x Mes All Notes OFF x x sages Active Sense x o Reset x o Notes mLAN MIDI ...

Page 143: ...eing executed Never attempt to turn off the power while data is being written to Flash ROM Turning the power off in this state results in loss of all user data and may cause the system to freeze due to corruption of data in the Flash ROM LIBRARY CATEGORY CONFLICT The channel categories e g Input Aux Out etc of the original recall store destination do not match page 103 LIBRARY FOR EFFECT1 ONLY Not...

Page 144: ... is it connected to the Hi Z jack page 21 When using SQ01 Make sure that Disable Audio select Audio from the Setup menu in the Track View window is off unchecked SQ01 Online Manual When using SQ01 When the application is closed in the condition that the sampling wave frequency of SQ01 is set to 48kHz then is connected with the mLAN Auto Connector with a setting other than 48kHz a message appears w...

Page 145: ...from any possible noise sources Is the mLAN cable damaged Old cables and thin cables can be the cause of noise Make sure to use the included mLAN cable or any other high quality cable with the same thickness When using the mLAN driver make sure to turn off or disable any background applications for example virus scanning software or auto backup routines Otherwise noise may result due to instabilit...

Page 146: ...e reception transmission appropriate page 94 Do the channel settings match for the transmitted and receiving devices page 94 Is a scene assigned to the program change number being transmitted page 94 Pairing was specified but the signal is monaural Is the odd numbered channel panned far left and the even numbered channel panned far right pages 99 102 Pairing was specified but the signal phase does...

Page 147: ...river Is the mLAN cable properly connected Check the connection disconnect the mLAN cable once then insert it again The mLAN connection does not work Has the driver been installed Installation Guide Is the mLAN cable properly connected Check the connection disconnect the mLAN cable once then insert it again For Windows Is mLAN set to ON From the taskbar right click on the mLAN Manager icon Install...

Page 148: ...Operation may become sluggish when resuming a dual processor computer from a sleep or suspended condition Restart the computer For Windows Refer to Hints when handling audio data Installation Guide For Windows This problem can sometimes be solved by setting Hyper Threading to Disable For Windows When not using mLAN right click on the mLAN Manager icon in the task bar and select OFF close mLAN Cann...

Page 149: ...onnected to the Monitor Out The Mix Balance between mLAN Monitor Input and Stereo Output can be adjusted Stereo Input Stereo two systems combined use with Effect return 44 1 kHz 48 kHz Stereo one system 88 2 kHz 96 kHz Digital Input Stereo one system Digital Cascade Input Stereo one system is cascade connected to the Stereo Bus with attenuator Oscillator Sine 100 Hz 1 kHz 10 kHz Noise 0 dB 96 dB 1...

Page 150: ... possible on the input side Dither On Off possible on the output side MIDI IN OUT A B DIN 5 pin MIDI mLAN 1 2 IEEE 1394 6 pin IEEE 1394 FireWire FOOT SWITCH 1 2 PHONE Analog Section Input Gain LINE MIC Gain Knob 1 8 4 dB 46 dB Monitor Volume MONITOR PHONES Knob Phantom Switch PHANTOM 48 V ON OFF rear panel Power Switch STANDBY ON switch rear panel Faders Faders 1 8 STEREO Fader 60 mm motorized 0 1...

Page 151: ...ion List 108 Cursor Left Right Up Down buttons 20 Cycle playback 74 D D IN ST BUS CASCADE Digital In Stereo Bus Cascade 93 D OUT DITHER Digital Out Dither 93 DAW 6 DC IN terminal 22 Decay Gate and Ducking 124 Device ID 94 Dial Rotary Encoder 20 Digital cascade connection Basics Section 29 Digital In Stereo Bus Cascade 93 Digital In Out 93 DIGITAL OUT COPYRIGHT 95 Digital Out Dither 93 Digital Perf...

Page 152: ...ayer selection Channel selection Basics Section 40 LEVEL channel 99 Library 54 Library 01X Terminology 14 Library Structure Basics Section 36 LOGIC Remote Function List 106 LOOP button 19 Loop connection 147 M MARKER button 20 Markers 74 Memory Library Structure Basics Section 36 MENU SELECT 87 Meter 46 MIC LINE INPUT 21 MIC LINE INPUT TRS phone jacks 3 through 8 BAL 21 MIC LINE INPUT XLR jacks 1 ...

Page 153: ...Parameters Values 119 Preset Effects Library 125 Preset EQ Library 115 Preset EQ Parameters Values 116 PROGRAM CHANGE 94 Program change 87 PROGRAM CHANGE ASSIGN TABLE 94 Programming markers 74 R Range Gate and Ducking 124 Ratio Compander 123 Ratio Compressor 122 Ratio Expander 123 REC bus assign 99 REC bus L R 01X Terminology 14 REC RDY Record Ready button 17 RECALL SAFE 86 RECBUS REC bus assign 9...

Page 154: ... THRESH Compander 123 THRESH Compressor 122 THRESH Expander 123 THRESH Gate and Ducking 124 Threshold Compander 123 Threshold Compressor 122 Threshold Expander 123 Threshold Gate and Ducking 124 Title Edit Basics Section 41 Top Panel 16 Touch 15 Touch in Touch out 01X Terminology 15 Transport 74 Troubleshooting 144 Turning on the 01X 24 TWE Wave Editor 9 U Undo 83 UNDO button 19 Using Mute On Off ...

Page 155: ...Y LINE MIC AD DIGITAL STEREO IN 2 COAXIAL SRC METER EFFECT 1 AUX3 INSERT SEND 24 1 SELECT EFFECT METER 3 FX EFFECT 2 AUX4 INSERT SEND 24 1 SELECT EFFECT METER 3 FX INPUT SELECT INPUT PATCH 2 2 2 2 EFFECT2 is available in 48kHz 44 1kHz mode only ATT DIGITAL STEREO OUT COAXIAL 2 mLAN OUT 2 RECBUS 24 1 DIRECT OUT1 24 1 24 1 IEEE 1394 mLAN IN 1 16 2 Min Max MONITOR A B Mix Balance MONITOR PHONES Knob ...

Page 156: ... FINLAND F Musiikki Oy Kluuvikatu 6 P O Box 260 SF 00101 Helsinki Finland Tel 09 618511 NORWAY Norsk filial av Yamaha Scandinavia AB Grini Næringspark 1 N 1345 Østerås Norway Tel 67 16 77 70 ICELAND Skifan HF Skeifan 17 P O Box 8120 IS 128 Reykjavik Iceland Tel 525 5000 OTHER EUROPEAN COUNTRIES Yamaha Music Central Europe GmbH Siemensstraße 22 34 25462 Rellingen Germany Tel 49 4101 3030 Yamaha Cor...

Reviews: