Summary of Contents for P20 2019
Page 1: ...en Version 1 0 Quick Start Guide P20 2019 ...
Page 2: ......
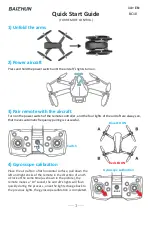
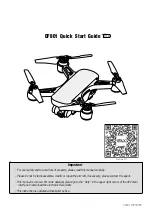
The XAG P20 2019 is an innovative and advanced product designed to enhance your productivity. With its user-friendly features and cutting-edge technology, the Quick Start Manual provides a hassle-free setup process. Download the free manual from our website and unlock the full potential of your XAG P20 2019.
Page 1: ...en Version 1 0 Quick Start Guide P20 2019 ...
Page 2: ......