


X-keys KVM Products
Product Manual
XK-16 Stick:
XK-1320-UKVM16-R
XK-8 Stick:
XK-1321-UKVM8-SO
XK-4 Stick:
XK-1322-UKVM4-R
XK-24:
XK-0994-UKVM-R
XK
E
-
40
:
XK-1
500
-U
S
K
40-R
XK-60:
XK-1364-UKVM60-SO
XK-80:
XK-1351-UKVM80-SO
XKE-128:
XK-1391-UKVM128-SO
USB 3 Switch Interface:
XK-1446-UKVM3-SO
USB 12 Switch Interface:
XK-1475-UKVM12-SO
3 - 128 Keys
Sends USB Keyboard
Blue or Red Backlighting
Designed, Sold, and Supported in USA
From P.I Engineering,
The No Slogan Company
USA: www.xkeys.com
UK: www.x-keys-UK.com
Software
Download and install X-keys Basic Setup application from:
http://xkeys.com/PISupport/SoftwareMacroWorksHW.php
IMPORTANT
A special procedure is required to put KVM versions of the X-keys into
programming mode. Please find your device below for the correct procedure.
XK-24, XK-60, and XK-80
Hold down the programming button on the top edge of the unit while plugging in
the USB connector. Unplug after programming to return to operating mode.
XK
E
-
40
Use a thumbtack or paper clip to hold
the programming button
located on the right end of the
unit
while plugging in the USB
connector. Unplug the unit after programming to return to
operating mode.
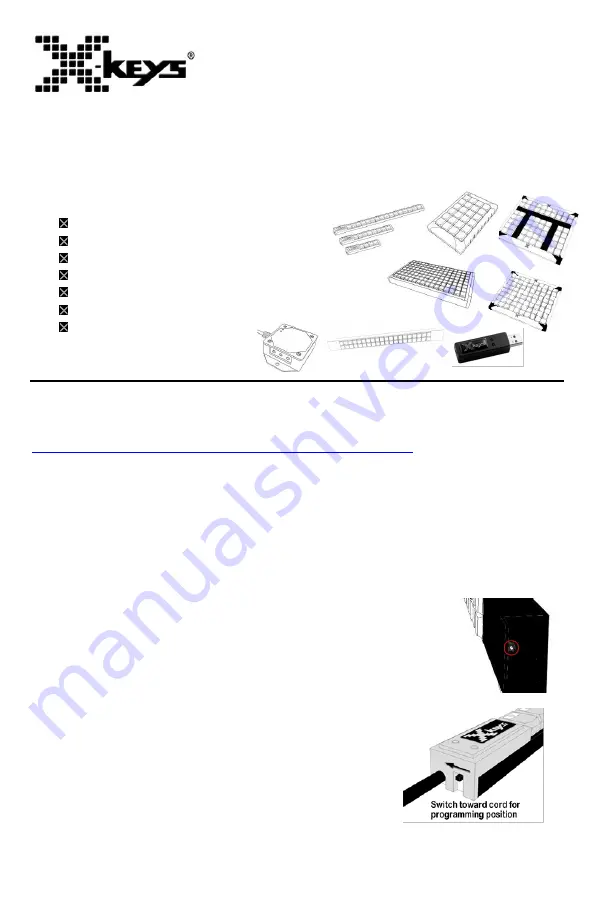
XK-4, XK-8, and XK-16 Stick
Flip the programming switch toward the cord before
plugging in. Unplug and return the switch to operating
position after programming.
XKE-128, USB 3 and 12 Switch Interface
Plug in the USB connector and wait for Windows to
recognize and install the device. Replug the device
into the same USB port and tap the Scroll Lock key on your USB keyboard ten
to fifteen times within ten seconds of replug.


