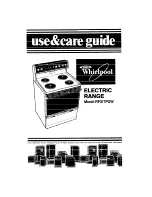
background image

Summary of Contents for RS576PXP

Page 1: ...ement Copy Your Model and Serial Numbers Here If you have a questjon or need service have this infor matlon ready 1 Complete Model and Serial Numbers from the plate just behind the oven door Model Number 2 Purchase date from your sales slop Serlol Number Copy this informatlon in these spaces Keep this book Purchase Dole your warranty and the sales slip together in a handy place Service Company and...

Page 2: ... 2 Proper Use 2 Safety 3 Using Your Range 4 Setting the Clock 4 Using the Minute Timer 4 The Oven Controls 5 Baking or Roasting Adjusting the Oven Temperature Control 6 6 Broiling Using the Automatic MEALTIMER Clock 7 8 The Oven Light The Oven Vent 9 9 Surface Unit Controls 10 Cooktop Module Controls 10 Changing Cooktop Modules 11 Surface Unit Modules 1 11 Grill Module Optional Griddle Module 11 1...

Page 3: ...I FOR YOUR SAFETY l I DO NOT STORE OR USE GASOLINE OR OTHER FLAMMABLE VAPORS AND LIQUIDS IN THE VICINITY OF THIS OR ANY OTHER APPLIANCE I ...

Page 4: ...op out Turn counterclockwise until the Minute Timer dial shows OFF The clock setting will change if you push in when turning USING THE MINUTE TIMER DO NOT PUSH IN THE KNOB when setting the Minute Timer 1 Without pushing in the Minute Timer Knob turn it until the time showing in the window is longer than you want 2 Without pushing in turn the knob back so the setting you want shows in the window 3 ...

Page 5: ...e Oven Selector on BAKE the bottom element does most of the work The top element heats but does not turn red Baking pg 6 1 With the Oven Selector on TIMED BAKE the MEALTIMER Clock can be used to turn the oven on and off automati tally MEALTIMER Clock pg 8 1 Use the Oven Temperature Control to set baking or roast ing temperature when the Oven Selector is on BAKE or TIMED BAKE When both the Oven Sel...

Page 6: ...lps heat during baking but does not turn red Let the oven preheat until the Signal Light goes off 7 When baking is done turn both knobs to OFF ADJUSTING THE OVEN TEMPERATURE CONTROL Does your new oven seem to be hotter or colder than your old oven at the same settings The temperature setting in your old oven may have changed gradually overthe years The accurate setting of your new oven can seem di...

Page 7: ...ratures Suggested oven rack positions and broiling times Food Beef Steaks Rare Medium Well done Beef Steaks Rare Medium Well Done Hamburgers iamb Chops Approximate Minutes inches cm from top Temperature set to BROIL Description of food to broil Element 1st side 2nd side 1 2 5 cm 3 8 cm 7 9 3 5 1 2 5 cm 3 8 cm 9 11 P 7 1 2 5 cm 3 8 cm II 13 5 7 1 12 4 cm 4 5 lo 13 cm 13 15 6 8 1 2 4cm 4 5 1 O l 3 c...

Page 8: ...re you want them and 5 Push in and turn the Stop fime Knob clock place the food in the oven wise to the time you want the oven to shut 2 Set the Oven Selector on TIMED BAKE Off 3 Set the Oven Temperature Control on the 6 After baking is done turn both knobs to baking temperature you want OFF 4 Make sure the clock is set to the right time 7 To stop the oven before the preset time of day turn both k...

Page 9: ...s 5 Let the oven light switch go and turn the Oven Selector to OFF 6 Push in the automatic oven light switch and hold it for another 10 seconds 7 Close the oven door THE OVEN LIGHT Theovenlightwillcomeonwhenyouopentheovendoororwhenyoupush the Oven Llght switch Close the oven door or push the switch again to turn off the light To replace the light bulb 1 Turn off the electric power at the main powe...

Page 10: ...ancakes 40 Use MED for gravy puddings and icings or to cook large amounts of vegetables Use MED LO to keep food cooking after starting it on 0 higher setting Use LO to keep food warm until ready to serve Set the heat higher or lower within the LO band to keep food at the temperature you want COOKTOP MODULE CONTROLS Use Surface Unit Controls to turn on cooktop modules For the Optlonal Griddle only ...

Page 11: ...E Terminal I _i 1 To remove lift 2 Lift front end of off grills heating element and pull toward you 5 Replace in reverse order 3 Lift out basket of ceramic rocks 4 Lift slightly at the back and remove the grease well being careful not to spill fat drippings All parts must be cleaned after each use to avold fat spoilage and odors See page 20 OPTIONAL GRIDDLE MODULE Terminal 1 To remove lift and rem...

Page 12: ...iddle every time you use it However oil or butter adds flavoring m and aids browning 1 Lift and remove 2 Preheat for a 3 Add food Use griddle cover few minutes only nylon or DO NOT until butter plastic utensils replace until melts or beads Metal can griddle is cool of water dance scratch the non on the griddle stick finish Approxlmate Grlddle Module Settlngs Bacon Grllled Sandwiches Pancakes Hambu...

Page 13: ... 2 Ibs 1 kg 120 44 C Hi To test steak for 8 Min 9 Min doneness cut 11 Min 12 Min near center 12 Min 13 Min with sharp knife 10 Min 7 Min 13 Min 13 Min 16 Min 16 Min 8 Min 10 Min 9 Min 12 Min 10 Min 13 Min 15 Min 15 Min When fish 4 Min 4 Min flakes easily it 5 Min 5 Min is done Cook all fish on aluminum foil 2 lbs l kg 190 F 88 C Hi 55 Min Total Jq 1 9 cm 170 F 76 C Hi 21 lbs l kg 170 F 76 C Hi 1 l...

Page 14: ...r socket and pins through holes in Rear Support at the high or low position 1 2 3 4 14 Put one fork on the spit pointing away from 5 the handle Push spit through meat so the weight is balanced around the center Put the second fork on the spit pointing toward the meat Push both forks into the meat and tighten the thumbscrews 6 7 Push the pointed end of the spit all the way into the motor socket Put...

Page 15: ... hr at the base of the 45 min tail and High 2 hrs diagonally 15 min through the High 2 hrs cavity to the fork of the wishbone If wing tips brown too rapidly cover them with foil NOTE l Use the high spit position for anything over two inches 5 cm in diameter l Turkeys bigger than 8 to IO pounds should not be put on the rotisserie Roast them in the oven Optional range accessorfes Optlonal accessorie...

Page 16: ... 4 Push the knobs straight back on Make sure they point to OFF SURFACE UNITS AND REFLECTOR BOWLS REMOVING 1 Be sure surface units are OFF and COOL 2 Lrft the edge of the unit opposite the recep tacle just enough to clearthe reflector bowl 3 Pull the surface unit straight away from the receptacle 4 Lift out the reflector bowl REPLACING 1 Be sure surface unit controls are OFF 2 Line up opening in th...

Page 17: ...t enough Or some may be too large for the surface unit In either case some of the heat that is meant to go into or around a utensil goes down and heats the reflector bowl This ex tra heat can discolor it USING THE SELF CLEANING CYCLE The self cleaning cycle uses very hlgh heat to burn away soil Before you start make sure you understand exactly how to use the cycle safely BEFORE YOU START 1 Clean a...

Page 18: ...r it has started l Turn the Stop Ime Knob clockwise until the hand points to the right time of day l Turn the Oven Selector and Oven Temperature Control to OFF l When the oven cools you can open the door Wait until the oven IS cool SPECIAL CAUTIONS DO NOT touch the range during he cleaning cycle it can burn you DO NOT use foil or other DO NOT use commercial liners in the oven During oven cleaners ...

Page 19: ... steel wool pad DO NOT TOUCH THE RANGE DURING THE CLEANING CYCLE IT CAN BURN YOU HOW IT WORKS During the self cleaning cycle the oven gets much hotter than it does for baking or broiling approximately 870 F 466 C This heat breaks up grease and soil and burns it off The graph shows approximate temperatures and times during a self cleaning cycle set for two hours SELF CLEANING CYCLE TWO HOUR SETTING...

Page 20: ...nlng acids such as vlnegar tomato lemon juice or milk to remain on surface Acids will remove the glossy flnlsh l Do not use obraslve or harsh cleansers Chrome reflector Automotlc dlshwosher or worm l Wash wlth other cooklng utensils bowls soapy water or plastic scrubbing pad l Do not place In Self Cleaning Oven Porceloln enamel Warm soapy water or soopy steel l Wash wlth other cooklng utensils bro...

Page 21: ...ooktop modules will not Performance problems often result from little things you can find and fix yourself wrth out tools of any kind Ii nothlng operates l Is the range correctly wired to a live circuit with proper voltage See lnstallatlon Instructlons 9 Have you checked the main fuse or circuit breaker box operate l Have you checked the main fuse or circuit breaker box l Are surface units or cook...

Page 22: ...ultant can instruct you in how to ob tain satrsfactory operatron from your apple ante or if service is necessary recommend a qualified service company in your arec 3l If you need service FRANCHISED SERVICE Whirlpool has a nationwide net work of franchised TECH CARE Ser vice Companies TECH CARE service technicians are trained to fulfill the product warranty and provide after warranty service anywhe...

Page 23: ...THIS PAGE INTENTIONALLY LEFT BLANK ...

Page 24: ...ed to build every new Whirlpool appliance 0 FSP is a registered trademark of Whirlpool Corporation for Bentan Harbor Michigan Autotnatto Washers Clotties Drpen Freezers Retrip rator fraezsrs Ice Makers Oistwashert Built in Olrans anfl Surtace Units Rattges Miorawave OveRc C mptict rs Room Air Condttiu rs Dehsmidltiers CMbal Heating and Air Ccndltloning S tsms Part No 5040202 1877862 I983 Whirlpool...

Reviews: