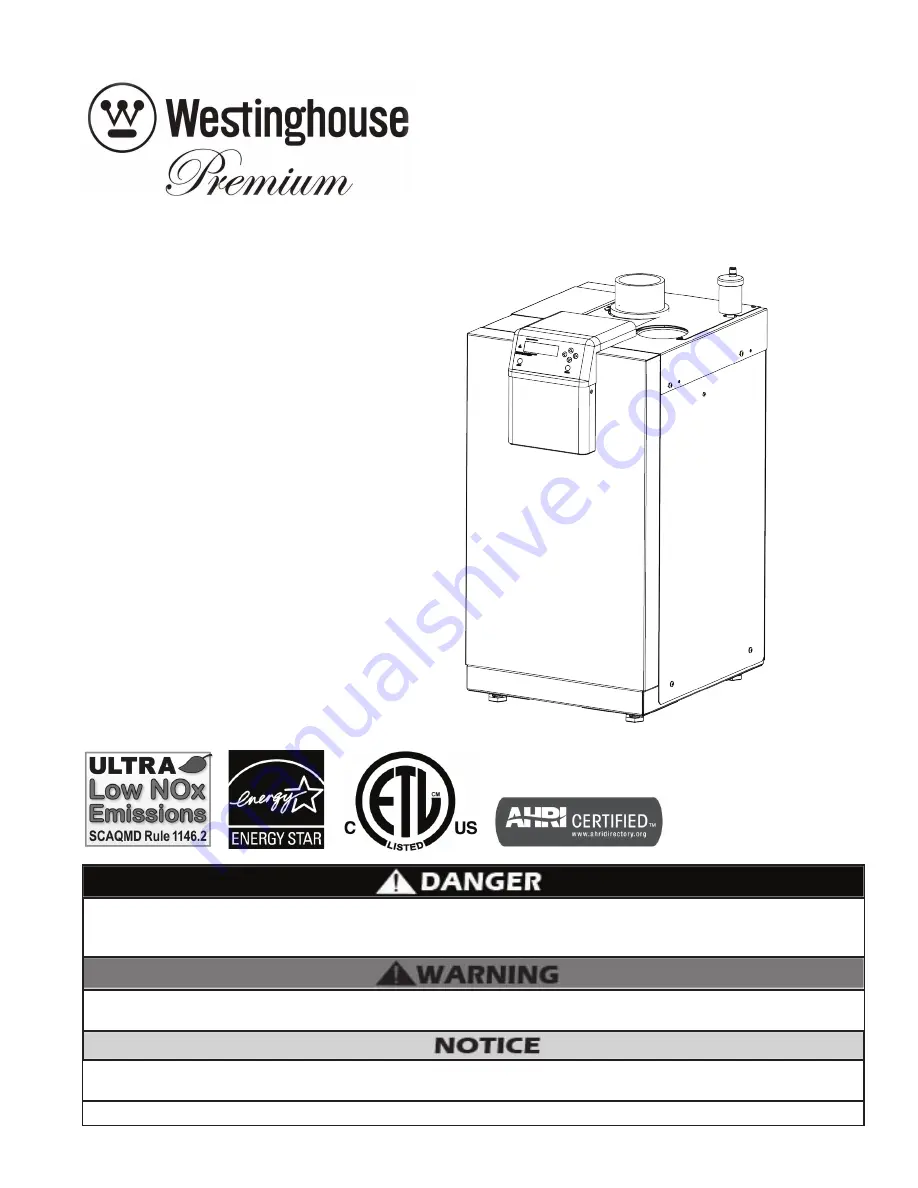
background image

Premier 

High Efficiency

Boilers

Installation

Start-Up

Maintenance

Parts

Warranty

WBRE**80 / 110 / 150 / 220  / 299 / 301 / 399
Models*

* “NG” Denotes Natural Gas Operation

“LP” Denotes Propane Gas Operation

This manual must only be used by a qualified installer / service technician. Read all instructions in this manual before 
installing. Perform steps in the given order. Failure to do so could result in substantial property damage, severe 
personal injury, or death.

Westinghouse reserves the right to make product changes or updates without notice and will not be held liable for 
typographical errors in literature.

NOTE TO CONSUMER: PLEASE KEEP ALL INSTRUCTIONS FOR FUTURE REFERENCE.

WHL-052 Rev. 4.28.16

Improper  installation,  adjustment,  alteration,  service,  or  maintenance  could  void  product  warranty  and  cause 
property damage, severe personal injury, or death.

Heat Exchanger Bears the ASME “H” Stamp

Summary of Contents for WBRE110

Page 1: ...the given order Failure to do so could result in substantial property damage severe personal injury or death Westinghouse reserves the right to make product changes or updates without notice and will not be held liable for typographical errors in literature NOTETO CONSUMER PLEASE KEEP ALL INSTRUCTIONS FOR FUTURE REFERENCE WHL 052 Rev 4 28 16 Improper installation adjustment alteration service or m...

Page 2: ...VICINITY OFTHIS OR ANY OTHER APPLIANCE WHATTO DO IFYOU SMELL GAS Do not try to light any appliance Do not touch any electrical switch Do not use any phone in your building Immediately call your gas supplier from a neighbor s phone Follow the gas supplier s instructions If you cannot reach your gas supplier call the fire department Installation and service must be provided by a qualified installer ...

Page 3: ...idual such as a fire chief fire marshal chief of a fire prevention bureau labor department or health department building official or electrical inspector or others For the Installer This boiler must be installed by qualified and licensed personnel The installer should be guided by the instructions furnished with the boiler and by local codes and utility company requirements In the absence of local...

Page 4: ...iciency operation possible Such high efficiency is achieved by limiting heating circuit water temperature to 140 F when there is no anticipated heat load based upon the outdoor sensor and the Outdoor Reset Curve sensor response curve in the boiler software This feature may be over ridden as described below in specific installations The boiler control is equipped with an outdoor sensor override for...

Page 5: ...12 Maintenance 60 A Procedures 60 B Combustion Chamber Coil Cleaning Instructions 60 C CleaningWater Side of Heat Exchanger 60 D Maintaining the Condensate System 61 Part 13 Installation Checklist 66 Part 14 Maintenance Report 66 LimitedWarranty 70 Maintenance Notes 72 Customer Installation Record Form 73 Part 1 General Safety Information This boiler is approved for indoor installations only and i...

Page 6: ...ion due to sediment Westinghouse recommends a suction strainer in this type of system Do not use petroleum based cleaning or sealing compounds in boiler system Gaskets and seals in the system may be damaged possibly resulting in substantial property damage Do not use homemade cures or boiler patent medicines Substantial property damage damage to boiler and or serious personal injury may result Con...

Page 7: ... uses premixed air and gas to provide a wide range of firing rates Spark Ignition The burner is ignited by applying high voltage through the system spark electrode The spark from the electrode ignites mixed gas off of the burner Supply WaterTemperature Sensor This sensor monitors the boiler outlet water temperature System Supply The control adjusts boiler firing rate so the supply temperature will...

Page 8: ...on as catching the leveling feet could damage the boiler Condensate Neutralizer 80 110 150 220 299 301 Models 7450P 212 399 Model 7350P 611 Condensate Removal Pump 554200 Flow Switch Kit 80 110 150 220 Models 7450P 213 299 301 Models 7450P 214 399 Model 7450P 215 Vision II 7250P 322 NOTE When using an optional system sensor pipe insulation must be wrapped around it to improve temperature measureme...

Page 9: ...ances shown in Figure 2 it might not be possible to service the boiler without removing it from the space NOTE A combustible door or removable panel is acceptable front clearance Minimum Clearances from Combustible Materials Hot water pipes at least 1 from combustible materials Exhaustventpipe atleast1 fromcombustiblematerials Figure 2 Recommended Service Clearances All boilers eventually leak It ...

Page 10: ...om the outdoors into the boiler intake connection Unconfined space is space with volume greater than 50 cubic feet per 1 000 BTU hr 4 8 cubic meters per kW of the total input rating of all fuel burning appliances installed in that space Rooms connected directly to this space through openings not furnished with doors are considered part of the space SeeVenting Section for details Confined space is ...

Page 11: ...e building Turn on clothes dryers and any appliances not connected to the common venting system Turn on any exhaust fans such as range hoods and bathroom exhausts at maximum speed Do not operate a summer exhaust fan Close all fireplace dampers 4 Placeinoperationtheappliancebeinginspected Followthe lighting instructions Adjust the thermostat so the appliance will operate continuously 5 Test for spi...

Page 12: ...ll boiler or operate with water containing chlorine in excess of 100 ppm Figure 4 Boiler Dimensions NOTE All Dimensions Are Approximate NOTE It is recommended to clean the heat exchanger at least once a year to prevent lime scale buildup To clean the heat exchanger follow the maintenance procedure in this manual Hardness Less than 7 grains Chloride levels Less than 100 ppm pH levels 6 8 TDS Less t...

Page 13: ...WHL 052 Rev 4 28 16 13 Figure 5 Boiler Dimensions NOTE All Dimensions Are Approximate ...

Page 14: ...ge clearly visible The discharge line shall terminate plain not threaded with a material serviceable for temperatures of 375oF or greater Do not pipe discharge to any location where freezing could occur No valve may be installed between the relief valve and boiler or in the discharge line Do not plug or place any obstruction in the discharge line Test the operation of the relief valve after fillin...

Page 15: ...alves and Multiple Boilers This boiler is designed to function in a closed loop hydronic system We have included a temperature and pressure gauge that allows the user to monitor the system pressure and outlet temperature from the boiler It is important to note that the boiler has a minimal amount of pressure drop that must be calculated when sizing the circulators Unless the system has a closed ty...

Page 16: ...te the boiler at these flow rates These low or high flow rates will damage the heat exchanger or related components Damages due to improper operation ARE NOT covered by warranty The chart below represents various system design temperature rise through the boiler along with respective flows and friction loss This is provided to aid in circulator selection SystemTemperature Rise Chart 20 Δt 25 Δt 30...

Page 17: ...nt for treatment needed Hardness less than 7 grains Consult local water treatment companies for unusuallyhardwaterareas above7 grains hardness Chlorine concentration less than 100 ppm Using chlorinated fresh water should be acceptable as levels are typically less than 5 ppm Do not connect the boiler to directly heat swimming pool or spa water Do not fill boiler or operate with water containing chl...

Page 18: ...e the circulator is properly sized for the system and friction loss 7 Install an expansion tank on the system supply Consult the expansion tank manufacturer s instruction manual see Part 4 Section D for water volume for specific information relating to expansion tank installation Size the expansion tank for the required system volume and capacity 8 Install an air elimination device on the system s...

Page 19: ...Zoning with Zone Valves 1 When zoning with zone valves connect the boiler to the system as shown in Applications The primary secondary piping shown ensures the boiler loop will have sufficient flow It also avoids applying the high head of the boiler circulator to the zone valves 2 Connect DHW domestic hot water piping to indirect storage water heater as shown in Applications M Zoning with Circulat...

Page 20: ...r to the circulator manufacturer s instructions to properly support the circulator Failure to comply with these instructions could result in property damage severe personal injury or death Figure 7 Boiler with Indirect Priority Single Boiler Space Heating with Indirect Priority Primary Loop Secondary Circuit O Applications NOTE Systems shown are primary secondary piping systems These recommended s...

Page 21: ...m flow rates published in this manual 6 Installations must comply with all local codes 7 In Massachusetts a vacuum relief valve must be installed in the cold water line per 248 CMR 8 Reference Figure 6 to determine manifold pipe sizing The piping will not support the weight of the circulators Refer to the circulator manufacturer s instructions to properly support the circulator Failure to comply w...

Page 22: ... maintained above the minimum flow rates published in this manual 5 Installations must comply with all local codes 6 In Massachusetts a vacuum relief valve must be installed in the cold water line per 248 CMR The piping will not support the weight of the circulators Refer to the circulator manufacturer s instructions to properly support the circulator Failure to comply with these instructions coul...

Page 23: ...ve the minimum flow rates published in this manual 5 Installations must comply with all local codes 6 In Massachusetts a vacuum relief valve must be installed in the cold water line per 248 CMR The piping will not support the weight of the circulators Refer to the circulator manufacturer s instructions to properly support the circulator Failure to comply with these instructions could result in pro...

Page 24: ...ontamination often contained in indoor air it is best to pipe all intake combustion air directly to the outdoors NOTE If exhaust vent pipe system passes through an unheated space such as an alcove or attic the space must be heated Improper seating of vent pipe gaskets can cause eventual gasket failure and exhaust gas leakage Ensure the exhaust vent pipe is properly beveled and seated before insert...

Page 25: ... 9 Approved Materials for ExhaustVent and Intake Pipe C Additional Requirements for Installation in Canada 1 Installations must be made with a vent pipe system certified to ULC S636 IPEX is an approved vent manufacturer in Canada supplying vent material listed to ULC S636 Additionally you may use AL29 4C stainless steel venting to comply with Canadian requirements 2 The first three 3 feet of vent ...

Page 26: ...enter Minimum distance between exhaust vents and intake pipes on multiple boilers is 10 0 255 m center to center L When adjacent to a public walkway locate exit terminal at least 7 feet above grade In addition Total length of vent piping shall not exceed the limits specified in this manual The vent piping for this direct vented appliance is approved for zero clearance to combustible construction T...

Page 27: ... result in property damage serious injury or death 1 Use only solid PVC CPVC or stainless steel pipe or a Polypropylene vent system approved for use with Category IV appliances FOAM CORE PIPING IS NOT APPROVED FOR EXHAUST VENT APPLICATIONS Foam core piping may be used on air inlet piping only 2 Remove all burrs and debris from joints and fittings 3 When using PVC or CPVC pipe all joints must be pr...

Page 28: ...minate outside There are three basic direct vent options detailed in this manual 1 Side Wall Venting 2 Roof Venting and 3 UnbalancedVenting Be sure to locate the boiler such that the exhaust vent and intake pipe can be routed through the building and properly terminated Different vent terminals can be used to simplify and eliminate multiple penetrations in the building structure see Optional Equip...

Page 29: ...n1foot of the boiler and the balance of 4 foot intervals on the vent pipe Venting must be readily accessible for visual inspection from the first three feet from the boiler NOTES A For every 1 of overhang the exhaust vent must be located 1 vertical below overhang overhang means top of building structure and not two adjacent walls corner of building B Typical installations require 12 minimum separa...

Page 30: ...esult in property damage and add significantly to installation costs If an existing venting system is converted for use with this boiler the installer must ensure that the existing venting system is clean and free from particulate contamination that could damage the boiler Failure to do so could result in property damage and boiler failure Such failure IS NOT covered under warranty ConcentricVenti...

Page 31: ...irect vent so that all combustion air is taken directly from the outdoors into the boiler intake connection Unconfined space is space with volume greater than 50 cubic feet per 1 000 Btu hour 4 8 cubic meters per kW of the total input rating of all fuel burning appliances installed in that space Rooms connected directly to this space through openings not furnished with doors are considered part of...

Page 32: ...system and to meet local code requirements Westinghouse recommends neutralizing condensate with aCondensate Neutralizer Kit Part 7450P 212 for 80 110 150 220 299 301 Models Part 7350P 611 for 399 Models The neutralizer kit connects to the drain system and contains limestone chips that neutralize the pH level of the condensate The neutralizer kit should be checked annually and the limestone chips r...

Page 33: ... to follow these instructions could result in component or product failure serious injury or death Such product failure IS NOT covered by warranty Jumping out control circuits or components WILL VOID productwarrantyandcanresultinpropertydamage personal injury or death Label all wires prior to disconnecting them when servicing the boiler Wiring errors can cause improper and dangerous operation Fail...

Page 34: ...Alternately any dry contact closure across these terminals will cause the boiler to run Take caution to ensure neither of the terminals becomes connected to ground 2 Mount the thermostat on an inside wall as central as possible to the area being heated but away from drafts or heat producing devices such as television sets that could influence the ability of the thermostat to measure room temperatu...

Page 35: ...n ports Figure 23 CascadeTermination Plug Detail If an optional Low Water Cut Off LWCO Kit is used the LWCO probe should be mounted into the fitting provided in the outlet combination fitting Follow the complete instructions included in the kit for proper installation 1 Asignalfromabuilding management system may be connected to the boiler to enable remote control This signal should be a 0 10 volt ...

Page 36: ...or return of the alarm device to the neutral or return of the power for the alarm device To connect a device that should be powered off during a boiler lockout condition follow the same instructions as above except use the ALARM NC terminal rather than the ALARM NC terminal Note that in a cascade system the alarm output of the boiler addressed as 1 will also be active if the master boiler has a lo...

Page 37: ...WHL 052 Rev 4 28 16 37 Figure 25 Internal Connection Diagram ...

Page 38: ...upport a large amount of weight 5 Purge all gas lines thoroughly to avoid start up issues with air in the lines 6 Sealing compound must be approved for gas connections Care must be taken when applying compound to prevent blockage or obstruction of gas flow which may affect the Support gas supply piping with hangers not by the boiler or its accessories The boiler gas valve and blower will not suppo...

Page 39: ...lexible gas connections can be used when installing the boiler Flexible gas connections have different capacities and must be sized correctly for the connected boiler firing rates Consult with the flex line supplier to assure the line size is adequate for the job Follow local codes for proper installation and service requirements Ensure the pressure tap screw is properly tightened to prevent gas l...

Page 40: ...e explosion severe personal injury or death Adjustments to the throttle screw or offset may only be made by a qualified gas technician using a calibrated combustion analyzer capable of measuring CO2 and CO Failure to follow this instruction could result in fire explosion property damage severe personal injury or death C Boiler Gas Valve Strain on the gas valve and fittings may result in vibration ...

Page 41: ...em to properly clean the system 3 Flush system until water runs clean and you are sure piping is free of sediment NOTE It is recommended you clean heat exchanger at least once a year to prevent lime scale buildup Follow the maintenance procedure to clean the heat exchanger in the Maintenance Section of this manual Test replace freeze protection fluid 1 For systems using freeze protection fluids fo...

Page 42: ... board Apply power to the boiler The display will show the temperature of the water in the boiler Press the v and ENTER keys simultaneously and hold for 1 second The display will read The central heating pump will come on If you then press the key the central heating pump will shut off The display will read The DHW pump will come on If the boiler is set up as a cascade master and you then press th...

Page 43: ...s that a dangerous or unsafe condition has occurred the control may lock out the boiler and prevent it from igniting until a maintenance person diagnoses the problem repairs it and resets the control In the event that the control goes into lockout it will show a diagnostic code on the display illuminate the LED fault indicator and close the alarm relay contacts to aid in recognition of the conditi...

Page 44: ... fault code indicating that the supply sensor has failed Part 9 Start Up Procedure FORYOUR OWN SAFETY READ BEFORE OPERATING 1 This boiler does not have a pilot It is equipped with an ignition device which automatically lights the burner Do not try to light the burner by hand 2 BEFORE OPERATING Smell all around the boiler area for gas Be sure to smell next to the floor because some gas is heavier t...

Page 45: ...des to change between programmable functions It is recommended you use the Menu Maps in the back of this manual and the detailed menu instructions printed in this section to help in menu navigation UP AND DOWN ARROW KEYS v are used to navigate between the various functions displayed in the menu After the function is enabled for editing by pushing the ENTER key the v keys are used to adjust the fun...

Page 46: ... DHW TANK MAX TEMP 180 oF 3 This is the maximum temperature that can be selected in boiler settings for the DHW tank Factory Default is 180oF Range 95oF to 180oF Screen Description Function 6 DHW Post PumpTime DHW POST PUMP TIME 0 MINUTES 6 The indirect pump has the ability to postpurgeenergyfromtheboilertorun the pump after the set point has been achieved Please note that running the pump for a t...

Page 47: ... rotate Default 48 hours Range 0 240 hours Function 25 Cascade DHW Mode DHW CASCADE MODE ENTIRE CASCADE 25 Not applicable on this product Default ENTIRE CASCADE Range ENTIRE CASCADE DHW ON LOOP ONLY MASTER Function 26 System Freeze Protection SYS FREEZE PROT PROTECT OFF 26 NOTE This parameter is only present if the boiler is a cascade master Allows the user to set the freeze protection when a syst...

Page 48: ... Minimum Fan Speed 10V Maximum Fan Speed ALARM 0V Alarm is Off 10V Alarm is On TEMPERATUR Output follows boiler temperature setting based on outdoor reset 0V Minimum Boiler Temperature Table 19 System Setting Program Navigation NOTE For the following functions you must have your maintenance function turned on To change these functions press ENTER The left most digit will begin to blink Use the or ...

Page 49: ... you selected the run hour function you will need to program 10 000 hours if required Hours SERVICE SCHEDULE 10000 s 000000 34 Allows the user to set the middle two digits of the amount of run hours before next service reminder Function 35 Day SERVICE SCHEDULE DAY 00 00 2000 35 Sets the day of next service reminder Hours SERVICE SCHEDULE 10000 s 000000 35 Sets the two right digits of the amount of...

Page 50: ...current on the top line The second line displays boiler fan speed Press v once 0 10 V 0 0V BOILER The top line displays the voltage on the optional input This voltage is only relevant if an external 0 10 volt signal is being used to control the boiler Press v once BUS COMM NO CONN This display shows the status of the communication bus between multiple boilers If in a single boiler configuration th...

Page 51: ...ewillalternatebetweenthewords FAULT HISTORY and the actual fault encountered The bottom line will display the date and time that the fault occurred Table 23 Boiler Fault Screens Press v once FAULT HISTORY 10 08 28 2009 Fr 5 19A This screen displays the tenth oldest boiler control lockout fault The top linewillalternatebetweenthewords FAULT HISTORY and the actual fault encountered The bottom line w...

Page 52: ...cade Menu This menu is accessed by pressing at the default menu or at the status menu CASCADE TT 0123 567 SYS PUMP ON 12 47P This screen displays information about cascade status The TT in the center of the top line shows that cascade demand is coming from TT contact being closed You may also see DHW if the demand is from a DHW sensor or 0 10 if the demand is from a 0 10 volt input The following n...

Page 53: ...will revert to its normal readout when the condition is corrected or it may be a condition that the controller has evaluated as not safe to restart the boiler In this case the boiler control will be locked out the red FAULT light will be lit and the message LOCKOUT will be displayed on the readout in the lower line Theboilerwillnotstartuntilaqualifiedtechnicianhasrepaired the boiler and pressed th...

Page 54: ...le in this manual to see if it corresponds to the temperature of the sensor If the resistance does not agree with the sensor replace the sensor If the sensor is OK disconnect the sensor wiring from both the boiler and the sensor and check continuity using an ohmmeter Repair or replace as necessary If this error is present the boilers in the cascaded group will run and ignite simultaneously when th...

Page 55: ...ing there is less than a 50 F rise from the return thermistor to the supply thermistor 3 Check the direction of flow off the boiler circulator See Piping Details in this manual 4 Troubleshoot the dual supply thermistor by following steps in F02 RETURN TEMP HIGH F06 PUMP ON TIME This display indicates that the boiler return temperature is excessive When accompanied by the red FAULT light and LOCKOU...

Page 56: ...MP ON TIME The fan is not running at the speed determined by the control Fan speed has been more than 30 faster or slower than the commanded speed for more than 10 seconds This is a serious safety issue as indicated by the illuminated red light and the word LOCKOUT flashing on the display This boiler will not restart until a technician determines and repairs the cause and pushes RESET on the displ...

Page 57: ...y reset 1 If an indicator light is illuminated investigate the source of the error for that particular switch 2 With boiler in service mode measure the gas pressure in the supply line with a gas pressure meter Monitor the gas pressure during both low and high fire conditions for correct pressure range 3 If there are no optional switches or none of the indicator lights is illuminated on the optiona...

Page 58: ...er If the flue temperature on the thermometer does not agree with the flue temperature displayed in the status menu inspect the wiring to the flue temperature sensor in the boiler and repair as necessary If the wiring is intact replace the flue sensor If the flue temperature is excessive on the status menu and the test thermometer reads the same check and adjust combustion controls on the boiler T...

Page 59: ...and adjust combustion controls on the boiler LINE VOLTAGE E19 PUMP OFF E19 indicates the line voltage frequency is out of range This could happen if the boiler is being powered from a small gasoline powered generator that is overloaded or not functioning correctly Inspect power wiring to the boiler and repair as necessary If connected to line voltage notify the power company If connected to an alt...

Page 60: ...nection not from the boiler side so flow from condensate reservoir can be observed c Disconnect electrical connections from the gas valve spark electrode flame rectification probe and combustion blower d Remove the four 4 screws on the aluminum NPT connector on the right side of the gas valve e Disconnect the wiring connected to the combustion blower motor f Remove the six 6 10MM nuts from the bur...

Page 61: ...care to ensure chips are no smaller than to avoid blockage in condensate piping for piping details Do not operate the boiler without the clear hose attached from the hose barb to the pressure switch Failure to follow this warning could result in property damage serious personal injury or death It is very important that the condensate piping be no smaller than To prevent sagging and maintain pitch ...

Page 62: ...WHL 052 Rev 4 28 16 62 Figure 30 Combustion System Replacement Parts 80 220kBTU Models ...

Page 63: ...WHL 052 Rev 4 28 16 63 Figure 31 Combustion System Replacement Parts 299 399kBTU Models ...

Page 64: ...WHL 052 Rev 4 28 16 64 Figure 32 Cabinet Replacement Parts All Models ...

Page 65: ...WHL 052 Rev 4 28 16 65 Figure 33 Cabinet Replacement Parts All Models ...

Page 66: ...ry convert the boiler to the proper fuel type Locate the stickers in the appropriate locations on the boiler Verify combustion settings after gas conversion Carbon Dioxide CO2 High Fire CO2 Low Fire Verify combustion settings after gas conversion Carbon Monoxide ppm CO High Fire ppm CO Low Fire Mail in conversion registration 10 Record heating curve Record steps 8 9 10 11 Notes Table 30 Installati...

Page 67: ...des Combination Ignitor and Flame Probe Check ionization in uA d7 in Status Menu in Start Up Procedures Record high fire and low fire Clean probe with plumbers cloth to remove oxides Condensate 1stYear 2ndYear 3rdYear 4thYear Neutralizer Check condensate neutralizer Replace if necessary Condensate Pipe Disconnect condensate pipe Clean out dirt Fill with water to level of outlet and reinstall NOTE ...

Page 68: ...ONOXIDE DETECTORS At the time of installation of the side wall horizontal vented gas fueled equipment the installing plumber or gasfitter shall observe that a hard wired carbon monoxide detector with an alarm and battery back up is installed on the floor level where the gas equipment is to be installed In addition the installing plumber or gasfitter shall observe that a battery operated or hard wi...

Page 69: ...ENTING SYSTEM PROVIDED When the manufacturer of Product Approved side wall horizontally vented gas equipment provides a venting system design or venting system components with the equipment the instructions provided by the manufacturer for installation of the equipment and the venting system shall include 1 Detailed instructions for the installation of the venting system design or the venting syst...

Page 70: ...ced thirty 30 days after the date of manufacture of the heating appliance and NOT the date of installation of the heating appliance H This warranty extends only to heating appliances utilized in closed loop heating applications that have been properly installed based upon manufacturer s installation instructions I It is expressly agreed between Westinghouse and the original consumer purchaser that...

Page 71: ...PPING COSTS This warranty does not extend to shipping charges delivery expenses or administrative fees incurred by the purchaser in repairing or replacing the boiler This warranty does not extend to labor costs beyond the coverage specified in this warranty document LIMITATIONS OF YOUR WESTINGHOUSE WARRANTY AND REMEDIES THE FOREGOING WARRANTIES ARE EXCLUSIVE AND ARE GIVEN AND ACCEPTED IN LIEU OF A...

Page 72: ...WHL 052 Rev 4 28 16 72 Maintenance Notes ...

Page 73: ...of Installation Installation Address Product Name Serial Number s Comments Installer s Code Name Installers Phone Number Signed by Installer Signed by Customer Installation Notes IMPORTANT Customer Please only sign after the installer has fully reviewed the installation safety proper operation and maintenance of the system If the system has any problems please call the installer If you are unable ...

Reviews: