Western Digital Dual-option Backup USB 2.0, User Manual
The Western Digital Dual-option Backup USB 2.0 user manual is available for download free of cost, offering comprehensive guidance on using the product. Prepare yourself with this essential manual, which can be easily obtained from manualshive.com to maximize the benefits of your Dual-option Backup USB 2.0.
Share
Download


Reviews:
No comments
Related manuals for Dual-option Backup USB 2.0
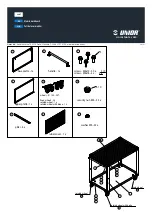
940T
Brand: Unior Pages: 2

Eglu Go Up
Brand: Omlet Pages: 4

DV-HD60
Brand: Edirol Pages: 1

HAWK 2 ST11900W
Brand: Seagate Pages: 40

ST3250621NS
Brand: Seagate Pages: 54

DJNA-351010
Brand: IBM Pages: 2

18-51000 Series
Brand: Salsbury Industries Pages: 5

Cocoon Indoor
Brand: GrainPro Pages: 19

BS-GS2008P
Brand: Buffalo Pages: 2

BARRACUDA ST32000542AS
Brand: Seagate Pages: 2

Air Disk
Brand: GOO Pages: 8

SmartStore SM2520
Brand: Riverlea Pages: 16

CDP 5040
Brand: SonicWALL Pages: 56

TH6101009
Brand: VIKA Pages: 12

CAXA Series
Brand: Cavalry Pages: 16

CACE Series
Brand: Cavalry Pages: 16

CADA-C32A Series
Brand: Cavalry Pages: 18

Skylight Shed-6x3
Brand: Palram Pages: 35


