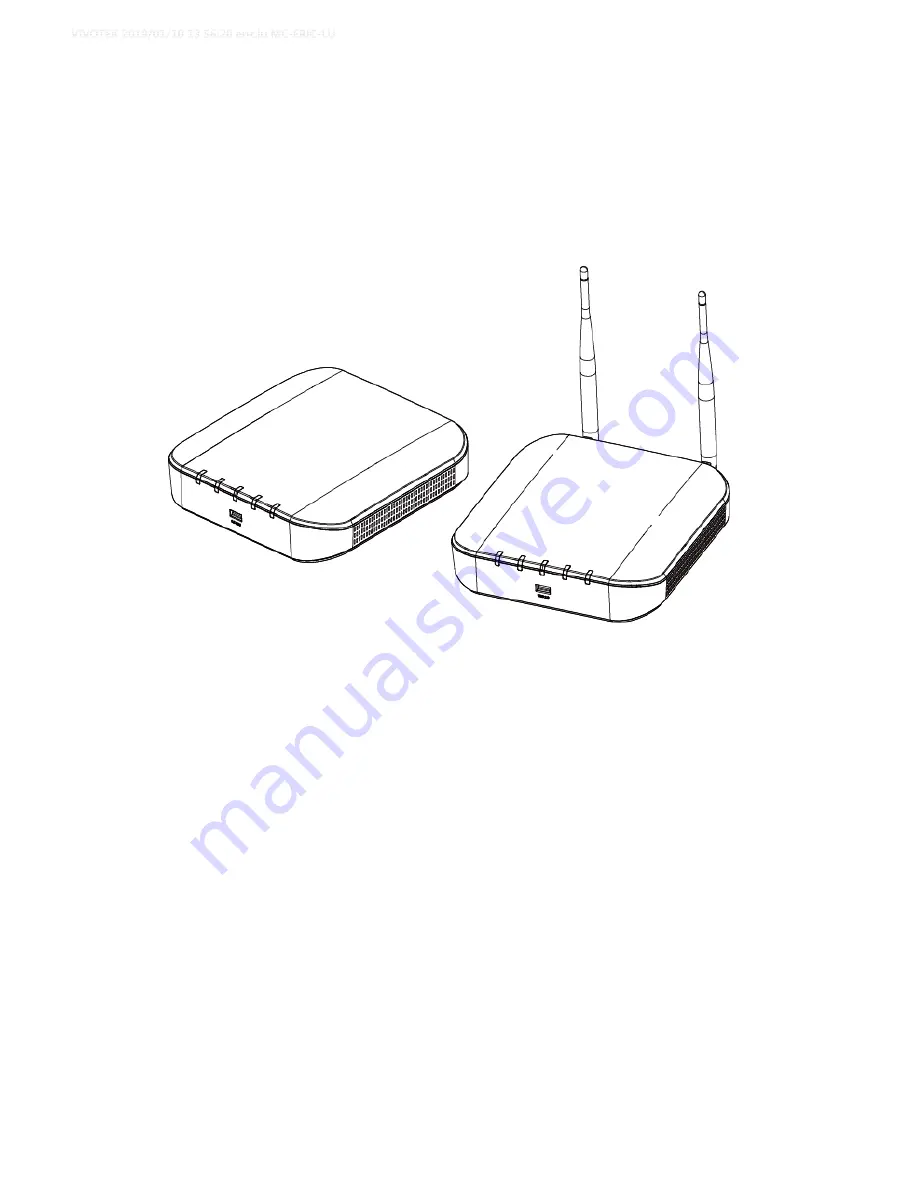
background image

ND8312

 ‐ 

wired


ND8212W


wireless


Network


Video


Recorder


Hardware


Installation


Guide


NOTE:


The latest VIVOTEK 9xxx series supports H.265 encoding. If the H.265 
cameras are attached to the NVR, you need to manually configure its video 
streaming codec to H.264 in order to properly stream video.   


In a complicated wireless network environment where many WiFi APs reside, 
transmission latency can occur due to the interference of wireless signals or 
overlapped channels.     


Read Before Use


The use of surveillance devices may be prohibited by law in your country. The 

Network Video Recorder is not only a high-performance web-ready camera but 

can also be part of a flexible surveillance system. It is the user’s responsibility 

to ensure that the operation of such devices is legal before installing this unit 

Summary of Contents for ND8212W

Page 1: ...plicated wireless network environment where many WiFi APs reside transmission latency can occur due to the interference of wireless signals or overlapped channels Read Before Use The use of surveillance devices may be prohibited by law in your country The Network Video Recorder is not only a high performance web ready camera but can also be part of a flexible surveillance system It is the user s r...

Page 2: ...e product is used properly as intended The Network Video Recorder is a network device and its use should be straightforward for those who have basic networking knowledge It is designed for various applications including video sharing video recording general security surveillance etc The Configuration chapter suggests ways to best utilize the Network Video Recorder and ensure proper operations For ...

Page 3: ...OTEK USA for USA and Canada 2050 Ringwood Avenue San Jose CA 95131 USA 1 408 773 8686 1 408 773 8298 Sales Inquiry Netherlands VIVOTEK Europe for general inquiry logistic and inventory info only Randstad 22 133 1316BW Almere The Netherlands 31 0 36 5298 434 Sales Inquiry VIVOTEK Japan 9th floor Shiba Park Building A 2 4 1 Shibakoen Minato ku Tokyo 105 0011 Japan Sales Inquiry VIVOTEK India 602 Bes...

Page 4: ...2 P O Box 61053 Jafza ONE Jebel Ali free zone Dubai United Arab Emirates 971 4 8815333 971 4 8815205 Sales Inquiry VIVOTEK Mexico Ejército Nacional N 418 Piso 7 Oficina 711 Col Polanco V Sección Delegación Miguel Hidalgo México D F 52 55 1101 1793 Sales Inquiry ...

Page 5: ...and record to the ND8212W NVR The ND8312 is the wired version Supporting the HDMI local video output users can control the GUI OSD interface via mouse keyboard eliminating the need for a separate PC to search video or to playback from the NVR The new local display design Auto Adaptive Stream will dynamically modify Stream 2 resolution of a camera to best fit the display resolution according to the...

Page 6: ... at all times during the installation Ensure that all maintenance and repair work is handled by qualified personnel such as electrical engineers or network specialists Read this manual before installing or operating the system The documentation contains important safety instructions about permitted uses The rated AC input is 100 240V 1 5A 60 50Hz the max consumption 15 6W DC12V 3A If a fault occur...

Page 7: ...Chassis Dimensions ...

Page 8: ...28 for LED definitions 2 USB 2 0 port Rear View The difference between the ND8212W and ND8312 is the antenna The ND8312 comes without the antenna 1 Antenna connector 5 USB port 2 Power socket DC12V 3A 6 WPS Reset button 3 10 100Mbps uplink port 7 Antenna connector 4 HDMI ...

Page 9: ...ation maintain ambient airflow Do not block the airflow around chassis such as placing the system in a closed cabinet Hardware Installation SATA hard disk s are user supplied The network video recorder can readily accommodate most of the off the shelf SATA hard drives 1 Use a Phillips screwdriver to loosen the retention screws from the bottom of the chassis Remove the top cover ...

Page 10: ...2 Secure the HDD brackets to the hard drive 3 Connect SATA data and the SATA power cables to the hard drive ...

Page 11: ...4 Secure the hard drive to the mounting positions in the chassis with its label side facing up and the connectors facing the right hand side of the chassis 5 When done install the top cover ...

Page 12: ...6 Install the included wireless antennas ND8212W 7 Connect a mouse and or keyboard to the USB connectors If you prefer to hang the NVR on wall drill and install two screws 104mm apart ...

Page 13: ...ality Ethernet cable to the network 3 Connect USB devices such as mouse keyboard or USB thumb drive formatted in FAT format or UPS 4 Connect the power adaptor to the power mains and the system The NVR works with both wired and wireless cameras The ND8312 comes without the wireless connectivity ...

Page 14: ...is presumed that the system has not been configured yet The Installation wizard only appears for an unconfigured machine or one that was restored to its default Follow the onscreen messages to complete the initial configuration 1 When started for the first time the system will prompt for the forceful configuration of a password This ensures security from malicious network attack The applicable alp...

Page 15: ...Click the Apply button when the new password is accepted 2 Select the UI language Time zone and current date and time Click on the Continue button to proceed ...

Page 16: ...e files And those files may not be playable 3 The system will then start to scan the local subnet for connected cameras 4 All cameras detected on the network will be automatically selected If necessary deselect the cameras you want to exclude from the configuration Click Continue to proceed Cameras properly installed in the same subnet should all be listed If you cannot find a camera examine its n...

Page 17: ... stressed 5 The system will automatically create a volume from the installed disk drive The process may take several minutes 6 An optional utility VIVOCloud is available through the Apple and Android App Stores The VIVOCloud works with a server hosted by VIVOTEK for bridging and tunneling video requests between client devices and network cameras CMS NVR The utility simplifies and facilitates netwo...

Page 18: ...he VIVOCloud comes with viewing and playback interfaces very similar to those in the iViewer utility To connect the NVR from a cell phone using the VIVOCloud 6 1 Click on the VIVOCloud button on the wizard 6 2 The QR code will be generated 6 3 Open the utility from your cell phone If you already registered an account tap LOG IN If not tap SIGN UP to register an account from a VIVOTEK server ...

Page 19: ...6 4 You can be defaulted to the Live view page Tap the Add button below to add devices ...

Page 20: ...6 5 Tap the ADD DEVICES MANUALLY button 6 6 You can then point your cell phone lens at the NVR screen Step 5 3 and use the SCAN QR CODES function to establish the connection You may ...

Page 21: ...also manually enter the device ID 6 7 The process will take several seconds to complete 6 8 The NVR and the cameras under it will be ready for access ...

Page 22: ...7 Click the Done button The LiveClient screen will display and by default the recording from the selected cameras will immediately take place ...

Page 23: ...de for wireless connection details 2 Press the WPS button on the NVR for less than 10 seconds Wait for the system status LED to change to green 3 Open the system Settings Camera Management page When successfully connected the wireless camera will be listed If the camera is accessed for the first time you should enter a new password to access the camera ...

Page 24: ...t SSID and password is VVTK XXXXXX VVTK XXXXXX The six digits are the the last six digits of the MAC address on the NVR s product label For example MAC 00 02 D1 60 4B BF SSID PASSWORD VVTK 604BBF VVTK 604BBF It is highly recommended to change the default password to that of your preference See Settings Network Connection mode for wireless network configuration ...

Page 25: ...age volumes 1 Connect the power cord to start the NVR Wait for the system status LED to light green 2 From a management computer download and execute the Shepherd utility software Follow the onscreen instructions to complete the installation 3 Start the Shepherd utility The Shepherd utility will discover the NVR located in the same subnet 4 Double click on the ND8312 or ND8212W entry to start a we...

Page 26: ...le Expand the menu on the right of the Login button Select and click on the Settings button to begin your configuration You can select the display language from the lower left corner of the screen 6 On the Settings page click on Storage Volume to access your storage volume configuration 7 On the Storage settings page check if your hard drive is present and ...

Page 27: ...u have let the setup wizard create single a disk volume you can manually delete them and then create new volumes Note that previous recordings will be erased 8 Refer to the later discussions for the rest of the configuration procedure LED Indicators ND8312 ND8212W ...

Page 28: ...he Ethernet port is disconnected 2 Orange blinking Data is being transmitted and received 4 Camera 1 Solid Green All configured cameras have been connected 2 Solid Red One or more configued cameras is missing 3 OFF No camera is connected 5 Reset 1 Blinking Blue Reset is taking place 2 OFF Normal status ND8212W Name Behavior Definitions 1 Power 1 OFF Powered down 2 Solid Green Device is up and runn...

Page 29: ...the Station mode and failed to connect to an AP 4 OFF Wi Fi is off 5 WPS 1 Blinking Blue WPS is searching for nearby devices 2 OFF WPS is not functioning Power Up and Power Down To power up and power down On the initial configuration Connect the power adapter between the system and power outlet To power up after a power down re connect the DC connector After the initial connection Press the softwa...

Page 30: ...ry 2 Always power off the system using the software power button Do not disconnect the power cord while the system is still operating Doing so will result in data inconsistencies The normal power off procedure allows cached data to be written to disks NOTE If system buzzer is sounded move your mouse cursor to reveal the main screen portal and then click on the Stop buzzer button Serious system fau...

Page 31: ...Introduction to the Local Console Interface By default a live view appears on an HDMI monitor The interface architecture of the local console is illustrated as follows ...

Page 32: ...ortal will appear on screen For all the configurable options available through this portal please refer to Chapter 3 on page 46 You can also hide these portal toolbar Right click on the LiveView screen to display the option 2 How to access the Camera Portal Single click to select a view cell the Camera Portal will appear The system automatically detects the characteristics of an individual camera ...

Page 33: ...rt mechanical PTZ Tips Here are some operation steps using the tool bar 1 Single click to select a view cell and bring out the tool bar 2 Double click to expand a view cell to the full view 3 Double click again to shrink the view cell to the original size ...

Page 34: ...PTZ control panel for ordinary PTZ type PTZ control panel for joystick type PTZ ...

Page 35: ...ecording clips button Select a time value by a single click You will be prompted for User name and Password enter admin and admin the default user name and password and then click Login The Playback window will prompt and a playback begins from the point in time you selected e g 30 seconds ago This function allows you to quickly review what has just happened ...

Page 36: ...on Portal without selecting any view cell Click on the Search recording clips button Please refer to page 47 for more information about the search functions You will be prompted for User name and Password enter admin and admin the default user name and password and click Login It is highly recommended to change the password after you log in ...

Page 37: ...window will appear allowing an instant playback of the alarm related footage You will enter the Search alarm results page even if the alarm does not trigger a recording action 5 Why live view is unavailable The default live view receives a camera s stream 1 If a camera s stream 1 is configured using MPEG 4 as the video codec the following message will prompt You can go to the Settings Camera Media...

Page 38: ...ve to another layout page Move your cursor to the right hand side of your screen The page turner buttons will appear as shown below For example if you have 8 cameras placed on 2 2x2 layout pages use these buttons to visit different pages ...

Page 39: ... 2 Settings page If left unattended for 10 minutes system will automatically log out The system will prompt for user credentials if a user tries to access the Settings page again 3 Search recording clips window If currently there is a video playback the system will not enter the idle mode 2 2 Operation on a Camera View Cell The following apply when a camera view cell is selected 2 2 1 PTZ Panel On...

Page 40: ... Use the Zoom in and Zoom out buttons to adjust the camera s zoom ratio 5 Presets If you configured preset positions a list of preset positions will appear 6 Patrol If you configured preset positions into a patrolling tour click on this button and the camera will proceed with patrolling through preset points Note that on a speed dome camera the farther you pull the nugget away from the center the ...

Page 41: ...m out buttons to adjust the camera s zoom ratio 4 Presets If you configured preset positions a list of preset positions will appear 5 Speed Adjusts the speed when moving across the field of view 6 Patrol If you configured preset positions into a patrolling tour click on this button and the camera will proceed with patrolling through the preset points This portal appears with a fisheye camera The P...

Page 42: ...Global view window will appear at the lower right of the view cell as shown below You can display only a portion of the complete video frame as an area of your interest Using a click and drag on the ROI window you can instantly move to other areas within the video frame Use the zoom ratio pull bar at the bottom to change the zoom ratio You may also move the ROI around by clicks and drags Note that...

Page 43: ... select 30 secs 1 min 3 mins 10 mins and 60 mins for an immediate playback For security reasons using this function requires users to enter his her credentials The Playback window will prompt and a playback begins from the point in time you selected e g 30 seconds ago This function allows you to quickly review what has just happened ...

Page 44: ...herwise the DO signal will be continuously triggered As the result if the DO is configured as an alarm trigger many alarm messages will be generated 2 2 5 Others 1 Snapshot is used to take a snapshot from the camera currently selected Note that this function only saves the snapshot in JPEG to a USB thumb drive IMPPORTANT The USB thumb drive has to be one that is formatted in FAT format 2 Manual Re...

Page 45: ...em displays a video in its full resolution Due to the size of view cells on your monitor when in a multi cell layout the system automatically polls the camera for a smaller resolution stream The Auto adaptive stream feature can be disabled if you prefer consistent display resolution 3 Fit screen with ratio The NVR server automatically optimizes the display camera view cells However you can still s...

Page 46: ......

Reviews: