Installation/Owners Manual
Battery Powered Solar or AC Charged
MADE IN THE USA
www.sentrygateopener.com
Designed to
open all types
of gates in all
kinds of places.
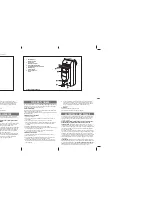
High Quality Low Voltage
Vehicular Swing Gate Opener
High Quality Low Voltage
Vehicular Swing Gate Opener
3
Year
Warranty
SENTRY
®
300 S / 300 D