Uniden UH8080NB, Owner'S Manual
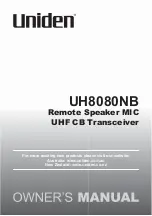
The Uniden UH8080NB is a versatile CB radio with a built-in scanner, perfect for off-roading and long-distance communication. With a comprehensive Owner's Manual available for download, users can easily access important instructions and information for free at manualshive.com. Explore its features and maximize your radio's performance.
Share
Download


Reviews:
No comments
Related manuals for UH8080NB

B2
Brand: NAUTICAST Pages: 26

GSD20 Sounder
Brand: Garmin Pages: 12

GC 12
Brand: Garmin Pages: 13

F5X007
Brand: Belkin Pages: 1

2178.085
Brand: Exalto Pages: 28

MD652i
Brand: Hytera Pages: 11

YS PRO
Brand: Yacht Sentinel Pages: 60

LS PLUS
Brand: Facnor Pages: 32

S1DAB11E
Brand: Sandstrom Pages: 76

GRUNDIG YB400
Brand: Grundig Pages: 30
V115
Brand: Retekess Pages: 14

WS8007
Brand: Technoline Pages: 31

DS-PS1-E-WE
Brand: HIKVISION Pages: 5

JFE-380 -
Brand: JRC Pages: 80

VX-4000U
Brand: Vertex Standard Pages: 72

SBCHR100/55
Brand: Philips Pages: 1

TAPR802
Brand: Philips Pages: 12

TAVS700
Brand: Philips Pages: 13


