Ultrasport Uni-Jump 244, User Manual
The Ultrasport Uni-Jump 244, perfect for fitness enthusiasts, is a high-quality exercise trampoline. Achieve your fitness goals with this versatile equipment. For a hassle-free experience, make sure to download the free user manual from manualshive.com to unlock the full potential of your trampoline.
Share
Download


Reviews:
No comments
Related manuals for Uni-Jump 244
MLM
Brand: Rapsodo Pages: 2

Moon
Brand: ZANEEN Pages: 5

CL05
Brand: Fenix Pages: 4
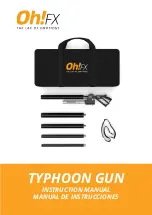
TYPHOON
Brand: Oh!FX Pages: 8

VFL500-SE Series
Brand: WE-EF Pages: 9

dweLED 139 Series
Brand: WAC Lighting Pages: 2

ARCHISHAPE 2.0 Linear MINI
Brand: Osram Pages: 6

ACTION GRIP 71799
Brand: Lifetime Pages: 48

CYCHK
Brand: ABSCO SHEDS Pages: 25

ForesterPro AAL-1015-40-B-BZ
Brand: AMP Pages: 5

SNN9009K
Brand: Quoizel Pages: 2

4UPWW
Brand: SPORTSPOWER Pages: 16

expandacom
Brand: extraspace Pages: 16

CDP135
Brand: Rock empire Pages: 52

ZK8054
Brand: Clas Ohlson Pages: 5

WORKLIGHT WL250B SLIM
Brand: ANSMANN Pages: 44

UFO StrobeClamp
Brand: Hagerman Audio Labs Pages: 8

Profilux LED
Brand: Oase Pages: 16


