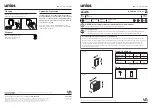
background image

TOOLS REQUIRED

TABLE OF CONTENTS

• Requires at least 493 lb (224 kg) of cement mix to fi ll a

volume of 3.7 ft

3

 (0.105 m

3

).

• Requires 3+ days for concrete to cure, plus 3-4 hours

to complete assembly steps.

• 3+ people recommended for setup.

Pour le français, voir la page 2. Para el español, ver la página 3.

ASSEMBLY INSTRUCTIONS

MODEL #60091

MODEL 71799

BEFORE ASSEMBLY:

CONTACT LIFETIME CUSTOMER SERVICE:

Call: 

1-800-225-3865

7:00 am–5:00 pm (Monday–Friday) MST 
and 9:00 am–1:00 pm Saturday MST

QUESTIONS?

MODEL# AND PRODUCT ID


(you will need both when contacting us)

Model Number: 

71799


Product ID:

For Customer Service in Mainland 
Europe and the United Kingdom,
E-mail

:


[email protected]

Live Chat:  

www.lifetime.com  

(click on “Ask An Expert” tab) 

Video Instructions:

www.youtube.com/lifetimeproducts

7/16" (11 mm)

(x2)

(x1)

(x1)

(x1)

1/2" (13 mm)

(x2)

(x1)

9/16" (14 mm)

(x2)

3/4" (19 mm)

(x2)

(x1)

(x1)

Cement Mix

(493 lb)(224 kg)

(3’)

Rebar

(x1)

(x1)

(x1)

(x1)

ACTION GRIP

®


BASKETBALL SYSTEM

Icon Legend................................4

Notices....................................5

Initial Set Up..............................6

Pole Assembly..........................12

Backboard to Rim Assembly.......17

Backboard to Pole Assembly.......21

Parts Identifi er..........................i - iv

Handle Assembly.......................26

Final Assembly..........................33

Maintenance Instructions..........38

Warning Sticker........................39 

Registration........................40

Warranty................................41

Save this instruction in the event that the 
manufacturer has to be contacted for 
replacement parts.

ADDITIONAL ASSEMBLY HELP

ASSEMBLE IT WITH THE FREE BILT INTELLIGENT
INSTRUCTIONS APP

IN THE APP, SCAN OR SEARCH #1197971

COPY

Summary of Contents for ACTION GRIP 71799

Page 1: ...vice in Mainland Europe and the United Kingdom E mail cs lifetimeproducts eu Live Chat www lifetime com click on Ask An Expert tab Video Instructions www youtube com lifetimeproducts 7 16 11 mm x2 x1 x1 x1 1 2 13 mm x2 x1 9 16 14 mm x2 3 4 19 mm x2 x1 x1 Cement Mix 493 lb 224 kg 3 Rebar x1 x1 x1 x1 ACTION GRIP BASKETBALL SYSTEM IconLegend 4 Notices 5 Initial Set Up 6 Pole Assembly 12 Backboard to ...

Page 2: ... direct www lifetime com cliquer sur la languette Ask An Expert Videos educatifs www youtube com lifetimeproducts QUESTIONS N DEMODÈLEETRÉFÉRENCEDU PRODUIT vousaurezbesoindesdeuxlorsque vousnouscontactez N de modèle 71799 Référence du produit OUTILS REQUIS SOMMAIRE Pournosservicesàlaclientèledu continenteuropéenetau Royaume Uni E mail cs lifetimeproducts eu 7 16 po 11 mm x2 x1 x1 x1 1 2 po 13 mm x...

Page 3: ...vivo www lifetime com cliquee en la lengüeta Ask An Expert Instrucciones en vídeo www youtube com lifetimeproducts PREGUNTAS MODEL E ID DEL PRODUCTO necesitará los dos al contactarnos Número de modelo 71799 ID del producto INSTRUMENTAL REQUERIDO ÍNDICE Para nuestros servicios a clientes en el continente europeo y el Reino Unido correo eléctronico cs lifetimeproducts eu 7 16 11 mm x2 x1 x1 x1 1 2 1...

Page 4: ...st requise pour une section précise Indica que no se necesitan partes en una sección específica Indicates to use not to use an electric drill for a specific step Indique quand utiliser ou ne pas utiliser une perceuse électrique pour une étape précise Indica usar o no usar un taladro eléctrico en un paso específico These Nuts are centerlock nuts They are designed to be tight therefore they will be har...

Page 5: ...GRAVES Y O DAÑO A LA PROPIEDAD Y ANULARÁ LA GARANTÍA El propietario debe asegurarse de que todos los jugadores conocen y seguir estas reglas para la operación segura del sistema Si utiliza una escalera durante el ensamble tenga mucho cuidado Tres adultos competentes son requeridos para ensamblar el producto Compruebe si hay fugas en la base Las fugas pueden causar que el producto caiga Ensamble la...

Page 6: ...UIRED QUINCAILLERIE REQUISE HERRAJE REQUERIDO PARTS REQUIRED PIÈCES REQUISES PIEZAS REQUERIDAS TOOLS REQUIRED OUTILS REQUIS HERRAMIENTAS REQUERIDAS Metal Parts Pièces en métal Piezas de metal 3 Rebar 3 Barre d armature 3 Varilla corrugada Cement Mélange de béton Mescla de concreto 493 lb 224 kg ...

Page 7: ...ruccio nes para determinar la profundidad correcta del hoyo El borde del hoyo debe estar a ras al borde de la superficie de juego 18 9 21 A Ground Sleeve is available as an alternative to cementing the Pole into the ground Please contact Customer Service for more information Un manchon souterrain est disponible comme un choix alternatif de cimenter le poteau dans le sol Pour plus d informations veu...

Page 8: ...ferior ALE no raye el recubrimiento en polvo 14 5 in po 36 8 cm ALE 1 2 Mix the concrete Save 1 2 bag of concrete mix to use later in the assembly Pour the mixed concrete into the hole until it is filled to the level of the playing surface Mélengez le béton Conservez la moitié du mélange de béton jusqu à plus tard Versez l autre moitié de béton mélangé dans le trou jusqu à ce qu il soit de niveau a...

Page 9: ... la superficie de jugar Si es necesario inserte un objeto recto una regla un alambre etc por las ranuras en el poste inferior y rote el poste hasta que el objeto esté paralelo con la superficie de jugar Playing Surface Surface de jeu Superficie de juego Use a level to make sure the Bottom Pole is standing vertical Form the cement into a downward slope away from the pole to allow water runoff Failure ...

Page 10: ...ntinue the assembly until the concrete has been allowed to set for 1 4 hours WARNING Ne pas continuer l assemblage jusqu à le béton ait été permis durcir pendant 1 4 hours No continue el ensamble hasta que todo el concreto haya sido permitido curar durante 1 a 4 horas Cement Mélange de béton Mescla de concreto Check the pole several times within the first hour to make sure that all sides are vertic...

Page 11: ... un palo de escoba apisone el concreto en el poste para eliminar cualquier burbuja Recuérde de limpiar todo el exceso de concreto de las superficies exterior e interior del poste Do not overfill the pole or you may not be able to assemble the rest of the pole sections Ne pas remplisser à ras bord le poteau ou vous risquez de ne pas pouvoir assembler le reste des sections de poteau No sobrellene el p...

Page 12: ...e CIH ABZ and ADS will be used in this section The remaining hardware will be used later in the assembly Seulement un des CIH ABZ et ADS sera utilisé dans cette section La quincaillerie restante sera utilisée plus tard a l assemblage Se utilizará solamente un CIH ABZ y ADS en esta sección Se utilizará el herraje restante más tarde en el ensamble 43 3 8 110 cm Scrap Wood ALH x1 ALF x1 43 3 8 110 cm...

Page 13: ...naux ABE à l aide des rondelles plates AAF dans le poteau du milieu ALF comme illustré Alors faites glisser les pièces d écartement ABR par dessus les boulons hexagonaux Introduzca los pernos hexagonales ABE con las arandelas planas AAF en el poste superior ALH Deslice los espaciadores ABR en los pernos hexagonales ALF ABE ABR AAF Large holes Grands trous Agujeros grandes Small holes Petits trous ...

Page 14: ...ras con el poste mas girará libremente una vez instalado No golpee las secciones del poste para asentarlas hasta que se le indique 9 16 x2 2 3 Align the hole in the Top Pole ALH with the slot in the Middle Pole ALF and slide the Top Pole over the Middle Pole Insert a Screw ADS through a Domed Countersink Washer CIH into the small hole in the Top Pole and into the slot in the Middle Pole as shown T...

Page 15: ...a e inferior de poste ALF ALE después de asentarlas NO COMPLETE EL ARMADO Llame a nuestro Departamento de servicios a clientes ATTENTION THIS STEP CANNOT BE REVERSED ATTENTION CETTE ÉTAPE NE PEUT PAS ÊTRE INVERSÉE ATENCIÓN NO SE PUEDE INVERTIR ESTE PASO ALH ALF Do not hit your feet with the Pole sections as serious injury could occur Ne pas se cogner les pieds avec les Sections de poteau ceci peut...

Page 16: ... Chuck the Self Tapping Screw ABZ directly into an Electric Drill for easy installation or use a 3 8 Hex Driver Insérez la vis autotaraudeuses directement dans la perceuse électrique pour faciliter l installation ou utilisez une clé à douille hexagonale de 3 8 Inserte el tornillo ABZ directamente adentro del taladro eléctrico para facilitar la instalación o use una llave para tuercas de 3 8 ABZ x1...

Page 17: ...CAILLERIE REQUISE HERRAJE REQUERIDO ABD x2 ABF x2 AAM x2 ABK x4 AJW x2 APZ x1 AOW x1 AAV x2 DFE x4 ABB x4 AAJ x2 AJI x1 ALX x1 ALD x1 DFD x1 AMY x2 Plastic Parts Pièces en plastique Piezas de plástico TOOLS REQUIRED OUTILS REQUIS INSTRUMENTAL REQUERIDO x2 x2 x2 7 16 11 mm 1 2 13 mm 9 16 14 mm x1 BACKBOARDTORIMASSEMBLY ASSEMBLAGEDUPANNEAUÀL ANNEAU ENSAMBLEDELTABLEROALARO 3 ...

Page 18: ...danas de goma ABF por los agujeros indicados en la parte posterior del aro ALX como se muestra Fije el herraje con dos tuercas hexagonales en T AAJ Ensure that the Tap Bolts AAM are positioned on the outside edge of the holes as shown Assurez vous de positionner les boulons AAM vers le bord extérieur des trous comme illustré Asegúrese de ubicar los pernos AAM cerca el borde exterior de los agujero...

Page 19: ...1 2 13 mm 3 2 Connect the Rim ALX and Plastic Guard ALD to the Backboard AJI with the hardware shown Attachez l anneau ALX et le recouvrement protecteur en plastique ALD au panneau AJI à l aide de la quincaillerie indiquée Sujete el aro ALX y el resguardo de plástico ALD al tablero AJI usando el herraje ilustrado APZ ALX ABK ALD AAM ABK x2 AJI DFD APZ x1 x2 ...

Page 20: ...no en U Deslice los resortes de compresión AJW en el perno en u y coloque la placa retenedor del resorte AOW sobre los resortes de compresión Sujete la placa a los resortes usando el herraje ilustrado Attach the Backboard Brackets AMY to the Backboard using the hardware indicated Attachez bien les supports du panneau AMY au panneau à l aide de la quincaillerie indiquée Sujete los soportes del tabl...

Page 21: ...ÈCES REQUISES PIEZAS REQUERIDAS HARDWARE REQUIRED QUINCAILLERIE REQUISE HERRAJE REQUERIDO BACKBOARDTOPOLEASSEMBLY ASSEMBLAGEDUTABLEAUAUPOTEAU ENSAMBLEDELTABLEROALPOSTE 4 2 2 3 4 19 mm 9 16 14 mm 1 BCR AJY x2 AKC x2 AKB x2 21 1 8 53 6 cm 30 1 16 AAX x4 ABB x1 AAD x2 DFC x1 7 1 16 18 cm 7 1 2 DGA x2 ABN x8 7 1 2 19 cm 30 1 16 76 4 cm 7 5 8 19 4 cm GBU x2 7 5 8 19 4 cm ...

Page 22: ...e el herraje sólo a mano en este momento AKC AKC AAX DGA GBU AAX x1 DGA x1 3 4 19 mm x2 A Centerlock Nut requires some effort to thread onto a Bolt See page 2 for details Un écrou de blocage central exigera certain effort pour le serrer sur un boulon Voir la page 2 pour plus de détails Una Tuerca de bloqueo central requerirá un poco de esfuerzo para enroscarlo en el perno Ver la página 2 para más ...

Page 23: ...nk Cette page est intentionnellement laissée en blanc Esta página ha sido dejada en blanco intencionalmente Remove This Section Enlevez Cette Section Reitire Esta Sección PARTS IDENTIFIER IDENTIFICATEUR DE PIÈCES IDENTIFICADOR DE PIEZAS ...

Page 24: ...tal Pieza de metal Remove This Section Enlevez Cette Section Reitire Esta Sección ALH x1 ALF x1 ALE x1 ALL x1 AMY x2 AKB x2 AKQ x1 ALX x1 ALB x1 AJY x2 AKC x2 43 3 8 110 cm 30 1 16 21 1 8 53 6 cm Warning Sticker Autocollant d avertissement Etiqueta adhesiva de advertencia 43 3 8 110 cm DFD x1 ...

Page 25: ...ARDWARE REQUIRED ACCESSOIRES REQUIS HERRAJE REQUERIDO Plastic Parts Pièces en plastique Piezas de plástico Remove This Section Enlevez Cette Section Reitire Esta Sección AKP x1 AJI x1 AKZ x1 AKI x1 AMN x1 ALD x1 BCR BCO BCT BCU BCS BAB x1 BAA x1 AJQ x1 AJS x1 CNJ x1 ALM x1 ...

Page 26: ...nk Cette page est intentionnellement laissée en blanc Esta página ha sido dejada en blanco intencionalmente Remove This Section Enlevez Cette Section Reitire Esta Sección PARTS IDENTIFIER IDENTIFICATEUR DE PIÈCES IDENTIFICADOR DE PIEZAS ...

Page 27: ...ent un trou aux supports du tableau à l emplacement indiqué à l aide de la quincaillerie indiquée Serrez la quincaillerie seulement à la main en ce moment Sujete los extremos de los brazos de extensión largos AKC que tienen sólo un agujero a los soportes del tablero a la ubicación indicada usando el herraje ilustrada Apriete el herraje sólo a mano en este momento Secure the Hex Bolt DFC to the Bac...

Page 28: ...ratching Then secure by hand the Short Extension Arms AKC to the Top Pole ALH with the hardware shown Mettez l assemblage du tableau près de l assemblage du poteau Mettez l anneau sur un morceau de bois ou de carton pour empêcher les rayures Ensuite serrez à la main les bras de rallonge courts AKC au poteau supérieur ALH à l aide de la quincaillerie indiquée Coloque el ensamble del tablero cerca d...

Page 29: ...main les bras de rallonge courts AKC au poteau supérieur ALH à l aide de la quincaillerie indiquée Sujete a mano los brazos de extensión cortos AKC al poste superior ALH usando el herraje indicado Tighten Nuts until they are flush with the end of the Bolts Serrez les écrous jusqu à ce qu ils soient au ras des extrémités des boulons Apriete las tuercas hasta que estén a ras de los extremos de los pe...

Page 30: ...6 14mm 3 4 19mm Metal Part Pièce en métal Pieza de metal APS x1 AEA x2 ADR x2 AQI x1 ACY x2 AAC x1 AAN x1 7 AAX x1 ABO x2 ABB x1 7 1 16 18 cm AAD x1 AAZ x1 AKQ x1 ALB x1 AKI x1 AJS x1 AMN x1 AKP x1 CNJ x1 2 1 2 13mm 7 1 16 18 cm 7 17 8 cm Not actual length Pas illustré à la longueur réelle No está ilustrado al tamaño real Not actual length Pas illustré à la longueur réelle No está ilustrado al tam...

Page 31: ...ement indiqué Sujete la Lengüeta de cierre APS al Activador AMN con el herraje indicado y deslice el Resorte del activador AQI sobre el Activador en la ubicación indicada APS AMN AQI ADR ADR AEA x2 ADR x2 AEA AEA APS AKI AQI x1 APS x1 5 2 Insert the Trigger Assembly into the Handle AKI as shown The Lock Tab APS will fit into the bottom slot as shown Insérez l Assemblage du mécanisme dans la Manivel...

Page 32: ...la dans les rainures du Canal intérieur AKQ comme illustré Alignez le bord inférieur de l Autocollant avec le bord du Canal interne AKQ et adhérez le à la surface Oriente la Etiqueta adhesiva de altura AKP y péguela entre las ranuras del Canal interno AKQ como se muestra Alinee el extremo inferior del Autoadhesivo con el borde del Canal interno AKQ y adhieralo a la superficie Make sure the Inner Ch...

Page 33: ... place Mientras que apriete el Activador AMN inserte el extremo muescado del Canal interno AKQ dentro del Tubo externo ALB como se muestra Deslice el Canal interno dentro del Tubo externo hasta la marca 10 entonces suelte el Activador para que se encaje en su lugar 5 7 Insert the ChannelStop AJS into the top of the OuterTube ALB as shown Insérez le Butoir de canal AJS dedans l extrémité supérieure...

Page 34: ...e Tube externe ALB aux Bras de rallonge longs AKB en utilisant les accessoires indiqués Sujete el Tubo externo ALB a los Brazos de extensión largos AKB usando el herraje indicado Tighten the Centerlock Nut AAX until it is flush with the end of the Bolt Serrez l Écrou de blocage central jusqu à AAX ce qu il soit au ras de l extrémité du Boulon Apriete la Tuerca de bloqueo central hasta AAX que esté ...

Page 35: ...longe courts AKC qui sont le plus proche du Poteau Attachez le Attachez le Boulon aux Bras en utilisant l Écrou de blocage central ABB Inserte el Perno hexagonal AAZ por los agujeros en los Brazos de extensión cortos AKC que están más cercanos al Poste Sujete el Perno a los Brazos usando la Tuerca de bloqueo central ABB Tighten the Centerlock Nut until it is flush with the end of the Bolt Serrez l ...

Page 36: ... to hook the end of the other Spring up and over the Bolt Remontez le Panneau a la position plus haute En utilisant l extrémité fermée d une clé étirez les Ressort AJY sur le Boulon hexagonal AAZ Répétez cette étape pour insérer l extrémité de l autre Ressort sur le Boulon Levante el Tablero a la posición más alta Utilisando el extremo cerrado de una llave estire los Resortes AJY sobre el Perno he...

Page 37: ...1 ABZ x1 This Hardware taken from the hardware bag used in Section 2 Cette quincaillerie vient du sac de quincaillerie utilisé à la Section 2 Este herraje viene de la bolsa de herraje utilizada en la Sección 2 CIH x1 ALM x1 x1 x3 x1 x1 FINAL ASSEMBLY ASSEMBLAGE FINAL ENSAMBLE FINAL 6 Hardware Bag Sac des accessoires Bolsa de accesorios x1 BCU ADP x10 x1 BAA x1 AJQ x1 BAB x1 ...

Page 38: ...ion shown with the hardware indicated Make sure that the Center Frame Pad is centered on the metal piece of the Backboard as shown Attachez la Protection central AJQ et Protections angulaires BAA et BAB au Tableau à l emplacement illustré à l aide des accessoires indiqués Assurez vous que la Protection central est centrée sur le bord du Tableau comme illustré Sujete la Almohadilla central AJQ y Al...

Page 39: ...injury or property damage Prendre attention pendant l utilisation des échelles pour faire les étapes d assemblage Suivre tous les avertissements de l échelle Le non observation de suivre toutes ces instructions et avertissements peut causer des blessures graves personnelles ou endommager la propriété Sea prudente al pararse en escaleras haciendo los pasos de ensamble Seguir todas las advertencias ...

Page 40: ...ile two people continue to hold the assembly in place set the Wood Block on top of the Pole and strike it firmly 5 6 times with a hammer or mallet You must have wood on top of the Pole before hitting it with a hammer to prevent scratching the powder coating If the Middle Pole ALF does not completely cover the slots on the Bottom Pole ALE after seating DO NOT COMPLETE ASSEMBLY Call our Customer Serv...

Page 41: ...to the Top Pole Attachez bien le poteau du milieu ALF au poteau inférieur ALE à l aide d une vis ABZ Ensuite insérez un capuchon ALM dans le poteau supérieur Sujete el poste intermedio ALF al poste inferior ALE con un tornillo ABZ Entonces inserte un tapón de poste ALM al poste superior ALM ALH 6 6 Attach the Net AKZ to the Rim ALX Attachez la Filet AKZ à l Anneau ALX Sujete la Red AKZ al Aro ALX ...

Page 42: ...ara obtener las piezas de reemplazo c Examine el Adhesivo de advertencia en el Poste Si se rompió se desteñó o es ilegible llame a nuestro Departamento de Servicios a Clientes para solicitar un Adhesivo de advertencia de reemplazo d Examine todas las secciones del Poste para verificar si hay oxidación visible o pintura descascarada o rajada Si una o las dos son presentes haga lo siguiente 1 Use una...

Page 43: ...e déplacer ou d ajuster l équipement Ne portez pas de bijoux bagues montres colliers etc lorsque vous jouez Ces objets pourraient s accrocher au filet Gardez de l eau et de la matiére organique loin de la base Le gazon les déchets etc pourraient provoquer la corrosion et ou la détérioration Une fois par mois vérifiez que le Poteau et toutes les pièces en métal ne montrent pas de signes de corrosion ...

Page 44: ... salir del mercado o que sufra alguna modificación su registro provee la información que necesitamos para notificarle directamente El registro es rápido fácil y completamente voluntario Mantener su privacidad es nuestra política permanente en Lifetime Y puede estar seguro que Lifetime no venderá ni dará sus datos personales a terceros ni les permitirá usar sus datos personales para fines propios REGI...

Page 45: ... injury resulting from the use of this product All merchandise is sold on this condition and no representative of the company may waive or change this policy 5 This product is not intended for institutional or commercial use Lifetime Products Inc does not assume any liability for such use Institutional or commercial use will void the warranty 6 Our goods come with guarantees that cannot be exclude...

Page 46: ...grer le plus haut degré de sécurité dans l ensemble du matériel l impossibilité de blessure ne peut pas être garantie L utilisateur assume tous les risques de blessure résultant de l utilisation de ce produit L ensemble de la marchandise est vendu en vertu de cette condition et aucune personne représentant la société ne peut déroger à cette politique ni la modifier 5 Ce produit n ést pas prévu pour...

Page 47: ...seguridad en todos nuestros equipos no puede garantizarse la libertad de cualquier tipo de lesión El usuario asume todos los riesgos de lesiones emergentes del uso de este producto Toda nuestra mercadería se vende bajo esta condición y ningún representante de la compañía puede anular ni cambiar esta política 5 Este producto no está pensado para el uso institucional ni comercial Lifetime Products I...

Page 48: ...roductos de Lifetime visitarnos en www lifetime com solo inglés ENHANCE YOUR LIFETIME PURCHASE BY ADDING ACCESSORIES OR OTHER GREAT PRODUCTS MEJORAR LA COMPRA DE LIFETIME AGREGANDO ACCESORIOS U OTROS MARAVILLOSOS PRODUCTOS Ou composer le 1 800 424 3865 Du lundi au vendredi de 7 h à 17 h HR et le samedi de 9 h à 13 h HR Pour acheter des accessoires ou des autres produits Lifetime visiter le www lif...

Reviews: