Ulead COOL 3D, User Manual
Ulead COOL 3D, a cutting-edge software, offers unparalleled 3D animation and modeling capabilities. For a smooth user experience, our comprehensive User Manual covers every aspect of this powerful tool. Download the free manual from manualshive.com to unlock the full potential of Ulead COOL 3D and create stunning visual effects.
Share
Download


Reviews:
No comments
Related manuals for COOL 3D

App for Android
Brand: TomTom Pages: 58
REACH
Brand: Sharp Pages: 16

AR-P17 Software setupg guide
Brand: Sharp Pages: 22

Qtopia Desktop
Brand: Sharp Pages: 39
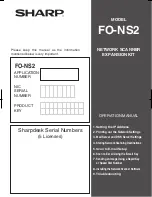
FO-NS2
Brand: Sharp Pages: 43

AR-NB2A
Brand: Sharp Pages: 48
MXUSX5 - Desk - PC
Brand: Sharp Pages: 91

e-Copy ShareScan OP 3.0
Brand: Sharp Pages: 144

PenCell IQ-9B01
Brand: Sharp Pages: 247

API-810
Brand: Unibrain Pages: 77

APWeb
Brand: AMX Pages: 34

PSB - ADMINISTRATORS GUIDE FOR RESELLERS
Brand: F-SECURE Pages: 48

Plug-in Suite
Brand: Focusrite Pages: 9

CONTRIBUTE
Brand: MACROMEDIA Pages: 21

AcuFil
Brand: Janome Pages: 6

450RGH
Brand: Gateway Pages: 15

BJC-S330
Brand: Canon Pages: 170

ARCserve Backup
Brand: CA Pages: 69


