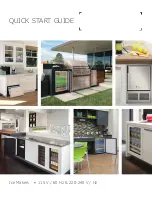
background image

QUICK START GUIDE

Ice Makers  •  115 V / 60 Hz & 220-240 V / Hz

Summary of Contents for U-BI95W-00A

Page 1: ...QUICK START GUIDE Ice Makers 115 V 60 Hz 220 240 V Hz...

Page 2: ...continents for over two decades and is proud to have the opportunity to ship to you PRODUCT INFORMATION Looking for additional information on your product User Guides Spec Sheets CAD Drawings Complian...

Page 3: ...arge when you register your product on u line com See complete warranty for details Contents 1 Safety and Warning 2 Environmental Requirements 3 Electrical 4 Water Hookup 7 Door Swing 8 Door Adjustmen...

Page 4: ...g children with reduced physical sensory or mental capabilities or lack of experience or knowledge unless they have been given supervision or instruction concerning use of the appliance by a person re...

Page 5: ...e only genuine U Line replacement parts Imitation parts can damage the unit affect its operation or performance and may void the warranty This appliance is intended to be used in household and similar...

Page 6: ...es and or reduce ice production on applicable models For best performance keep the unit out of direct sunlight and away from heat generating equipment In climates where high humidity and dew points ar...

Page 7: ...This unit requires connection to a grounded three prong polarized receptacle that has been placed by a qualified electrician The unit requires a grounded and polarized 230 VAC 50 Hz 8A power supply n...

Page 8: ...looding or void the product warranty Use new hose set Do not reuse old hose set CAUTION Turn off water supply and disconnect electrical supply to unit prior to installation Use caution when handling b...

Page 9: ...onnection When connecting the water supply please note the following Before installing the unit and connecting to the cold water supply review the local plumbing codes The water pressure should be bet...

Page 10: ...2 Remove the back panel 3 Locate water valve inlet 4 Break away filler feature in bushing with flat screwdriver 5 Thread water line through back panel hole with bushing 6 Locate water valve inlet and...

Page 11: ...rly If the door is not sealed the unit may not cool properly or excessive frost may form in the interior Properly aligned the door s gasket should be firmly in contact with the cabinet all the way aro...

Page 12: ...move three screws from hinge holes on the opposite side using a Torx T 25 screwdriver Reinstall into holes where the hinge was removed Take care not to scratch cabinet Remove bottom hinge 1 Remove bot...

Page 13: ...erly or excessive frost may form in the interior Properly aligned the door s gasket should be firmly in contact with the cabinet all the way around the door no gaps Carefully examine the door s gasket...

Page 14: ...e use 3 Remove door by tilting forward and lifting door off bottom hinge Retain shoulder washers they will be reused 4 Remove three screws from hinge holes on the opposite side Reinstall into holes wh...

Page 15: ...TMENT Install grille Door Latch MARINE MODELS The door latch assembly included with your unit can be installed to prevent the door from opening when the vehicle is in motion To install perform the fol...

Page 16: ...erior packing material and wipe out the inside of the unit with a clean water dampened cloth 1200 SERIES LEVELING INFORMATION 1 Use a level to confirm the unit is level Level should be placed along to...

Page 17: ...harp 1 Remove top hinge screw pin with Phillips head screwdriver Remove door by tilting forward and lifting off bottom hinge pin 2 Pull door gasket out of groove top edge of door only Start in the mid...

Page 18: ...construction or surrounding cabinetry the panel may not sit flush with the top of the door drawer 9 Secure integrated panel to door drawer using clamps A robust tape may also be used U Line recommend...

Page 19: ...system will continue to cool and maintain the ice supply NOTICE Do not place cans or bottles in the ice compartment because they will freeze To turn off ice production Raise the bin arm into an uprig...

Page 20: ...only For parts and service assistance or to find U Line factory authorized service near you contact U Line 8900 N 55th Street Milwaukee WI 53223 u line com onlineservice u line com 1 800 779 2547 17 1...

Page 21: ...d or other natural disasters The product must be installed operated and maintained in accordance with your product s User Guide The remedies described above for each warranty are the only ones that U...

Reviews: