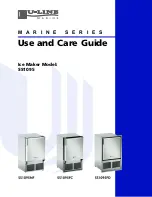
background image

Use and Care Guide

M A R I N E   S E R I E S

Ice Maker Model:
SS1095

Summary of Contents for SS1095

Page 1: ...Use and Care Guide M A R I N E S E R I E S Ice Maker Model SS1095...

Page 2: ...located on the inside rear cover of this guide To validate your warranty the product and its original purchase date must be registered A Warranty Registration Card has been included for this purpose...

Page 3: ...e Maker 5 Normal Operating Sounds 6 Outdoor Marine and RV Usage 6 Storage Vacation Moving 6 Product Disposal 7 Cleaning and Maintenance 8 Interior Cleaning As Required 8 Defrosting 8 Condenser Cleanin...

Page 4: ...e off the doors and leave shelves in place so that children may not easily climb inside WARNING SHOCK HAZARD Electrical Grounding Required Never attempt to repair or perform maintenance on the unit un...

Page 5: ...lways throw away all ice cubes made during the first two to three hours of operation The power switch is located behind the front grille A small opening in the top of the grille Figure 2 is provided t...

Page 6: ...iciency and maximum sound reduction for its internal working components In spite of this technology your model may make sounds that are unfamiliar Normal operating sounds may be more noticeable becaus...

Page 7: ...embly and reconnect any lines removed from the water supply valve 7 Disconnect the power cord from its outlet and leave it disconnected until the unit is returned to service 8 Clean and dry the interi...

Page 8: ...bucket Then place ice bucket back into unit and close door 5 After approximately one hour remove ice bucket and discard water 6 Allow the frost to completely melt naturally Clean the interior and ice...

Page 9: ...e cleaned at least once each year as follows WARNING Disconnect electrical power to the unit before cleaning the solenoid valve 1 Disconnect electrical power to the unit 2 Shut off the water at the ma...

Page 10: ...in small increments Too large of an adjustment could cause the unit to malfunction 3 Turn the adjusting screw toward the minus sign clockwise for smaller cubes or toward the plus sign counterclockwise...

Page 11: ...firmly in contact with cabinet all the way around the door no gaps 4 Tighten bottom hinge screws 5 Tighten top hinge screws Door Reversal Depending upon the location of the unit it may be desirable t...

Page 12: ...plug Figure 22 from door handle and relocate on opposite side Lift the handle slightly and press on the locking tab then gently pry the hole plug out of the hole being careful not scratch the top cap...

Page 13: ...y identifying common problems and provide information on possible causes and remedies Most often this will resolve the problem without the need to call for service If Service is Required If you do not...

Page 14: ...sealing properly Adjust door See MAINTENANCE DOOR ALIGN ADJUST REVERSE Infrequent use of cubes Break apart cubes Noise during operation Copper water supply tubing contacting internal components Caref...

Page 15: ...d such as fire floods wind and lightening damages incurred or resulting from shipping improper installation unauthorized modification or misuse abuse of the product customer education calls food loss...

Page 16: ...nit providing complete installation information is available for download at www U Line com Information for custom panel inserts per model including panel size and instructions are available by visiti...

Reviews: