I
OT
N
T
AL
E
AUTO
0
I2 0
:
Su
Pm
HEAT
O
O L
C
2
7
74
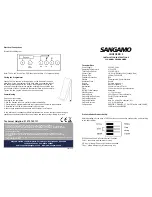
RESIDENTIAL
RESIDENTIAL
THERMOSTAT
THERMOSTAT
P/N
P/N
P374-
P374-
1900
1900
TOTALINE
Signature
HEAT
COOL
HEAT
PUMP
DUAL
FUEL CAPABLE
HEAT
COOL
HEAT
PUMP
DUAL
FUEL CAPABLE
7-DAY
PROGRAMMABLE
DIGITAL
THERMOSTAT
HUMIDITY
CONTROL
Equipped with Humidity Module
Programmable Output
Accepts EZ Programmer
Accepts Optional IR Remote Control
Optional Internet / Phone Control
Accessory
Outdoor Sensor Ready
with High/Low Readouts
for the Day
with
Replacement Components Division Carrier Corporation 02/06
Meets Residential California Title 24
Use with most Air Conditioning & Heating Systems including: 1 or 2 Stage
Electric Cooling & 3 Stage Gas Heating, Heat Pump, Electric or Hydronic Heat.
OWNER’S
MANUAL
OWNER’S
MANUAL
3 Configurable Outputs
Control up to 3 Heat &
2 Cool Stages
Adjustable 2nd & 3rd Stage
Timers & Deadbands
Backlit Display & Button
Legends
Aux Heat Indicator
Dry Contact Equipped
3 Configurable Outputs
Control up to 3 Heat &
2 Cool Stages
Summary of Contents for P374-1900
Page 5: ......