background image

1

EXPERIMENT MANUAL

Franckh-Kosmos Verlags-GmbH & Co. KG, Pfizerstr. 5-7, 70184 Stuttgart, Germany   |    +49 (0) 711 2191-0    |   www.kosmos.de 

Thames & Kosmos, 301 Friendship St., Providence, RI, 02903, USA    |   1-800-587-2872    |   www.thamesandkosmos.com 

Thames & Kosmos UK LP, 20 Stone Street, Cranbrook, Kent, TN17 3HE , UK   |   01580 713000    |   www.thamesandkosmos.co.uk

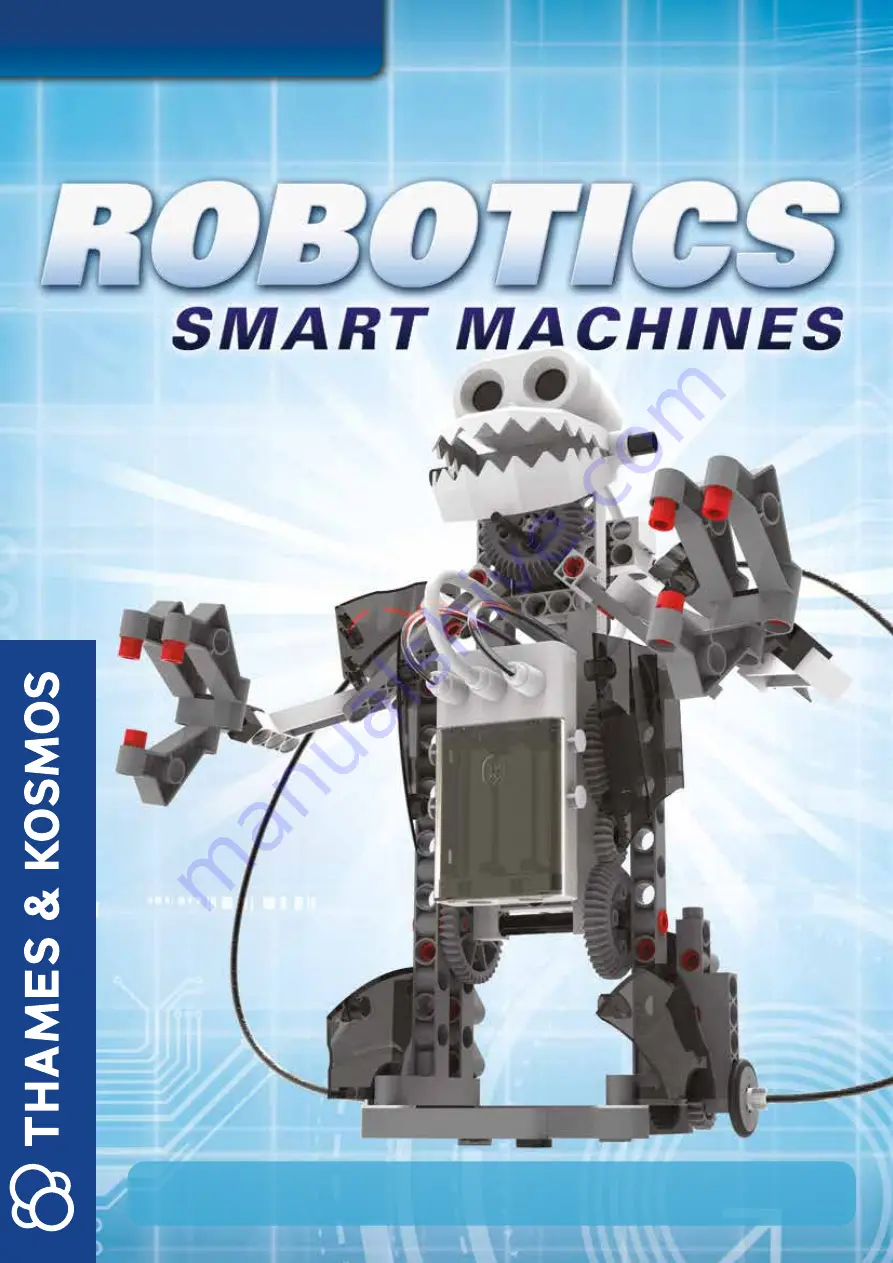
Summary of Contents for BEETLE

Page 1: ...erstr 5 7 70184 Stuttgart Germany 49 0 711 2191 0 www kosmos de Thames Kosmos 301 Friendship St Providence RI 02903 USA 1 800 587 2872 www thamesandkosmos com Thames Kosmos UK LP 20 Stone Street Cranbrook Kent TN17 3HE UK 01580 713000 www thamesandkosmos co uk ...

Page 2: ...he following symbol Please contact your local authorities for the appropriate disposal location Dear Parents Before starting the experiments read through the instruction manual together with your child and discuss the safety information Check to make sure the models have been assembled correctly and assist your child with the experiments We hope you and your child have a lot of fun with the experi...

Page 3: ... J2S2 30 Small gear 8 7026 W10 D2S 31 Worm 1 7344 W10 A1W 32 Crank bar 1 7026 W10 J2D 33 O ring 2 R12 08S 34 Small pulley 2 7344 W10 N3S 35 Body plate 3 3 7392 W10 L1TD 36 Body plate 4 3 7392 W10 L2TD 37 Leg left 1 7397 W10 C1W 38 Leg right 1 7397 W10 C2W 39 Diagonal connector 6 7404 W10 B2S 40 30 mm tube 4 7400 W10 G1D 41 20 mm tube 1 7400 W10 G2D 42 Short anchor pin 6 880 W10 M1B 43 Anchor pin 5...

Page 4: ...hor pins from the frames C Gear wheels The models will often have several gear wheels installed in a row In order for the models to work well these gears will have to mesh well Otherwise the force from one gear wheel won t be properly transferred to the next D Installing batteries in the Bluetooth battery box Slide the transparent cover open Insert brand new disposable 1 5 volt batteries into the ...

Page 5: ... Bot 23 Beetle 24 Programming the Beetle 31 Crocodile 32 Programming the Crocodile 38 Tiltrotor Aircraft 39 Programming the Tiltrotor Aircraft 49 Robo Dog 50 Programming the Robo Dog 55 Robotosaurus 56 Programming the Robotosaurus 61 Catapult 62 Programming the Catapult 64 Publisher s information Inside back cover TIP Above each set of assembly instructions you will find a red bar It shows you the...

Page 6: ...m floors deliver packages map terrain climb mountains entertain people cook dinner the list goes on and on With this kit you can build robots that use an ultrasonic sensor to sense their environment With the app you can program the robots motors to behave in different ways depending on the data coming from the ultrasonic sensor In this way you can create different robots that perform different tas...

Page 7: ... with all the mechanical parts rods gears axles frames and so on allow you to build and program mechanical robots that can sense their surrounding using sound waves First follow the assembly instructions starting on page 13 to build one of the models The Spy Bot model starting on page 18 is one of the easiest Make sure you have inserted the batteries correctly according to the battery information ...

Page 8: ...t They can also navigate and find their way around without normal eyesight ACTIVE SONAR Humans have developed a technology to replicate echolocation which is called sonar Sonar is an acronym for SOund Navigation And Ranging Sonar is used for navigation in submarines ships and airplanes A similar technology using electromagnetic radio waves instead of sound waves is called radar RAdio Detection And...

Page 9: ...ot yet pair to any devices you see You connect the app to the Bluetooth battery box via a control inside the app itself not via the device settings 2 Start the app and connect the app to your robot by pressing the circular Bluetooth button in the upper left corner A Note If you are using Android you may need to grant location services permission to enable the Bluetooth connection A permission dial...

Page 10: ...entimeters Press the Stop button 4 The sensor distance indicator line H has adjustable ranges Different program segments can run in each of these ranges By default there are three ranges The first range marker I is set at 30 and the second marker J at 50 This means there are four program segments by default which are described on the next page Continued on next page D E F G I J H Object Near Objec...

Page 11: ...pressed When an object is detected between 0 and 30 the blue 0 30 segment L runs When an object is detected between 30 and 50 the green 31 50 segment M runs When an object is detected between 50 and 100 the purple 51 segment N runs You can slide the range markers to change the distance ranges You can also increase the number of distance range segments by pressing the add range marker button O You ...

Page 12: ...ill change the direction 3 With the time slider E you can also set the duration for which the motor s will turn from 0 5 to 5 0 seconds 4 When you are satisfied with your selections press the green check mark button and the motor block F appears in the program segment The blocks show which motor s G the command will turn and at what speed and in what direction H each motor will turn Below that it ...

Page 13: ...on and the rest programming window appears L You can choose the duration 0 5 to 5 seconds of the pause in the program Press the green check mark button and the rest block M is added to the program segment WRITING A COMPLETE PROGRAM Following the previous instructions for adding commands you can now go and write programs for all of the segments You can think of the different actions you want your r...

Page 14: ...t to move to a different program click the storage box button Q and select which program you want to open SAVING PROGRAMS When you want to save a program you have written press the disk button R The program script will immediately be saved inside the program 1 6 you are currently in A confirmation screen will appear REVERT TO SAVED To revert to the last saved version of the program and erase all u...

Page 15: ...1x 2x 2x 1x 2x 3x 49x 5x 1x 2x 6x 1x 1x 3x 3x 2x 2x 1x 1x 8x 6x 2 16 20 22 2x 1x 2x 1x Hole A Hole B Hole B Hole C 1 2 3 4 Orient holes A toward the right when you look at the assembly from either side like this Make sure holes A are rotated toward the backside of the model on the left leg side and toward the front side of the model on the right leg side A A A A A A A A Left leg Left leg Right leg...

Page 16: ...BIPEDAL ANDROID 5 6 7 8 Left hand Left hand Right hand Right hand 16 ...

Page 17: ...Bipedal Android 1 2 last Hole A Hole B Hole B Hole C 9 10 1 Do first 2 Do second Last Do last Connect to hole C 17 ...

Page 18: ...1 12 The three wires pass through the middle frame NOTE This model requires a smooth tabletop or floor in order to turn properly Try it on different surfaces such as a glass table and hardwood floor to see what works best 18 ...

Page 19: ...nd sensor When the obstacle is detected the robot will turn to the side When the robot no longer detects an obstacle it will walk forward again This program is preloaded in the app under Program 7 Test it out and write down how the robot behaves for each program segment below PROGRAMMING NOTES DEMO PROGRAM Program 7 OPENING SEGMENT SEGMENT 0 30 SEGMENT 31 40 SEGMENT 41 19 ...

Page 20: ...0 11 13 17 18 15 16 19 21 20 22 24 26 27 28 43 44 47 48 49 50 53 54 29 30 33 34 39 40 37 38 42 1x 2x 2x 3x 2x 2x 5x 1x 2x 1x 3x 2x 2x 2x 6x 1x 4x 1x 1x 1x 1x 2x 2x 2x 1x 1x 2x 1x 2x 4x 30x 6x 2x 2x 1x 1x 2x 2x 5x 4x 2 3 4 5 6 20 ...

Page 21: ...A 7 8 9 10 11 Left Right Orient these parts so that the numbers are on the inside and bottom 21 Spy Bot ...

Page 22: ...12 13 14 15 16 17 Same 22 SPY BOT ...

Page 23: ...B 18 19 20 21 22 23 24 x2 Connect to holes B 23 Spy Bot ...

Page 24: ...Done A B 26 27 25 24 SPY BOT ...

Page 25: ... s built in video camera to record what the robot sees You could even stream it back to another computer via a video chat program Motor 1 moves the robot forward or backward and Motor 2 turns the robot around In this way this cute robot can become a stealthy spy bot or a remote expedition bot CHARTING A COURSE Draw a floor plan of your home or classroom here and then draw a route for your spy bot ...

Page 26: ... through the square frame 1 2 3 7 8 5 4 9 10 13 17 16 21 20 22 24 25 27 43 44 47 48 49 50 53 54 29 30 35 36 39 37 38 42 18x 8x 9x 1x 2x 1x 6x 1x 4x 6x 2x 2x 3x 1x 10x 1x 3x 1x 1x 2x 1x 2x 3x 1x 2x 12x 4x 6x 1x 1x 2x 2x 8x 4x 26 BEETLE ...

Page 27: ...Hole A Hole B Hole B Hole C 9 10 12 11 Connect to hole C Align the gears exactly as shown The arrows point to holes C Hole C Hole C Hole C 27 Beetle ...

Page 28: ...13 14 15 Connect to holes C Top view Connect to holes C Align the gears exactly as shown The arrows point to holes C Hole C Hole C Hole C 28 BEETLE ...

Page 29: ...Connect to holes C Top view Side view 16 17 18 19 20 29 Beetle ...

Page 30: ...BEETLE 21 22 30 ...

Page 31: ...Beetle 23 24 31 ...

Page 32: ...BEETLE Done 26 25 Motor unit 2 Ultrasonic sensor Motor unit 1 32 ...

Page 33: ...cted the robot will move its front pincers and flap its wings to scare off any potential predators If the obstacle keeps approaching the beetle will start to back away This program is preloaded in the app under Program 4 Test it out and write down how the robot behaves for each program segment below DEMO PROGRAM Program 4 OPENING SEGMENT SEGMENT 0 21 SEGMENT 22 35 SEGMENT 36 50 SEGMENT 51 33 ...

Page 34: ...C 1 2 3 4 5 x2 x2 Connect to holes B 1 2 3 7 8 5 6 10 13 14 17 18 16 19 21 20 22 23 24 25 27 43 44 47 48 49 53 54 29 30 35 36 39 42 2x 6x 6x 5x 2x 2x 6x 2x 1x 2x 1x 2x 5x 1x 7x 1x 1x 1x 2x 2x 2x 1x 2x 1x 4x 1x 2x 51x 6x 6x 3x 3x 5x 4x 34 ...

Page 35: ...6 7 8 35 Crocodile ...

Page 36: ...CROCODILE 9 10 11 12 13 36 ...

Page 37: ...Crocodile Hole A Hole B Hole B Hole C 14 15 16 17 18 19 x2 Connect to hole C 37 ...

Page 38: ...CROCODILE 20 21 22 23 Connect to holes B Connect to hole C 38 ...

Page 39: ...Crocodile Done 26 24 25 39 ...

Page 40: ... it senses something coming closer to it it opens its mouth to scare off potential enemies This program is preloaded in the app under Program 2 Test it out and write down how the robot behaves for each program segment below PROGRAMMING NOTES DEMO PROGRAM Program 2 OPENING SEGMENT SEGMENT 0 40 SEGMENT 41 60 SEGMENT 61 40 ...

Page 41: ... 19 21 20 22 23 24 26 27 28 43 44 47 48 49 53 54 55 30 31 34 35 36 39 40 37 38 42 1x 6x 4x 1x 1x 3x 2x 2x 2x 4x 1x 2x 4x 5x 1x 7x 1x 2x 1x 1x 2x 2x 2x 1x 2x 2x 2x 1x 4x 1x 33x 6x 2x 6x 1x 1x 3x 3x 2x 1x 5x 41 Tiltrotor Aircraft TILTROTOR AIRCRAFT ...

Page 42: ...6 7 8 42 TILTROTOR AIRCRAFT ...

Page 43: ...Hole A Hole B Hole B Hole C 9 10 Align the gear so holes B are oriented as shown here Align the gear so holes B are oriented as shown here 43 Tiltrotor Aircraft ...

Page 44: ...11 12 13 14 15 x2 x2 x2 TILTROTOR AIRCRAFT 44 ...

Page 45: ...16 17 Tiltrotor Aircraft 45 ...

Page 46: ...Hole A Hole B Hole B Hole C 18 19 20 x2 Connect to holes B TILTROTOR AIRCRAFT 46 ...

Page 47: ...21 23 22 Tiltrotor Aircraft 47 ...

Page 48: ...26 24 25 TILTROTOR AIRCRAFT 48 ...

Page 49: ...27 28 Tiltrotor Aircraft 49 ...

Page 50: ...1 Done 31 29 1 2 2 3 3 30 TILTROTOR AIRCRAFT 50 ...

Page 51: ...s from the table surface the ultrasonic sensor detects the absence of the ground The program tells motor 2 to rotate the wings into horizontal flying mode Now you can pretend the model is flying around When it s time to land if the aircraft approaches the tabletop again the sensor will tell motor 2 to swivel back into landing mode and the landing gear extends Now you can safely land the aircraft T...

Page 52: ...4 17 18 16 19 20 22 24 27 28 43 44 47 48 49 50 51 52 53 54 55 29 30 31 33 34 35 36 39 40 37 38 42 13x 2x 4x 1x 3x 2x 2x 6x 1x 4x 1x 1x 3x 1x 2x 4x 6x 1x 5x 1x 2x 1x 1x 1x 1x 1x 1x 2x 2x 2x 1x 4x 2x 37x 6x 2x 4x 1x 1x 1x 1x 2x 2x 1x 2x 1x ROBO DOG 52 ...

Page 53: ...1 1 2 Hole A Hole B Hole B Hole C B 6 7 8 9 10 Connect to holes B Use numbers for alignment 53 Robo Dog ...

Page 54: ...Hole A Hole B Hole B Hole C C 11 12 13 14 15 Connect to holes B ROBO DOG 54 ...

Page 55: ...A B C C 16 17 18 19 20 21 Robo Dog 55 ...

Page 56: ...Done 22 23 24 ROBO DOG 56 ...

Page 57: ...r robo dog walk forward and sit down This program is preloaded in the app under Program 3 Test it out and write down how the robot behaves for each program segment below PROGRAMMING NOTES DEMO PROGRAM Program 3 OPENING SEGMENT SEGMENT 0 25 SEGMENT 26 40 SEGMENT 41 Robo Dog 57 ...

Page 58: ...5 6 9 10 12 13 14 17 18 15 16 19 20 22 23 24 27 28 43 44 47 48 49 50 51 52 53 54 55 29 31 32 33 34 35 36 39 40 37 38 41 42 11x 2x 2x 5x 2x 2x 4x 1x 4x 1x 6x 2x 2x 2x 2x 4x 1x 3x 1x 1x 1x 1x 1x 1x 1x 1x 2x 2x 2x 2x 2x 4x 2x 46x 2x 1x 4x 6x 1x 1x 3x 3x 2x 2x 1x 1x 4x 58 ROBOTOSAURUS ...

Page 59: ...Hole A Hole B Hole B Hole C 6 7 8 Note The two gears are rotated 180 degrees relative to each other Hole C 20 mm tube Small gear Hole C 59 Robotosaurus ...

Page 60: ...ROBOTOSAURUS Hole A Hole B Hole B Hole C 9 10 11 12 13 Connect to hole C Left leg 60 ...

Page 61: ...Robotosaurus 14 15 16 17 Connect to hole C Motor unit 2 Right leg 61 ...

Page 62: ...ROBOTOSAURUS Done 18 19 20 Ultrasonic sensor Motor unit 1 Motor unit 2 Flexible shaft Ultrasonic sensor cable 62 ...

Page 63: ...ad the program well enough to interpret what the robot dino will do before you run the program for the first time This program is preloaded in the app under Program 5 Test it out and write down how the robot behaves for each program segment below PROGRAMMING NOTES DEMO PROGRAM Program 5 OPENING SEGMENT SEGMENT 0 10 SEGMENT 11 30 SEGMENT 31 63 ...

Page 64: ...A B 2 3 4 5 6 7 8 9 Connect to hole B Connect to holes B 1 3 8 5 13 17 16 19 21 20 22 23 24 25 27 43 47 48 49 53 54 55 31 3x 4x 2x 3x 1x 1x 1x 1x 2x 1x 1x 1x 1x 2x 2x 1x 2x 2x 1x 1x 2x 11x 1x 64 CATAPULT ...

Page 65: ... injuries do not aim at eyes or face Never launch heavy sharp pointed or sharp edged objects Never launch any objects other than those suggested small light weight balls Try using the catapult to launch a wadded up paper ball or a small foam ball 65 Catapult ...

Page 66: ...est it out and write down how the robot behaves for each program segment below Warning To avoid the risk of injuries do not aim at eyes or face Never launch heavy sharp pointed or sharp edged objects Never launch any objects other than those suggested small light weight balls PROGRAMMING NOTES DEMO PROGRAM Program 1 OPENING SEGMENT SEGMENT 0 30 SEGMENT 31 WHAT ELSE CAN YOU BUILD Now that you have ...

Page 67: ...lopment Genius Toy Taiwan Co Ltd Taichung Taiwan R O C Text and Editing Ted McGuire Additional Graphics and Packaging Dan Freitas Manual design concept Atelier Bea Klenk Berlin Manual illustrations Genius Toy Taiwan Co Ltd Taichung Taiwan R O C and Thames Kosmos Manual photos istockphoto com microolga p 4 bottom left all animal photos p 6 fotolia com nataliafrei p 4 bottom right Maxisport p 4 top ...

Page 68: ...68 620375 03 250119 ...

Reviews: