background image

Thoughtful lighting, responsibly designed in London. 

Thank you for making the switch to Tala.  
Discover the full Tala family at tala.co.uk 
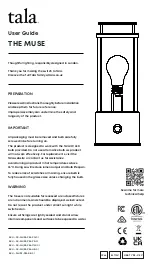
User Guide

THE MUSE

PREPARATION 

Please read instructions thoroughly before installation  
and keep them for future reference.

Improper assembly can undermine the safety and 
longevity of the product.

IMPORTANT


All packaging must be removed and bulb carefully 
screwed in before turning on.

The product is designed to work with the Tala 12V LED  
bulb provided. Do not use alternative bulb as product  
will not work effectively. For replacements, visit the  
Tala website or contact us for assistance. 

Avoid turning on product in hot temperatures above  
35ºC. Doing so will reduce lumen output and bulb lifespan.

To reduce risk of scratches or marking, ensure bulb is  
fully housed in the glass case unless changing the bulb. 

WARNING 

The Muse is not suitable for recessed or enclosed fixtures 
or environments, and should be displayed as instructed. 

Do not leave the product under direct sunlight while 
switched on. 

Ensure all fixings are tightly sealed and do not allow 
internal components and surfaces to be exposed to water. 

SKU – FB-MUSE-PBL-CW-01
SKU – FB-MUSE-PBL-HB-01

SKU – FB-MUSE-PBL-PG-01

IP44

USB TYPE-C 5V

Scan me for more 

technical help

E27 12V

SKU – FB-MUSE-PBL-PR-01

SKU – MUSE-PBL-SB-01

Summary of Contents for THE MUSE

Page 1: ...For replacements visit the Tala website or contact us for assistance Avoid turning on product in hot temperatures above 35 C Doing so will reduce lumen output and bulb lifespan To reduce risk of scra...

Page 2: ...screwdriver C x1 USB Type C Charging cable A C D 1 2 7 5 3 6 8 Handle 1 Lid 2 12V LED bulb 3 Dimmer dial 4 Base 5 Battery charge level button 6 USB Type C power input 7 Battery charge level Indicator...

Page 3: ...e the two screws on the lid with the provided screwdriver and remove the handle INITIAL SET UP 1a 1 B STEP 2 Lift off the lid and carefully remove all packing material from inside including the bulb b...

Page 4: ...tening of the bulb will cause misaligment If this occurs make small adjustments until straight and just touching the contact point Contact point STEP 3 Remove bulb from box and carefully screw into th...

Page 5: ...ntil the bulb lights up Adjust the dimmer for your desired light output Dial the dimmer up for a cool white light and dial down for a warm ambient colour temperature STEP 5 Return the lid and handle t...

Page 6: ...m charging cable provided and a 2 Amp USB Type A adapter CHARGING THE MUSE OPTION 2 WIRELESS CHARGING Place assembled product flat on a compatible wireless charging pad and ensure it is placed on the...

Page 7: ...battery capacity may begin to noticeably degrade Tips to prolong the battery life are Once fully charged please remove from charger Avoid allowing the battery to reach 0 Recharge when the low battery...

Page 8: ...y and if not installed and used in accordance with the instruc tions may cause harmful interference to radio communications However there is no guarantee that interference will not occur in a particul...

Reviews: