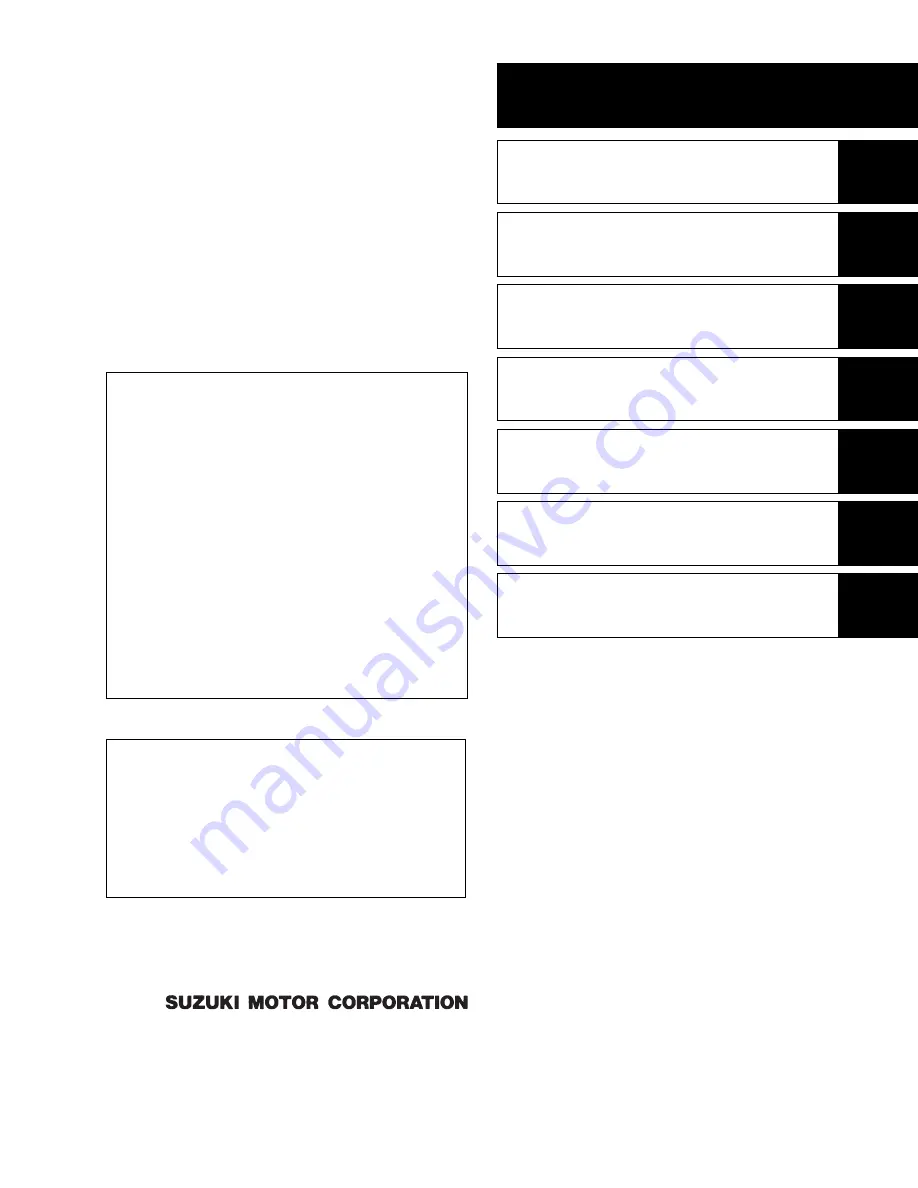
background image

GROUP INDEX

GENERAL INFORMATION

1

PERIODIC MAINTENANCE

2

ENGINE

3

FUEL SYSTEM

4

CHASSIS

5

ELECTRICAL SYSTEM

6

SERVICING INFORMATION

7

FOREWORD

This manual contains an introductory description on
the SUZUKI LT-Z50 and procedures for its inspec-
tion/service and overhaul of its main components.
Other information considered as generally known is
not included.
Read the GENERAL INFORMATION section to
familiarize yourself with the vehicle and its mainte-
nance. Use this section as well as other sections to
use as a guide for proper inspection and service.
This manual will help you know the vehicle better so
that you can assure your customers of fast and reli-
able service.

© COPYRIGHT SUZUKI MOTOR CORPORATION 2005

* This manual has been prepared on the basis

of the latest specifications at the time of publi-
cation. If modifications have been made since
then, differences may exist between the con-
tent of this manual and the actual vehicle.

* Illustrations in this manual are used to show

the basic principles of operation and work
procedures. They may not represent the
actual vehicle exactly in detail.

* This manual is written for persons who have

enough knowledge, skills and tools, including
special tools, for servicing SUZUKI vehicles.
If you do not have the proper knowledge and
tools, ask your authorized SUZUKI motorcy-
cle dealer to help you.

Inexperienced mechanics or mechanics
without the proper tools and equipment
may not be able to properly perform the
services described in this manual.
Improper repair may result in injury to the
mechanic and may render the vehicle
unsafe for the rider.

99500-40011-03E

PartShark.com 

877-999-5686

Summary of Contents for LT-Z50

Page 1: ...has been prepared on the basis of the latest specifications at the time of publi cation If modifications have been made since then differences may exist between the con tent of this manual and the actual vehicle Illustrations in this manual are used to show the basic principles of operation and work procedures They may not represent the actual vehicle exactly in detail This manual is written for p...

Page 2: ...P a r t S h a r k c o m 8 7 7 9 9 9 5 6 8 6 ...

Page 3: ...03 ENGINE book Page 105 Tuesday February 28 2006 3 03 PM SUPPLEMENTS LT Z50K9 09 MODEL 8 11 P a r t S h a r k c o m 8 7 7 9 9 9 5 6 8 6 ...

Page 4: ... the first page of each section to help you find the item and page you need COMPONENT PARTS AND WORK TO BE DONE Under the name of each system or unit is its exploded view Work instructions and other service information such as the tightening torque lubricating points and locking agent points are provided Example Front and rear wheel 1 Front tire 2 Front wheel 3 Rear tire 4 Rear wheel A Wheel set n...

Page 5: ... Measure in current range Apply molybdenum oil solution mixture of engine oil and SUZUKl MOLY PASTE in a ratio of 1 1 Measure in resistance range Apply SUZUKI SUPER GREASE A or equivalent 99000 25010 Measure in diode test range Apply SUZUKI MOLY PASTE or equiva lent 99000 25140 Measure in continuity test range Apply WATER RESISTANCE GREASE or equivalent 99000 25161 Use special tool Apply SUZUKI BO...

Page 6: ...2 SUZUKI LT Z50K6 06 MODEL 1 4 SERIAL NUMBER LOCATION 1 4 FUEL AND OIL RECOMMENDATION 1 5 FUEL FOR USA AND CANADA 1 5 FUEL FOR OTHER COUNTRIES 1 5 ENGINE OIL AND FINAL REDUCTION GEAR BOX OIL FOR USA 1 5 ENGINE OIL AND FINAL REDUCTION GEAR BOX OIL FOR OTHER COUNTRIES 1 5 BREAK IN PROCEDURES 1 6 INFORMATION LABELS 1 7 INFORMATION MARKS 1 7 SPECIFICATIONS 1 8 DIMENSIONS AND DRY MASS 1 8 ENGINE 1 8 DR...

Page 7: ...basic mechanical safety principles If you are unsure about how to perform a particular service operation ask a more experienced mechanic for advice GENERAL PRECAUTIONS Proper service and repair procedures are important for the safety of the service mechanic and the safety and reliability of the vehicle When 2 or more persons work together pay attention to the safety of each other When it is necess...

Page 8: ...uts tighten the larger sizes first Always tighten the bolts and nuts diagonally from the inside toward outside and to the speci fied tightening torque Whenever you remove oil seals gaskets packing O rings locking washers self locking nuts cotter pins circlips and certain other parts as specified be sure to replace them with new ones Also before installing these new parts be sure to remove any left...

Page 9: ...ION The frame serial number or V I N Vehicle Identification Number 1 is stamped on the left side of the rear frame pipe The engine serial number 2 is located on the right side of the generator case These numbers are required especially for registering the machine and ordering spare parts RIGHT SIDE LEFT SIDE P a r t S h a r k c o m 8 7 7 9 9 9 5 6 8 6 ...

Page 10: ...ine s performance and life Always select good quality engine oil Suzuki recommends the use of SUZUKI PERFORMANCE 4 MOTOR OIL or equivalent engine oil Use of API SF SG or SH SJ with JASO MA Suzuki recommends the use of SAE 10W 40 engine oil If SAE 10W 40 engine oil is not available select an alternative according to the following chart ENGINE OIL AND FINAL REDUCTION GEAR BOX OIL FOR OTHER COUNTRIES...

Page 11: ... the moving parts to BREAK IN before subjecting the engine to maximum stresses The future performance and reliability of the engine depends on the care and restraint exercised during its early life Refer to the following throttle position recommendations Keep to these break in throttle position Brake in engine speeds Up to 10 hours Less than 1 2 throttle P a r t S h a r k c o m 8 7 7 9 9 9 5 6 8 6...

Page 12: ...re air pressure and warning no passenger label English A For P 03 19 28 7 Tire air pressure and warning no passenger label French A For P 28 8 General warning AGE 6 label English A For P 03 19 28 9 General warning label French A For P 28 0 AGE 6 label French A For P 28 A EC mark label A For P 19 B ICES Canada label A For P 28 C Information label A For P 03 D Approval label A For P 19 A No passenge...

Page 13: ...g 167 lbs ENGINE Type Four stroke air cooled OHV Number of cylinders 1 Bore 36 0 mm 1 417 in Stroke 48 6 mm 1 913 in Displacement 49 cm 3 0 cu in Compression ratio 8 4 1 Carburetor MIKUNI VM13 single Air cleaner Polyurethane foam element Starter system Electric and recoil starter Idle speed 2 000 150 r min DRIVE TRAIN Reduction ratio 2 091 1 879 Variable change Reduction gear ratio 4 272 47 11 Fin...

Page 14: ...ont tire size AT16 8 7 tubeless Rear tire size AT16 8 7 tubeless ELECTRICAL Ignition type Electronic ignition CDI Ignition timing 20 B T D C at 4 600 r min Spark plug NGK CR6HSA or DENSO U20FSR U Battery 12 V 14 4 kC 4 Ah 10 HR Main fuse 10 A CAPACITIES Fuel tank 2 6 L 0 7 0 6 US lmp gal Engine oil oil change 300 ml 0 6 0 5 US Imp qt overhaul 350 ml 0 7 0 6 US lmp qt Final reduction gear box oil o...

Page 15: ...P a r t S h a r k c o m 8 7 7 9 9 9 5 6 8 6 ...

Page 16: ...8 FUEL LINE 2 8 ENGINE OIL 2 9 FINAL REDUCTION GEAR BOX OIL 2 10 THROTTLE CABLE PLAY 2 10 ENGINE IDLE SPEED 2 11 DRIVE BELT 2 11 DRIVE CHAIN 2 14 BRAKES 2 17 TIRES 2 18 STEERING 2 19 SUSPENSIONS 2 19 CHASSIS NUTS AND BOLTS 2 20 GENERAL LUBRICATIONS 2 22 COMPRESSION PRESSURE CHECK 2 23 COMPRESSION TEST PROCEDURE 2 23 INITIAL ENGAGEMENT AND CLUTCH LOCK UP INSPECTION 2 24 INITIAL ENGAGEMENT INSPECTIO...

Page 17: ...nterval Initial 1 month Every 3 months Every 6 months Item Air cleaner element C C Exhaust pipe nuts and muffler mounting bolt T T T Valve clearance I I Spark plug I Replace every 18 months Spark arrester C C Fuel line I I Replace every 4 years Engine oil R R Inspect each time the vehicle is ridden Final reduction gear box oil I Replace every 2 years Throttle cable play I I I Idle speed I I I Driv...

Page 18: ...Right frame cover 5 4 Frame center cover 5 5 Maintenance lid 5 6 Front grip 5 6 AIR CLEANER If the air cleaner is clogged with dust intake resistance will be increase resulting in a decrease in engine output and an increase in fuel consumption Clean the air cleaner element in the following manner Remove the seat 5 4 Remove the battery holder 5 5 Remove the air cleaner box cap 1 When installing the...

Page 19: ...r of removal When installing the air cleaner box cap 1 face the UP mark to the top Inspect the air cleaner element for tears A torn ele ment must be replaced Be sure to position the element snugly and correctly so that no incoming air will by pass it Remember the rapid wear of piston rings and the cylinder bore is often caused by a defective or poorly fitted element If driving under dusty conditio...

Page 20: ... and exhaust valve clearances at the interval indicated above and adjust the valve clearances to specification if necessary Remove the right frame cover 5 4 Remove the spark plug 2 7 Remove the cylinder head cover 1 Remove the generator rotor cover 2 NOTE Valve clearance is to be checked when the engine is cold The intake and exhaust valves must be checked and adjusted when the piston is at Top De...

Page 21: ...auge Valve clearance when cold IN 0 05 0 10 mm 0 002 0 004 in EX 0 10 0 15 mm 0 004 0 006 in If the clearance is out of specification adjust it to the specified range with a special tool and 2 5 mm hexagon wrench 3 Valve clearance adjuster locknut 4 7 N m 0 7 kgf m 5 0 lb ft Tighten the cylinder head cover 1 to the specified torque Cylinder head cover bolt 11 N m 1 1 kgf m 8 0 lb ft Install the re...

Page 22: ... 6 0 7 mm 0 024 0 028 in 09900 20803 Thickness gauge ELECTRODE S CONDITION Check the condition of the electrode If it is extremely worn or burnt replace the spark plug Replace the spark plug if it has a broken insulator damaged thread etc Inspect every 6 months Replace every 18 months Standard Cold type NGK CR6HSA CR7HSA DENSO U20FSR U U22FSR U 0 6 0 7 mm 0 024 0 028 in Confirm the thread size and...

Page 23: ...ark arrester 1 FUEL LINE Inspect the fuel hose for damage and fuel leakage If any defects are found replace it with a new one When replacing the fuel hose remove the left frame cover 5 4 To avoid damaging the cylinder head threads first tighten the spark plug by hand and then tighten it to the specified torque using the spark plug wrench Clean every 3 months Inspect every 3 months Replace every 4 ...

Page 24: ...he engine oil drain plug 1 and engine oil filler cap 2 Tighten the engine oil drain plug 1 with the new washer to the specified torque and then pour the new oil through the oil filler hole When performing an oil change the engine will hold about 300 ml 0 6 0 5 US lmp qt of oil Use API SF SG or SH SJ with JASO MA Engine oil drain plug 12 N m 1 2 kgf m 8 5 lb ft Check the engine oil level above Engi...

Page 25: ...ground Remove the right frame cover 5 4 Remove the generator cover 1 Remove the oil filler cap 2 Remove the drain plug 3 and drain the oil into an oil pan Reinstall the drain plug 3 Pour new oil through the oil filler hole until the oil flows from oil filler hole Reinstall the oil filler cap 2 Final reduction gear box oil capacity Oil change 25 ml 0 8 0 9 US Imp oz Overhaul 30 ml 1 0 1 1 US Imp oz...

Page 26: ...hot Start the engine turn the throttle stop screw 1 and set the engine idle speed as follows Engine idle speed 2 000 150 r min DRIVE BELT REMOVAL Remove the left frame cover 5 4 Remove the left footrest 1 Remove the CVT case cover 2 After the adjustment is completed check that handle bar movement does not raise the engine idle speed and that the throttle lever returns smoothly and auto matically I...

Page 27: ...older Remove the fixed drive face 5 Remove the clutch housing 6 with the special tool 09930 40113 Rotor holder Remove the movable driven face 7 with drive belt 8 INSPECTION Inspect the drive belt for wear and damage If any cracks or defects are found replace it with a new one P a r t S h a r k c o m 8 7 7 9 9 9 5 6 8 6 ...

Page 28: ... make its surfaces completely dry Tighten the clutch housing nut to the specified torque with the special tool 09930 40113 Rotor holder Clutch housing nut 50 N m 5 0 kgf m 36 0 lb ft Tighten the fixed drive face nut to the specified torque with the special tool 09930 40113 Rotor holder Fixed drive face nut Initial 13 N m 1 3 kgf m 9 5 lb ft Final 50 N m 5 0 kgf m 36 0 lb ft Fit the drive belt to t...

Page 29: ...se pins Twisted or seized links Damaged rollers Excessive wear Rusted links Kinked or binding links If any defects are found the drive chain must be replaced NOTE When replacing the drive chain replace the drive chain and sprockets as a set CHECKING Loosen the bolts 1 Tense the drive chain fully by turning both chain adjusters 2 Clean lubricate and inspect each time the vehicle is ridden The stand...

Page 30: ...he chain between the engine and rear sprockets as shown Drive chain slack Standard 25 35 mm 1 0 1 4 in After adjusting the drive chain tighten the bolts 2 to the specified torque Rear axle housing bolt 50 N m 5 0 kgf m 36 0 lb ft Recheck the drive chain slack NOTE After drive chain adjustment adjust the rear brake Rear brake adjustment 2 17 CLEANING AND LUBRICATING Remove the right rear tire 5 8 R...

Page 31: ...and drying the chain oil it with a heavy weight engine oil The drive chain joint clip should be attached in the way that the slit end will face opposite to the direction of travel Direction of travel P a r t S h a r k c o m 8 7 7 9 9 9 5 6 8 6 ...

Page 32: ...er 2 so that the free travel D is within specifi cation after loosening the locknut Rear brake lever play D 4 6 mm 0 16 0 24 in FRONT AND REAR BRAKE SHOE WEAR This vehicle is equipped with brake wear limit indicators for the front and rear brake Check brake lining wear as follows Make sure the brake lever play is properly adjusted While fully applying the brake check to see that the extension line...

Page 33: ...ressure for good roadability and a longer tire life Cold inflation tire pressure is as follows Cold inflation tire pressure Front 20 kPa 0 20 kgf cm 2 9 psi Rear 20 kPa 0 20 kgf cm 2 9 psi VEHICLE LOAD CAPACITY LIMIT 38 kg 84 lbs Inspect every month 4 0 mm To minimize the possiblility of tire damage from over inflation we strongly recommended that a man ual type air pump be used rather than a high...

Page 34: ...difference between A and B Toe in Standard 1 5 3 mm 0 06 0 12 in If the toe in is out of specification bring it into the specified range 5 28 SUSPENSIONS Support the vehicle with a jack and wooden blocks Remove the front and rear wheels 5 8 Inspect the suspension arm swingarm and bushing for scratches wear or defect If any defects are found replace them with new ones 5 19 and 5 40 Inspect the fron...

Page 35: ...teering shaft holder bolt 23 2 3 16 5 7 Handlebar clamp bolt 26 2 6 19 0 8 Front shock absorber bolt upper 29 2 9 21 0 lower 29 2 9 21 0 9 Front hub nut 65 6 5 47 0 0 Wheel set nut front and rear 28 2 8 20 0 A Front brake cable equalizer bolt 6 5 0 65 4 5 B Front brake cam lever nut 3 3 0 33 2 5 C Swingarm pivot nut 102 10 2 74 0 D Rear shock absorber bolt 29 2 9 21 0 E Rear shock absorber nut 29 ...

Page 36: ...PERIODIC MAINTENANCE 2 21 P a r t S h a r k c o m 8 7 7 9 9 9 5 6 8 6 ...

Page 37: ... holder 2 Brake lever holder 3 Brake cable 4 Throttle cable 5 Drive chain 6 Throttle lever NOTE Before lubricating each part remove any rust and wipe off any grease oil dirt or grime Lubricate exposed parts which are subject to rust with a rust preventative spray especially whenever the vehicle has been operated under wet or rainy conditions Lubricate every 3 months P a r t S h a r k c o m 8 7 7 9...

Page 38: ... gasket NOTE When the compression pressure goes below specification check the engine for conditions listed above COMPRESSION TEST PROCEDURE NOTE Before testing the engine for compression pressure make sure that the cylinder head bolts are tightened to the specified torque and the valves are properly adjusted Have the engine warmed up before testing Make sure that the battery is fully charged Remov...

Page 39: ... operation of the drive train Perform the following Warm up the engine INITIAL ENGAGEMENT INSPECTION Connect the multi circuit tester onto the spark plug high ten sion cord Start the engine Slowly open the throttle and note the engine speed r min when the vehicle begins to move forward 09900 25008 Multi circuit tester set Engagement speed 2 400 3 000 r min If the engagement speed does not coincide...

Page 40: ... throttle for a brief period and note the maxi mum engine speed sustained during the test cycle Lock up speed 3 300 4 300 r min If the lock up speed r min does not coincide with the standard range inspect the following items for any abnormalities Clutch shoe 3 39 Clutch housing 3 40 Movable drive and driven face 3 36 38 NOTE Release the parking brake lock Do not apply full power for more than 5 se...

Page 41: ...P a r t S h a r k c o m 8 7 7 9 9 9 5 6 8 6 ...

Page 42: ...SEMBLY 3 9 ENGINE COMPONENTS INSPECTION AND SERVICING 3 15 CYLINDER HEAD 3 15 ROCKER ARM PUSH ROD 3 20 CAMSHAFT ASSEMBLY 3 21 UPPER CRANKCASE CYLINDER 3 21 PISTON AND PISTON RING 3 22 CONROD AND CRANKSHAFT 3 24 CAM ROCKER ARM 3 27 FINAL REDUCTION GEAR BOX AND CVT CASE 3 28 CVT CASE COVER 3 33 GENERATOR CASE 3 33 STARTER PINION 3 34 MOVABLE AND FIXED DRIVE AND DRIVEN FACE 3 35 RECOIL STARTER 3 43 E...

Page 43: ...VAL INSTALLATION Carburetor 3 3 3 7 Muffler 3 3 3 8 Spark plug 3 9 3 56 PARTS REMOVAL INSTALLATION Recoil starter 3 11 CVT case cover 3 11 3 53 Starter pinion 3 11 3 53 Starter cup 3 11 3 52 Fixed drive face 3 11 3 52 Clutch housing 3 12 3 52 Clutch shoe movable driven face 3 12 3 51 Drive belt 3 12 3 51 PARTS REMOVAL INSTALLATION Generator cover 3 9 3 55 Generator rotor 3 10 3 54 Generator coil 3...

Page 44: ...following steps Drain engine oil 2 9 Remove the frame center cover 5 5 MUFFLER Remove the exhaust pipe nuts Remove the muffler mounting bolt Remove the muffler 1 FOOTREST Remove the left footrest 1 CARBURETOR Turn the fuel valve 1 to ON position Remove the fuel hose 2 Loosen the intake pipe clamp bolt 3 Remove the drain hose 4 from the clamp P a r t S h a r k c o m 8 7 7 9 9 9 5 6 8 6 ...

Page 45: ... chain 2 ELECTRICAL PARTS AND HOSES Disconnect the starter motor lead wire coupler 1 Disconnect the generator lead wire coupler 2 Remove the ground wire 3 Remove the breather hose 4 Remove the spark plug cap 5 Remove the rear brake cable guide 6 Remove the breather hose 7 P a r t S h a r k c o m 8 7 7 9 9 9 5 6 8 6 ...

Page 46: ...NGINE 3 5 ENGINE MOUNTING BRACKET AND BOLTS Remove the engine mounting bracket 1 Remove the engine mounting bolts and nuts Remove the engine from the left side P a r t S h a r k c o m 8 7 7 9 9 9 5 6 8 6 ...

Page 47: ...rque Engine mounting nut 31 N m 3 1 kgf m 22 5 lb ft LH RH RH LH 1 Engine mounting bolt 25 mm 4 Engine mounting bolt 40 mm 2 Engine mounting bolt 30 mm A Engine mounting nut ITEM N m kgf m lb ft 3 Engine mounting bolt 35 mm A 31 3 1 22 5 The engine mounting nuts are self locking Once the nuts have been removed they are no longer of use P a r t S h a r k c o m 8 7 7 9 9 9 5 6 8 6 ...

Page 48: ... the specified torque Carburetor mounting bolt 6 N m 0 6 kgf m 4 5 lb ft Install the exhaust pipe gasket 4 The drive chain joint clip should be attached in the way that the slit end will face opposite the direction of travel Direction of travel The removed O ring must be replaced with a new one The removed gasket must be replaced with a new one P a r t S h a r k c o m 8 7 7 9 9 9 5 6 8 6 ...

Page 49: ...2 15 Engine idle speed 2 11 Throttle cable play 2 10 to 11 POWER REDUCTION SPACER The power reduction spacer has been installed inside of the movable drive REMOVAL Remove the left frame cover 5 4 Remove the CVT case cover 3 11 Remove the starter cup 3 11 Remove the fixed drive face 3 11 Remove the movable drive spacer 1 and power reduction spacer 2 REMOUNTING Reinstall the movable drive in the rev...

Page 50: ...ER HEAD Turn the crankshaft counterclockwise to bring the line A on the generator rotor to the index mark B of the generator case NOTE When removing the cylinder head piston must be at TDC on compression stroke Remove the cylinder head bolts NOTE Loosen the cylinder head bolts little by little and diagonally Remove the cylinder head 1 NOTE Rocker arm and valve disassembly 3 15 P a r t S h a r k c ...

Page 51: ...th the special tool 09930 40113 Rotor holder Remove the generator rotor 1 with the special tool and removed nut 2 09920 13120 Crankshaft separator Remove the generator rotor 1 and nut 2 Remove the key 3 Remove the generator coil 4 and pick up coil 5 Be careful not to damage the generator coil by the special tool P a r t S h a r k c o m 8 7 7 9 9 9 5 6 8 6 ...

Page 52: ...ve the CVT case cover 1 Remove the dowel pins 2 and gasket 3 Remove the starter pinion 4 Remove the fixed drive face nut 5 with the special tool 09930 40113 Rotor holder Remove the starter cup assembly Remove the fixed drive face 6 P a r t S h a r k c o m 8 7 7 9 9 9 5 6 8 6 ...

Page 53: ... washer 0 MOVABLE DRIVEN Remove the clutch housing 1 with the special tool 09930 40113 Rotor holder Remove the clutch shoe movable driven face assembly 2 together with the drive belt 3 NOTE Clutch shoe movable driven face disassembly 3 37 CVT CASE Remove the CVT case 1 NOTE Loosen the CVT case bolts little by little and diagonally P a r t S h a r k c o m 8 7 7 9 9 9 5 6 8 6 ...

Page 54: ...gasket 3 GENERATOR CASE Remove the generator case 1 Remove the dowel pins 2 and gasket 3 CAM ROCKER ARM Remove the washer 1 and camshaft assembly 2 Remove the washer 3 spring 4 and cam rocker arms 5 P a r t S h a r k c o m 8 7 7 9 9 9 5 6 8 6 ...

Page 55: ...ve the crankcase bolts Remove the dowel pins 1 CRANKSHAFT Remove the crankshaft 1 together with piston Remove the crankshaft bearing retainer 2 PISTON Remove the piston pin circlip 1 Remove the piston pin 2 and piston 3 P a r t S h a r k c o m 8 7 7 9 9 9 5 6 8 6 ...

Page 56: ... out the rocker arm shaft 3 Remove the intake rocker arm 4 and exhaust rocker arm 5 Push the spring retainer 6 by the finger and move it side ways Remove the spring retainer 6 from the groove of the valve stem Remove the valve spring 7 Pull out the intake valve 8 and exhaust valve 9 P a r t S h a r k c o m 8 7 7 9 9 9 5 6 8 6 ...

Page 57: ...th new ones CYLINDER HEAD DISTORTION Decarbonize the combustion chamber Check the gasket surface of the cylinder head for distortion with a straightedge and thickness gauge taking a clearance reading at several places indicated If the largest reading at any position of the straightedge exceeds the service limit replace the cylinder head Cylinder head distortion Service Limit 0 05 mm 0 002 in 09900...

Page 58: ... 09900 20701 Magnetic stand 09900 21304 V block set 100 mm VALVE HEAD RADIAL RUNOUT Place the dial gauge at right angles to the valve head face and measure the valve head radial runout If the valve head radial runout exceeds the service limit replace the valve Valve head radial runout IN EX Service Limit 0 03 mm 0 001 in 09900 20607 Dial gauge 1 100 mm 09900 20701 Magnetic stand 09900 21304 V bloc...

Page 59: ... valve spring after cleaning Pour a small quantity of gasoline into the intake or exhaust port Check that no gasoline leaks through the valve seat If leakage is found replace the cylinder head VALVE STEM END CONDITION Inspect the valve stem end face for abnormal wear or damage If abnormal wear or damage is found resurface the valve stem end If the length A is less than the service limit the valve ...

Page 60: ...Service Limit 22 8 mm 0 90 in Valve spring tension IN EX 36 5 41 9 N 3 7 4 3 kgf 8 2 9 5 lbs at length 15 0 mm 0 59 in 09900 20102 Vernier calipers REASSEMBLY Reassemble the cylinder head in the reverse order of disassem bly Pay attention to the following points Apply MOLYBDENUM OIL SOLUTION to the new stem seal Press fit the stem seal onto the intake valve guide MOLYBDENUM OIL SOLUTION Insert the...

Page 61: ...the intake pipe 5 and insulator 6 Tighten the intake pipe bolts to the specified torque Intake pipe bolt 6 N m 0 6 kgf m 4 5 lb ft ROCKER ARM PUSH ROD INSPECTION Inspect the rocker arm push rods for abnormal wear damage or bend If any abnormal condition is found replace the push rod with a new one Make sure that the spring retainer fits snugly into the groove A on the valve stem end The removed O ...

Page 62: ...k Assemble the springs 1 diagonally 1 Spring UPPER CRANKCASE CYLINDER BUSHING Inspect the bushing 1 for wear or damage If any defects are found replace it with a new one CYLINDER DISTORTION Check the gasket surface of the cylinder for distortion with a straightedge and thickness gauge taking a clearance reading at several places as indicated If the largest reading at any position of the straighted...

Page 63: ...ore diameter 3 21 If the piston to cylinder clearance exceeds the service limit replace the upper crankcase cylinder or the piston or both Piston to cylinder clearance Service Limit 0 120 mm 0 0047 in PISTON RING TO GROOVE CLEARANCE Measure the side clearances of the 1st and 2nd piston rings with the thickness gauge If any of the clearances exceeds the limit replace both the pis ton and piston rin...

Page 64: ...ervice Limit 1st 0 50 mm 0 020 in 2nd 0 50 mm 0 020 in 09900 20803 Thickness gauge PISTON PIN AND PIN BORE Measure the piston pin bore inside diameter with a small bore gauge If the measurement is more than the service limit replace the piston Piston pin bore I D Service Limit 10 030 mm 0 3949 in 09900 20602 Dial gauge 1 1000 mm 1 mm 09900 22401 Small bore gauge 10 18 mm Measure the piston pin out...

Page 65: ...e Limit 10 040 mm 0 3952 in 09900 20605 Dial calipers 10 34 mm CONROD DEFLECTION Wear on the big end of the conrod can be estimated by checking the movement of the small end of the rod This method can also check the extent of wear on the conrod s big end Conrod deflection Service Limit 3 0 mm 0 12 in 09900 20607 Dial gauge 1 100 mm 09900 20701 Magnetic stand 09900 21304 V block set 100 mm P a r t ...

Page 66: ... the bearing removal is not neces sary CRANKSHAFT BEARING REMOVAL Remove the crankshaft bearing and cam drive gear with the suitable tool as shown in the photograph Play Play Remove the cam drive gear 1 together with the right crankshaft bearing The cam drive gear 1 is the cam timing gear Because extreme accuracy is required when press fitting it replacing the crankshaft assem bly is recommended P...

Page 67: ...suitable plate as shown in the illustration Press fit the cam drive gear 1 with the suitable tool Phase angle between the crank pin center A and the cam drive gear engraved line B 0 30 Suitable plate Right crankshaft bearing Cam drive gear 0 30 Crankshaft P a r t S h a r k c o m 8 7 7 9 9 9 5 6 8 6 ...

Page 68: ...ks as shown with the two end journals resting on the blocks Position the dial gauge as shown and rotate the crankshaft slowly to read the runout Replace the crankshaft if the runout is more than the service limit Crankshaft runout Service Limit 0 08 mm 0 003 in 09900 20607 Dial gauge 1 100 mm 09900 20701 Magnetic stand 09900 21304 V block set 100 mm CRANKSHAFT REASSEMBLY When rebuilding the cranks...

Page 69: ...P a r t S h a r k c o m 8 7 7 9 9 9 5 6 8 6 ...

Page 70: ...SEMBLY 3 9 ENGINE COMPONENTS INSPECTION AND SERVICING 3 15 CYLINDER HEAD 3 15 ROCKER ARM PUSH ROD 3 20 CAMSHAFT ASSEMBLY 3 21 UPPER CRANKCASE CYLINDER 3 21 PISTON AND PISTON RING 3 22 CONROD AND CRANKSHAFT 3 24 CAM ROCKER ARM 3 27 FINAL REDUCTION GEAR BOX AND CVT CASE 3 28 CVT CASE COVER 3 33 GENERATOR CASE 3 33 STARTER PINION 3 34 MOVABLE AND FIXED DRIVE AND DRIVEN FACE 3 35 RECOIL STARTER 3 43 E...

Page 71: ...x cover 4 NOTE Loosen the final reduction gear box cover bolts little by little and diagonally Remove the dowel pins 5 Remove the washer 6 and 7 Remove the drive shaft 8 Remove the counter shaft 9 with the special tool 09920 13120 Crankshaft separator COUNTER SHAFT INSPECTION Inspect the counter shaft wear or damage If it is worn or damaged replace it with a new one P a r t S h a r k c o m 8 7 7 9...

Page 72: ...llowing procedure if there is any thing unusual Remove the oil seal 1 with the special tool 09913 50121 Oil seal remover Remove the oil seal 2 with the special tool 09913 50121 Oil seal remover Remove the bearings with the special tool 09913 70210 Bearing installer set 09921 20240 Bearing remover set Play Play The removed oil seal must be replaced with a new one The removed oil seal must be replac...

Page 73: ...aring 1 99000 25010 SUZUKI SUPER GREASE A or equivalent Install the oil seal 2 with the special tool 09913 70210 Bearing installer set Apply SUZUKI SUPER GREASE A to the oil seal lip 99000 25010 SUZUKI SUPER GREASE A or equivalent The removed snap ring must be replaced with a new one The removed bearing should be replaced with a new one Press fit the bearing 1 1 1 5 mm 0 04 0 06 in from the end su...

Page 74: ...0210 Bearing installer set Apply SUZUKI SUPER GREASE A to the oil seal lip 99000 25010 SUZUKI SUPER GREASE A or equivalent BUSHING INSPECTION Inspect the CVT case bushing for wear or damage If anything unusual is found replace the bushing with a new one REASSEMBLY Install the counter shaft 1 into the CVT case with a plastic mallet P a r t S h a r k c o m 8 7 7 9 9 9 5 6 8 6 ...

Page 75: ...face 99000 31110 SUZUKI BOND 1215 or equivalent NOTE Make surfaces free from moisture oil dust and other foreign materials Spread on surfaces thinly to from an even layer and assemble the cover within few minutes Tighten the final reduction gear box cover bolts and drain plug 7 to the specified torque Final reduction gear box cover bolt 11 N m 1 1 kgf m 8 0 lb ft NOTE Tighten the drain plug 7 toge...

Page 76: ...ts are found replace it with a new one OIL SEAL INSPECTION Damage to the lip of the oil seal may result in leakage of the fuel air mixture or gear oil Inspect the oil seal and if it is dam aged replace it with a new one The removed snap ring must be replaced with a new one When installing a new snap ring pay attention to the direction of the snap ring Fit it to the side where the thrust is as show...

Page 77: ...il seal lip 99000 25010 SUZUKI SUPER GREASE A or equivalent STARTER PINION INSPECTION Check that the gear 1 rotates in the direction A when hold ing the gear 2 Check that the gear 1 rotates in the direction B and C when holding the gear 2 If anything unusual is found replace the starter pinion with a new one The removed oil seal must be replaced with a new one P a r t S h a r k c o m 8 7 7 9 9 9 5...

Page 78: ... Power reduction spacer G Movable driven face 6 Movable drive face H Fixed driven face 7 Roller I Bearing 8 Damper J Snap ring ITEM N m kgf m lb ft 9 Movable drive face plate K Needle bearing A Initial 13 1 3 9 5 0 Washer A Fixed drive face nut A Final 50 5 0 36 0 A Clutch housing B Clutch housing nut B 50 5 0 36 0 B Clutch shoe C Clutch shoe nut C 60 6 0 43 5 P a r t S h a r k c o m 8 7 7 9 9 9 5...

Page 79: ...ace them with new ones MOVABLE AND FIXED DRIVE FACE INSPECTION Inspect the drive face for any abnormal condition such as stepped wear or discoloration caused by burning If any defects are found replace them with new ones ROLLER INSPECTION Inspect each roller and their sliding surface for wear or damage If any defects are found replace the rollers as a set NOTE The rollers must always be changed as...

Page 80: ...ASSEMBLY Hold the clutch shoe assembly 1 with the special tool 09930 40113 Rotor holder Loosen the clutch shoe nut 2 Attach the special tool to the clutch shoe movable driven face assembly and compress the clutch shoe assembly by turning in the special tool handle 2 09922 31420 Clutch spring compressor Remove the clutch shoe nut 3 Do not remove the clutch shoe nut before attaching the clutch sprin...

Page 81: ...ovable driven face 9 INSPECTION Inspect the movable driven face metal A for wear or damage If anything unusual such as scratches in the movable driven face metal A replace it with a new one Inspect the rollers and pins for abnormal wear or damage If they are worn or damaged replace them with new ones Do not attempt to disassemble the clutch shoe assem bly P a r t S h a r k c o m 8 7 7 9 9 9 5 6 8 ...

Page 82: ... Remove the bearing 3 with the special tool 09913 70210 Bearing installer set CLUTCH SHOE INSPECTION Inspect the boss and centrifugal weight fulcrum sections for looseness damage and operation Inspect the clutch shoe for damage and fouling with oil on the surface If any abnormality is found replace the clutch shoe assembly with a new one Play Play The removed bearing should be replaced with a new ...

Page 83: ...CTION Measure the movable driven face spring free length with a ver nier calipers If the length is less than the service limit replace the spring with a new one Movable driven face spring free length Service Limit 73 0 mm 2 87 in 09900 20102 Vernier calipers DRIVE BELT Inspect that the drive belt is free from any greasy substance Inspect the contact surface of the drive belt for cracks or dam age ...

Page 84: ...g 3 Install the needle bearing 4 with a suitable spacer Apply SUZUKI SUPER GREASE A to the needle bearing 99000 25010 SUZUKI SUPER GREASE A or equivalent Install the movable driven face 5 onto the fixed driven face 2 Position the needle bearing with its punch mark out side P a r t S h a r k c o m 8 7 7 9 9 9 5 6 8 6 ...

Page 85: ...e 5 Compress the spring 9 with the special tool 09922 31420 Clutch spring compressor Tighten the clutch shoe nut temporarily Remove the special tool from the clutch shoe assembly Tighten the clutch shoe nut to the specified torque with the special tool 09930 40113 Rotor holder Clutch shoe nut 60 N m 6 0 kgf m 43 5 lb ft Align the flats A of the fixed driven face end and clutch shoe plate P a r t S...

Page 86: ...Starter cup 9 Spiral spring 3 Starter cup bolt 0 Starter case 4 Friction plate A Rope 5 Friction spring B Knob 6 Ratchet C Cap ITEM N m kgf m lb ft 7 Return spring A Recoil starter friction plate bolt A 5 4 0 54 4 0 P a r t S h a r k c o m 8 7 7 9 9 9 5 6 8 6 ...

Page 87: ...ntie a knot at the rope Hook the rope to the groove A of the reel 7 Turn the rope on the reel 7 properly Remove the reel 7 Remove the spiral spring 8 from the recoil starter case 9 Wear hand and eye protection when removing the reel since the spiral spring may quickly unwind and cause an injury P a r t S h a r k c o m 8 7 7 9 9 9 5 6 8 6 ...

Page 88: ...ing engage the part A of the reel with the spiral spring end 2 Hook the rope onto the hook part B of the reel Turn the reel counterclockwise three or four times with the rope Lace the end of the rope through the recoil starter case hole C Tie a knot at the end of the rope Install the cap 3 to the knob 4 Apply SUZUKI SUPER GREASE A to the sliding part of the ratchet and reel 99000 25010 SUZUKI SUPE...

Page 89: ...6 and ratchet 99000 25010 SUZUKI SUPER GREASE A or equivalent Align the friction spring 6 with the projection D of the ratchet Apply THREAD LOCK 1342 to the bolt 7 Tighten the bolt 7 to the specified torque 99000 32050 THREAD LOCK 1342 or equivalent Recoil starter friction plate bolt 5 4 N m 0 54 kgf m 4 0 lb ft Pull the rope and check that the ratchet is pushed out P a r t S h a r k c o m 8 7 7 9...

Page 90: ...A and 1st ring B 1st ring B has letter O marked on the side Be sure to bring the marked side to the top when fitting it to the piston 2nd ring A has letter R marked on the side Be sure to bring the marked side to the top when fitting it to the piston Position the gaps of three rings as shown Before inserting the piston into the cylinder check that the gaps are so located C 2nd ring Lower side rail...

Page 91: ...R GREASE A to the oil seal lip 99000 25010 SUZUKI SUPER GREASE A or equivalent Install the oil seal 2 to the crankshaft Install the crankshaft bearing retainer 3 to the upper crank case cylinder Apply engine oil to the cylinder Apply a small quantity of engine oil to the piston ring Install the piston and crankshaft to the upper crankcase cylin der Use new piston pin circlips to prevent circlip fa...

Page 92: ...5 or equivalent NOTE Use of SUZUKI BOND is as follows Make surfaces free from moisture oil dust and other foreign materials Spread on surfaces thinly to form an even layer and assemble the crankcases within few minutes Tighten the crankcase bolts to the specified torque Crankcase bolt 11 N m 1 1 kgf m 8 0 lb ft Install the bushing 1 to the upper crankcase cylinder Install the bushing 2 to the gene...

Page 93: ...assembly 1 and washer 2 Align the hole A of the camshaft 1 with the matching mark B on the cam drive gear 3 NOTE Piston must be at TDC before installing the cam assembly Apply SUZUKI BOND 1215 to the part shown in the photo graph 99000 31110 SUZUKI BOND 1215 or equivalent NOTE Make surfaces free from moisture oil dust and other foreign materials GENERATOR CASE Install the dowel pins 1 and gasket 2...

Page 94: ... 8 0 lb ft MOVABLE DRIVEN FACE Install the drive belt 1 to the movable driven face 2 NOTE With the clutch shoe spring compressed by hands install the drive belt 1 between the movable driven face 2 and fixed driven face The removed gasket must be replaced with a new one Degrease the drive belt contact surface pulley face Position the drive belt so that the arrow A points the engine rotating directi...

Page 95: ...e movable drive face assembly 2 and fixed drive face 3 NOTE Degrease the drive belt contact surfaces Install the starter cup assembly 4 wave washer and fixed drive face nut 5 NOTE The concave side of the washer must face the starter cup 4 Tighten the fixed drive face nut 5 to the specified torque with the special tool 09930 40113 Rotor holder Fixed drive face nut Initial 13 N m 1 3 kgf m 9 5 lb ft...

Page 96: ...gf m 8 0 lb ft NOTE Tighten the bolt A together with the clamp 5 Tighten the bolt B together with the earth terminal after remounting the engine GENERATOR ROTOR Tighten the generator coil bolts 1 and pick up coil bolts 2 Pass the generator lead wire to the generator case groove A Generator coil bolt 10 N m 1 0 kgf m 7 0 lb ft Pick up coil bolt 4 5 N m 0 45 kgf m 3 0 lb ft Install the key 3 NOTE De...

Page 97: ...1 CYLINDER HEAD Apply MOLYBDENUM OIL SOLUTION to both ends of the push rods 1 MOLYBDENUM OIL SOLUTION Install the push rods 1 to the cam rocker arm hollows A Turn the crankshaft counterclockwise and align the line B on the generator rotor with the index mark C of the generator case Be careful not to damage the generator coil by the special tool Hole Match mark P a r t S h a r k c o m 8 7 7 9 9 9 5...

Page 98: ... 6 Valve clearance when cold IN 0 05 0 10 mm 0 002 0 004 in EX 0 10 0 15 mm 0 004 0 006 in Valve clearance adjuster lock nut F 7 N m 0 7 kgf m 5 0 lb ft GENERATOR COVER Tighten the generator cover bolts to the specified torque Generator cover bolt 11 N m 1 1 kgf m 8 0 lb ft NOTE Tighten the bolt A together with the washer and clamp 1 7 15 The removed gasket must be replaced with a new one Install ...

Page 99: ...linder head cover bolts to the specified torque Cylinder head cover bolt 11 N m 1 1 kgf m 8 0 lb ft Tighten the spark plug to the specified torque with a spark plug wrench Spark plug 11 N m 1 1 kgf m 8 0 lb ft The removed gasket must be replaced with a new one P a r t S h a r k c o m 8 7 7 9 9 9 5 6 8 6 ...

Page 100: ...NG 4 3 REMOUNTING 4 4 CARBURETOR 4 5 SPECIFICATIONS 4 6 I D NO LOCATION 4 6 REMOVAL 4 7 DISASSEMBLY 4 8 CLEANING 4 11 INSPECTION AND ADJUSTMENT 4 11 REASSEMBLY AND REMOUNTING 4 12 Gasoline must be handled carefully in an area well ventilated and away from fire or sparks P a r t S h a r k c o m 8 7 7 9 9 9 5 6 8 6 ...

Page 101: ...ALVE 1 Fuel tank breather hose 6 Fuel hose 2 Fuel tank cap 7 O ring 3 Fuel tank inlet rubber 8 Vacuum hose 4 Fuel tank 9 Gasket ITEM N m kgf m lb ft 5 Fuel valve A Fuel valve bolt A 4 5 0 45 3 3 P a r t S h a r k c o m 8 7 7 9 9 9 5 6 8 6 ...

Page 102: ...ER INSPECTION AND CLEANING If the fuel filter is dirty with sediment or rust fuel will not flow smoothly and loss in engine power may result Clean the fuel filter with compressed air also check the fuel filter for cracks Gasoline is highly flammable and explosive Keep heat spark and flame away The gaskets and O ring must be replaced with new ones to prevent fuel leakage P a r t S h a r k c o m 8 7...

Page 103: ...s Tighten the fuel valve bolts to the specified torque Fuel valve bolt 4 5 N m 0 45 kgf m 3 3 lb ft NOTE Install the rounded side A of fuel hose to the fuel valve Install the fuel tank NOTE Fuel tank breather hose 1 routing 7 17 The removed O ring and gaskets must be replaced with new ones P a r t S h a r k c o m 8 7 7 9 9 9 5 6 8 6 ...

Page 104: ...w J Main jet 3 Spring B Air vent hose K Float pin 4 Spring seat C O ring L Float 5 Jet needle D Needle valve seat M Gasket 6 Piston valve E Needle valve N Float chamber 7 Starter plunger F Needle valve retainer O Drain hose 8 O ring G Screw 9 Washer H Pilot jet P a r t S h a r k c o m 8 7 7 9 9 9 5 6 8 6 ...

Page 105: ...ons ITEM SPECIFICATION Carburetor type MIKUNI VM13 Bore size 13 mm I D No 43G0 Idle r min 2 000 150 r min Float height 23 4 1 0 mm 0 92 0 04 in Main jet M J 58 8 Jet needle J N 3N39 1st Needle jet N J E 6 Pilot jet P J 12 5 Air screw A S PRE SET Throttle cable play 3 5 mm 0 12 0 20 in P a r t S h a r k c o m 8 7 7 9 9 9 5 6 8 6 ...

Page 106: ... Remove the vacuum hose 3 Loosen the drain plug 4 Drain the fuel from the carburetor Remove the drain hose 5 from the clamp Remove the carburetor top cap 6 with throttle cable and pis ton valve 7 Loosen the clamp bolt 8 Remove the carburetor mounting bolts nuts 9 Remove the carburetor assembly 0 P a r t S h a r k c o m 8 7 7 9 9 9 5 6 8 6 ...

Page 107: ...valve 2 from the throttle cable Remove the spring seat 3 Remove the jet needle 4 from the piston valve 2 Remove the drain hose 5 Remove the float chamber 6 The removed O rings and gasket must be replaced with new ones P a r t S h a r k c o m 8 7 7 9 9 9 5 6 8 6 ...

Page 108: ...Remove the float 9 Remove the needle valve 0 Remove the main jet A and needle jet B Remove the pilot jet C Remove the screw D Remove the needle valve retainer E and needle valve seat F Remove the throttle stop screw G P a r t S h a r k c o m 8 7 7 9 9 9 5 6 8 6 ...

Page 109: ...4 10 FUEL SYSTEM Remove the spring H washer I and O ring J Remove the choke lever K Remove the starter plunger L P a r t S h a r k c o m 8 7 7 9 9 9 5 6 8 6 ...

Page 110: ...ign matter is caught between the valve seat and the nee dle valve the gasoline will continue flowing and overflow If the needle valve is worn beyond the permissible limit similar trouble will occur Conversely if the needle valve sticks the gasoline will not flow into the float chamber Clean the float chamber and float parts with gasoline Some carburetor cleaning chemicals especially dip type soaki...

Page 111: ...rnier calipers Float height A 23 4 1 0 mm 0 92 0 04 in 09900 20102 Vernier calipers If the float height A is out of specification bend the float arm 1 to bring the float height A to the standard range After adjusting check the float height A again REASSEMBLY AND REMOUNTING Reassemble and remount the carburetor in the reverse order of removal and disassembly Pay attention to the following points AI...

Page 112: ...r equivalent Install the piston valve 2 to the carburetor Install the intake pipe clamp 3 7 18 Tighten the carburetor mounting bolts to the specified torque Carburetor mounting bolt 6 N m 0 6 kgf m 4 5 lb ft The gasket must be replaced with a new one The O ring must be replaced with a new one Align the slit A of the piston valve 2 with the projec tion B on the carburetor body P a r t S h a r k c o...

Page 113: ...14 FUEL SYSTEM After remounting the carburetor perform the following Inspect fuel leakage Engine idle r min adjustment 2 11 Throttle cable play adjustment 2 10 P a r t S h a r k c o m 8 7 7 9 9 9 5 6 8 6 ...

Page 114: ...AND DISASSEMBLY 5 12 REASSEMBLY AND REMOUNTING 5 14 STEERING AND FRONT SUSPENSION 5 16 CONSTRUCTION 5 16 REMOVAL AND DISASSEMBLY 5 18 INSPECTION 5 21 REASSEMBLY AND REMOUNTING 5 23 TOE IN ADJUSTMENT 5 27 REAR BRAKE AND REAR AXLE HOUSING 5 28 CONSTRUCTION 5 28 REMOVAL 5 29 INSPECTION AND DISASSEMBLY 5 31 REASSEMBLY AND REMOUNTING 5 33 REAR SUSPENSION 5 38 CONSTRUCTION 5 38 REMOVAL AND DISASSEMBLY 5...

Page 115: ...TION 1 Seat 5 Maintenance lid 9 Fuel tank cap 2 Battery holder 6 Front frame cover 0 Fuel tank inlet rubber 3 Frame center cover 7 Left frame cover A Fuel tank 4 Right frame cover 8 Front grip P a r t S h a r k c o m 8 7 7 9 9 9 5 6 8 6 ...

Page 116: ...et the center piece stick out toward the head so that the pawls 2 close Insert the fastener into the installation hole NOTE To prevent the pawl 2 from damage insert the fastener all the way into the installation hole Push in the head of center piece until it becomes flush with the fastener outside face P a r t S h a r k c o m 8 7 7 9 9 9 5 6 8 6 ...

Page 117: ... nut 1 Remove the front frame cover 2 NOTE indicates hook location LEFT FRAME COVER Remove the screws 1 and fasteners Remove the bolts 2 Remove the left frame cover 3 RIGHT FRAME COVER Remove the screws 1 and fasteners Remove the bolts 2 Remove the right frame cover 3 P a r t S h a r k c o m 8 7 7 9 9 9 5 6 8 6 ...

Page 118: ...then battery cable Remove the battery 1 Remove the fuse box 2 from the battery holder 3 Remove the battery holder 3 Remove the starter relay 4 from the frame center cover 5 Disconnect the couplers Remove the bolts Remove the fuel tank cap 6 Remove the frame center cover 5 NOTE Remount the fuel tank cap 6 after removing the frame center cover 5 P a r t S h a r k c o m 8 7 7 9 9 9 5 6 8 6 ...

Page 119: ...TING Remount the exterior parts in the reverse order of removal Pay attention to the following points FUEL TANK INLET RUBBER Align the fuel tank inlet rubber hollow A with the fuel tank lug B NOTE Make sure that the F mark C on the fuel tank inlet rubber is forward Forward P a r t S h a r k c o m 8 7 7 9 9 9 5 6 8 6 ...

Page 120: ...e wheels in the reverse order of removal Pay atten tion to the following points Installing each wheel make sure the arrow A on the tire points in the direction of rotation Tighten the wheel set nuts to the specified torque Front and rear wheel set nut 28 N m 2 8 kgf m 20 0 lb ft 1 Front tire 4 Rear wheel 2 Front wheel A Wheel set nut front rear ITEM N m kgf m lb ft 3 Rear tire A 28 2 8 20 0 P a r ...

Page 121: ...he tire on the rim by hand as shown NOTE Inspect the sealing portion of the rim before installing the tire on the rim When using the tire levers do not scratch or hit the sealing portion hump of the wheel or it may cause air leakage Never apply grease oil or gasoline to the tire bead because they will deteriorate the tire The standard tire fitted on this vehicle is AT16 8 7 for the front and rear ...

Page 122: ...e tire bead on both sides Then coat the bead with clean water and re seat the tire Adjust the tire pressure to the specified pressure Cold inflation tire pressure Front 20 kPa 0 20 kgf cm 2 9 psi Rear 20 kPa 0 20 kgf cm 2 9 psi Vehicle load capacity 38 kg 84 lbs Maximum operating pressure 25 kPa 0 25 kgf cm 3 6 psi 35 kPa 0 35 kgf cm 5 1 psi 45 kPa 0 45 kgf cm 6 5 psi Place the tire under a protec...

Page 123: ...e dust seal 4 Wheel hub outer bearing C Brake plate 5 Front wheel hub D Brake cam lever 6 Spacer E Front brake cam lever bolt 7 Wheel hub inner bearing F Spring ITEM N m kgf m lb ft 8 Inner dust seal A Front hub nut A 65 6 5 47 0 9 Front brake shoe B Front brake cam lever nut B 3 3 0 33 2 5 P a r t S h a r k c o m 8 7 7 9 9 9 5 6 8 6 ...

Page 124: ... the front wheel hub 2 Remove the front brake shoe assembly 3 Remove the spring 4 Remove the front brake adjusting nut 5 Remove the front brake cam lever nut 6 and bolt 7 Remove the brake cam lever 8 and front brake camshaft 9 The removed cotter pin must be replaced with a new one P a r t S h a r k c o m 8 7 7 9 9 9 5 6 8 6 ...

Page 125: ...09900 20101 Vernier calipers Brake drum I D Service Limit 80 7 mm 3 18 in BRAKE SHOE Inspect the brake shoes for wear or damage If they are worn or damaged replace it with new ones FRONT BRAKE DUST SEAL Inspect the front brake dust seal for wear or damage If any defects are found replace it with a new one NOTE Apply adhesive all around of the new dust seal and attach it to the brake plate Replace ...

Page 126: ...h rotation If there is any thing unusual replace the bearing with a new one Remove the wheel hub inner bearing with the special tool 09941 50111 Bearing remover Remove the spacer 1 Remove the wheel hub outer bearing with the special tool 09941 50111 Bearing remover The removed dust seal must be replaced with a new one The removed bearing should be replaced with a new one The removed bearing should...

Page 127: ...ter bearing with the special tool 09924 84521 Bearing installer set A Clearance Apply 3 grams of grease to the each dust seal lip before installing it Install the dust seals with the special tool 09913 70210 Bearing installer set 99000 25161 WATER RESISTANCE GREASE or equiv alent First install the wheel hub inner bearing then install the spacer and outer bearing The sealed cover of the bearing mus...

Page 128: ...he front wheel hub and spring Tighten front brake cam lever nut to the specified torque Front brake cam lever nut 3 3 N m 0 33 kgf m 2 5 Ib ft Tighten the front hub nut 3 to the specified torque Front hub nut 65 N m 6 5 kgf m 47 0 Ib ft Install the new cotter pin to the nut Install the front wheel 5 8 After installing the front brake adjust the following item Front brake lever play 2 17 Be careful...

Page 129: ...ront suspension arm nut A Front shock absorber upper bolt A 29 2 9 21 0 5 Tie rod B Front shock absorber lower bolt B 29 2 9 21 0 6 Inner tie rod end C Front suspension arm bolt C 50 5 0 36 0 7 Outer tie rod end D Tie rod locknut D 29 2 9 21 0 8 Knuckle arm bolt E Tie rod end nut E 29 2 9 21 0 9 Dust seal F Knuckle arm nut F 50 5 0 36 0 P a r t S h a r k c o m 8 7 7 9 9 9 5 6 8 6 ...

Page 130: ...ring shaft bushing 3 Handlebar lower holder 9 O ring ITEM N m kgf m lb ft 4 Steering shaft A Handlebar clamp bolt A 26 2 6 19 0 5 Steering shaft holder B Steering shaft holder bolt B 23 2 3 16 5 6 Dust seal C Steering shaft lower nut C 29 2 9 21 0 P a r t S h a r k c o m 8 7 7 9 9 9 5 6 8 6 ...

Page 131: ...brake cable 1 Remove the cotter pin and knuckle arm nut 2 Remove the cotter pin and tie rod end nut 3 Remove the knuckle arm 4 and bolt 5 Remove the front shock absorber 6 Remove the front suspension arm 7 The removed cotter pin must be replaced with a new one The removed cotter pin must be replaced with a new one P a r t S h a r k c o m 8 7 7 9 9 9 5 6 8 6 ...

Page 132: ...73210 Bearing remover 09930 30104 Sliding shaft STEERING Remove the front frame cover 5 4 Remove the front suspension 5 19 Remove the front and rear brake cables Remove the throttle case cover screws Remove the throttle cable Disconnect the ignition switch coupler P a r t S h a r k c o m 8 7 7 9 9 9 5 6 8 6 ...

Page 133: ...ve the tie rods Remove the handlebar clamp bolts Remove the cotter pins Remove the steering shaft holder and steering shaft The removed cotter pins must be replaced with new ones The removed O ring must be replaced with a new one The removed cotter pins must be replaced with new ones P a r t S h a r k c o m 8 7 7 9 9 9 5 6 8 6 ...

Page 134: ...amp wear DUST SEALS AND O RING Inspect the dust seals and O ring for wear or damage If any defects are found replace them with new ones KNUCKLE ARM BUSHING Insert the spacer into the bushing and inspect for abnormal noise and smooth rotation while rotating the spacer If any defects are found replace it with a new one The removed steering shaft bushing must be replaced with a new one The locknuts 6...

Page 135: ...E ROD END Inspect the tie rod for distortion and the boot for wear and tie rod end for smooth movement If any defects are found replace it with a new one STEERING SHAFT AND HOLDER Inspect the steering shaft for distortion or bends If any defects are found replace it with a new one Inspect the steering shaft holders for wear or damage If any defects are found replace them with new ones Do not attem...

Page 136: ...dust seals 3 O ring 4 and steering shaft 5 before remounting the steering shaft 5 99000 25161 WATER RESISTANCE GREASE or equiv alent Install the steering shaft lower dust seal 1 steering shaft holders 2 dust seals 3 and O ring 4 to the steering shaft 5 Tighten the steering shaft lower nut to the specified torque and install the new cotter pin Steering shaft lower nut 29 N m 2 9 kgf m 21 0 Ib ft To...

Page 137: ...m 21 0 lb ft NOTE After installing the tie rod end nuts install the new cotter pins into the tie rod ends When installing the tie rod end make sure the punched mark L on the tie rod ends come inside NOTE The locknuts 1 have left hand threads HANDLEBAR Set the white mark on the handlebar lower holder to the for ward Align the punched mark on the handlebars with matching sur face of the handlebar ho...

Page 138: ...DLEBAR SWITCH Align the handlebar switch lug 1 with the handlebar hole 2 THROTTLE LEVER CASE Align the throttle lever case lug 1 with the handlebar hole 2 FRONT SUSPENSION Install the knuckle arm bushing with the special tool 09924 84510 Bearing installer set Apply grease to the knuckle arm bushings dust seals and spacer Install the spacer and the dust seals 99000 25161 WATER RESISTANCE GREASE or ...

Page 139: ...e specified torque and install the new cotter pin Knuckle arm nut 50 N m 5 0 kgf m 36 0 Ib ft Tighten the tie rod end nut to the specified torque and install the new cotter pin Tie rod end nut 29 N m 2 9 kgf m 21 0 Ib ft NOTE Make sure that the steering turns smoothly in both directions Install the front brake 5 16 Install the front grip 5 6 Install the front wheel 5 8 After installing the front b...

Page 140: ...y tighten the four locknuts 3 Check that the distance C and D are equal as shown If the distances are not equal adjust the tie rod to the right or left until the toe in is within specification Check the toe in again by measuring distance A and B If the toe in is not within specification repeat the adjustment as above until the proper toe in is obtained and distance C and D become equal After adjus...

Page 141: ... Rear brake shoe O Rear sprocket mounting flange 9 Rear brake panel P Rear sprocket 0 Rear brake camshaft Q Rear sprocket washer A O ring R Spacer R B Brake lining indicator plate A Rear hub nut ITEM N m kgf m lb ft C Spring B Rear brake panel nut A 75 7 5 54 0 D Rear brake cam lever bolt C Rear brake cam lever nut B 28 2 8 20 0 E Rear brake cam lever D Rear axle housing bolt C 7 7 0 77 5 5 F Rear...

Page 142: ...the rear wheels Remove the center cap holder 2 rear axle washer 3 and rear wheel hub 4 Remove the spacers left 5 and right 6 Remove the chain case cover Loosen the drive chain 2 14 Remove the rear sprocket The removed cotter pin must be replaced with a new one P a r t S h a r k c o m 8 7 7 9 9 9 5 6 8 6 ...

Page 143: ...move the rear brake drum cover Remove the rear axle Remove the rear brake drum Remove the rear brake shoes 7 Disconnect the rear brake cable 8 Remove the rear brake panel 9 P a r t S h a r k c o m 8 7 7 9 9 9 5 6 8 6 ...

Page 144: ...using INSPECTION AND DISASSEMBLY BRAKE DRUM Inspect the brake drum and measure the brake drum I D to determine the extent of wear Replace the brake drum if the measurement exceeds the service limit The value of this limit is indicated inside the brake drum 09900 20101 Vernier calipers Brake drum I D Service Limit 110 7 mm 4 36 in P a r t S h a r k c o m 8 7 7 9 9 9 5 6 8 6 ...

Page 145: ...it 3 mm 0 12 in STOPPER RING Inspect the stopper ring for wear or damage If any wear or defects are found replace it with a new one REAR SPROCKET Inspect the sprocket teeth for wear If they are worn as illus trated replace the sprocket and drive chain A Normal wear B Excessive wear Unlock the rear sprocket washer 1 Remove the bolts and rear sprocket 2 Remove the rear sprocket washer 1 Replace the ...

Page 146: ...gs with the special tool 09921 20240 Bearing remover set Remove the spacer 1 REASSEMBLY AND REMOUNTING Reassemble and remount the rear brake and rear axle housing in the reverse order of removal and disassembly Pay attention to the following points BEARING AND REAR AXLE HOUSING Apply SUZUKI SUPER GREASE A to the rear axle housing bearings and the lip of the dust seals before installing them 99000 ...

Page 147: ...sing bolt 50 N m 5 0 kgf m 36 0 lb ft REAR BRAKE Apply SUZUKI SUPER GREASE A to the rear brake cam shaft and new O rings 99000 25010 SUZUKI SUPER GREASE A or equivalent Install the new O rings into the brake camshaft hole First install the left bearing 1 then install the spacer 2 and right bearing 3 The sealed cover of the bearing must face outside Left Right Left Right Clearance P a r t S h a r k...

Page 148: ...aft NOTE Align the groove C on the camshaft with the tongue D of the indicator plate Tighten the rear brake cam lever nut to the specified torque Rear brake cam lever nut 7 7 N m 0 77 kgf m 5 5 Ib ft Tighten the rear brake panel nut to the specified torque Rear brake panel nut 28 N m 2 8 kgf m 20 0 Ib ft Connect the rear brake cable Indicator plate Rear brake camshaft P a r t S h a r k c o m 8 7 7...

Page 149: ...r sprocket 1 should face out side Tighten the rear sprocket bolt to the specified torque Rear sprocket bolt 23 N m 2 3 kgf m 16 5 Ib ft Bend the rear sprocket washers 2 Install the new stopper ring 3 and rear sprocket 1 Install the rear axle Be careful not to apply too much grease to the cam and pin If grease gets on the lining brake slippage will result P a r t S h a r k c o m 8 7 7 9 9 9 5 6 8 6...

Page 150: ...d torque Rear hub nut 75 N m 7 5 kgf m 54 0 Ib ft Install the new cotter pin NOTE Bend the cotter pin to outside After installing the rear brake and rear axle housing adjust the following items Rear brake lever play 2 17 Drive chain slack 2 14 to 16 P a r t S h a r k c o m 8 7 7 9 9 9 5 6 8 6 ...

Page 151: ...wingarm pivot shaft 3 Chain case cover A Rear shock absorber bolt ITEM N m kgf m lb ft 4 Rear shock absorber lower bolt B Rear shock absorber nut A 29 2 9 21 0 5 Swingarm pivot bushing C Swingarm pivot nut B 29 2 9 21 0 6 Swingarm C 102 10 2 74 0 P a r t S h a r k c o m 8 7 7 9 9 9 5 6 8 6 ...

Page 152: ...le housing 5 31 and 5 32 Remove the chain case 1 Remove the rear shock absorber lower bolt 2 Remove the rear shock absorber bolt 3 Remove the rear shock absorber 4 Remove the swingarm pivot nut 5 and shaft Remove the swingarm 6 P a r t S h a r k c o m 8 7 7 9 9 9 5 6 8 6 ...

Page 153: ...04 V block set 100 mm Swingarm pivot shaft rumout Service Limit 0 6 mm 0 02 in SWINGARM Inspect the swingarm for distortion or damage If any defects are found replace it with a new one BUSHING Inspect the bushing for wear or damage If any defects are found replace it with a new one REASSEMBLY AND REMOUNTING Reassemble and remount the rear suspension in the reverse order of removal and disassembly ...

Page 154: ...2 and bushing edge A is 1 5 mm 0 059 in Tighten the swingarm pivot nut to the specified torque Swingarm pivot nut 102 N m 10 2 kgf m 74 0 Ib ft Tighten the rear shock absorber bolt to the specified torque Rear shock absorber bolt 29 N m 2 9 kgf m 21 0 Ib ft Tighten the rear shock absorber nut to the specified torque Rear shock absorber nut 29 N m 2 9 kgf m 21 0 Ib ft 1 5 mm 0 059 in P a r t S h a ...

Page 155: ... Install the rear axle housing and rear brake 5 35 to 37 After installing the rear suspension adjust the following items Rear brake lever play 2 17 Drive chain slack 2 15 P a r t S h a r k c o m 8 7 7 9 9 9 5 6 8 6 ...

Page 156: ... CHARGING SYSTEM 6 7 TROUBLESHOOTING 6 7 INSPECTION 6 8 STARTER SYSTEM 6 11 TROUBLESHOOTING 6 11 STARTER MOTOR REMOVAL 6 12 STARTER MOTOR DISASSEMBLY 6 13 STARTER MOTOR INSPECTION 6 14 STARTER MOTOR REASSEMBLY 6 15 STARTER MOTOR INSTALLATION 6 16 STARTER RELAY INSPECTION 6 16 IGNITION SYSTEM 6 18 TROUBLESHOOTING 6 18 INSPECTION 6 20 SWITCHES 6 23 BATTERY 6 24 SPECIFICATIONS 6 24 INITIAL CHARGING 6...

Page 157: ...d do not pull the lead wires Inspect each terminal on the coupler for being loose or bent Inspect each terminal for corrosion and contamination CLAMP Clamp the wiring harness at such positions as indicated in WIRING HARNESS ROUTING 7 14 Bend the clamp properly so that the wiring harness is clamped securely In clamping the wiring harness use care not to allow it to hang down Do not use wire or any ...

Page 158: ...Be sure to recharge the battery in a well ventilated and open area Note that the charging system for the MF battery is different from that of a conventional battery Do not replace the MF battery with a conventional battery CONNECTING THE BATTERY When disconnecting terminals from the battery for disassem bly or servicing be sure to disconnect the battery lead wire first When connecting the battery ...

Page 159: ...ed the tester will be damaged After using the tester be sure to turn the switch to the OFF position 09900 25008 Multi circuit tester set NOTE When connecting the multi circuit tester use the needle pointed probe to the back side of the lead wire coupler and connect the probes of tester to them Use the needle pointed probe to prevent the rubber of the water proof coupler from damage 09900 25009 Nee...

Page 160: ...ECTRICAL SYSTEM 6 5 LOCATION OF ELECTRICAL COMPONENTS 1 Battery 2 Starter relay 3 Fuse box 4 CDI unit 5 Ignition coil 6 Starter motor 7 Generator 8 Pick up coil P a r t S h a r k c o m 8 7 7 9 9 9 5 6 8 6 ...

Page 161: ...6 6 ELECTRICAL SYSTEM 1 Ignition switch 2 Parking brake switch 3 Engine stop switch 4 Starter button 5 Regulator rectifier 6 Remote engine stop switch P a r t S h a r k c o m 8 7 7 9 9 9 5 6 8 6 ...

Page 162: ...y terminals 6 9 Is the regulated voltage OK Step 4 1 Measure the resistance of the generator coil 6 9 Is the resistance of generator coil OK YES Remove accessories NO Go to Step 2 YES Go to Step 3 NO Short circuit of wiring harness Faulty electrical equipment YES Faulty battery Abnormal driving condition NO Go to Step 4 YES Go to Step 5 NO Faulty generator coil Disconnected lead wires Generator Re...

Page 163: ...onnect the battery lead wire 1 Measure the current between battery terminal and the bat tery lead wire with the multi circuit tester If the reading exceeds the specified value leakage is evident 09900 25008 Multi circuit tester set Tester knob indication Current 20 mA Battery current leak Under 1 mA YES Go to Step 6 NO Faulty generator YES Go to Step 7 NO Faulty regulator rectifier YES Faulty batt...

Page 164: ...tester set Tester knob indication Voltage Regulated voltage Charging output 13 5 15 2 V at 2 800 r min GENERATOR COIL RESISTANCE Remove the left frame cover 5 4 Disconnect the generator coupler 1 Measure the resistance between the W R wire and ground with the multi circuit tester If the resistance is not within the standard range replace the generator coil with a new one 09900 25008 Multi circuit ...

Page 165: ... is cold REGULATOR RECTIFIER Remove the frame center cover 5 5 Disconnect the regulator rectifier coupler 1 Remove the regulator rectifier 2 Measure the voltage between the terminals with the multi circuit tester as indicated in the table below If the voltage is not within the specified value replace the regulator rectifier with a new one 09900 25008 Multi circuit tester set Tester knob indication...

Page 166: ...s a click sound heard Step 2 1 Check if the starter motor runs when its terminal is connected to the battery terminal Does the starter motor run YES Go to Step 2 NO Go to Step 3 YES Faulty starter relay Loose or disconnected starter motor lead wire Loose or disconnected between starter relay and battery terminal NO Faulty starter motor Starter relay Starter button Parking brake switch Starter moto...

Page 167: ...ty starter pinion 3 34 STARTER MOTOR REMOVAL Disconnect the battery lead wire Remove the right frame cover 5 4 Remove the starter motor 1 Disconnect the starter motor lead wire 2 YES Go to Step 4 NO Faulty engine stop switch Faulty starter button Faulty parking brake switch Faulty remote engine stop switch Faulty ignition switch Poor contact of connector Open circuit in wiring harness YES Poor con...

Page 168: ...13 STARTER MOTOR DISASSEMBLY Disassemble the starter motor as shown in the illustration 1 Starter motor case 4 Housing end assembly 2 Armature 5 O ring 3 Starter motor lead wire P a r t S h a r k c o m 8 7 7 9 9 9 5 6 8 6 ...

Page 169: ...ew one If the commutator surface is discolored polish it with 400 sand paper and wipe it with a clean dry cloth If there is no undercut scrape out the insulator with a saw blade 1 Insulator 2 Segment ARMATURE COIL INSPECTION Check for continuity between each segment and between each segment and the armature shaft with the multi circuit tester If there is no continuity between the segments or there...

Page 170: ...ER MOTOR REASSEMBLY Reassemble the starter motor in the reverse order of disassem bly Pay attention to the following points Apply SUZUKI SUPER GREASE A to the lip of the oil seal 99000 25010 SUZUKI SUPER GREASE A or equivalent Apply a small quantity of SUZUKI MOLY PASTE to the arma ture shaft 99000 25140 SUZUKI MOLY PASTE or equivalent Apply SUZUKI SUPER GREASE A to the O ring 99000 25010 SUZUKI S...

Page 171: ...st check the insulation between A and B terminals with the multi circuit tester Then apply 12 V to terminals as shown and check the continuity between A and B If there is no continuity replace the starter relay with a new one 09900 25008 Multi circuit tester set Tester knob indication Continuity test Do not apply battery voltage to the starter relay for more than five seconds since the relay coil ...

Page 172: ...nals with the multi circuit tester If the resistance is not within the standard range replace the starter relay with a new one 09900 25008 Multi circuit tester set Tester knob indication Resistance Ω Starter relay resistance 70 90 Ω P a r t S h a r k c o m 8 7 7 9 9 9 5 6 8 6 ...

Page 173: ...arged before diagnos ing Step 1 1 Check the ignition system couplers for poor connections Is there connection in the ignition system couplers YES Go to Step 2 NO Poor connection of couplers O W B Ignition coil Engine stop switch Spark plug Fuse 10A Battery Generator Pick up coil CDI unit W R B W B W W R Br Br O W O W O W W B B O G O G O G O O W Parking brake switch Remote engine stop switch R R W ...

Page 174: ...il OK Step 7 1 Measure the pick up coil peak voltage and resistance 6 21 to 22 NOTE The pick up coil peak voltage inspection is applicable only with the multi circuit tester and peak volt adaptor Is the peak voltage and resistance OK YES Go to Step 3 NO Faulty ignition switch Faulty remote engine stop switch Faulty engine stop switch Broken wiring harness or poor connection of related circuit coup...

Page 175: ... 09900 25008 Multi circuit tester set Turn the ignition switch to the ON position Press the starter button and allow the engine to crank for a few seconds and then measure the ignition coil primary peak voltage Repeat the above procedure a few times and measure the highest ignition coil primary peak voltage Tester knob indication Voltage Ignition coil primary peak voltage 150 V and more If the vol...

Page 176: ... the seat 5 4 NOTE Make sure all of the couplers are connected properly Disconnect the CDI unit coupler 1 Measure the pick up coil peak voltage in the following proce dure Connect the multi circuit tester with the peak volt adaptor as follows Pick up coil Probe Brown lead wire Probe Black White lead wire or ground 09900 25008 Multi circuit tester set Turn the ignition switch to the ON position Pre...

Page 177: ... CDI unit coupler Tester knob indication Voltage Pick up coil peak voltage 1 5 V and more If the peak voltage on the generator coupler is within the specifi cation but on the CDI unit coupler is not within specification replace the wiring harness with a new one If both peak voltages are not within specification replace the generator coil with a new one PICK UP COIL RESISTANCE Remove the left frame...

Page 178: ...CH ENGINE STOP SWITCH STARTER BUTTON PARKING BRAKE SWITCH REMOTE ENGINE STOP SWITCH Color ON OFF RUN Position B Y B W R O Color Position O G O W Color Position B W Y G OFF SECEDE SET ON Color Position O W B Color Position O O G WIRE COLOR O Orange R Red B W Black with White tracer B Y Black with Yellow tracer O G Orange with Green tracer O W Orange with White tracer W B White with Black tracer Y G...

Page 179: ...2 NOTE After filling the electrolyte completely use the removed cap 2 as sealing caps of battery filler holes Do not remove or pierce the sealed areas 3 of the electrolyte container Insert the nozzles of the electrolyte container 4 into the bat tery s electrolyte filler holes holding the container firmly so that it does not fall Take precaution not to allow any of the fluid to spill Make sure air ...

Page 180: ... above the upper surface of the battery s top cover For initial charging use the charger specially designed for MF battery Never use anything except the specified battery Once the caps have been installed to the battery do not remove the caps Do not tap the caps with a tool such as hammer when installing them CORRECT INCORRECT For charging the battery make sure to use the charger specially designe...

Page 181: ...echarging time 0 5 A for 5 to 10 hours or 5 A for 30 min utes After recharging wait for 30 minutes and more and check the battery voltage with a multi circuit tester If the battery voltage is the 12 5 V and less recharge the bat tery again If battery voltage is still 12 5 V and less after recharging replace the battery with a new one When the vehicle is not used for a long period check the bat ter...

Page 182: ...RNESS CABLE AND HOSE ROUTING 7 14 WIRING HARNESS ROUTING 7 14 CABLE ROUTING 7 16 FUEL HOSE PIPING 7 17 CARBURETOR AND CVT CASE HOSE ROUTING 7 18 HANDLEBARS AND HANDLEBAR PAD INSTALLATION 7 19 HEAT SHIELD INSTALLATION 7 20 SPECIAL TOOLS 7 21 TIGHTENING TORQUE 7 23 ENGINE 7 23 FUEL 7 23 CHASSIS 7 24 TIGHTENING TORQUE CHART 7 25 SERVICE DATA 7 26 P a r t S h a r k c o m 8 7 7 9 9 9 5 6 8 6 ...

Page 183: ...tive ignition coil Open circuited wiring connections Defective generator coil 3 No fuel reaching the carburetor Clogged fuel hose Clogged or defective fuel valve Defective carburetor needle valve Clogged fuel filter Adjust Repair or replace Adjust Replace Replace See electrical section Retighten Repair or replace Tighten Replace Replace Replace Clean or replace Clean and dry Replace Replace Repair...

Page 184: ...e drive and driven face Worn or slipping drive belt Worn rollers in movable drive face Adjust Replace Replace Replace Clean Replace Replace Replace Replace Replace Replace bearing retainer Replace Replace Symptom possible causes and remedy Worn or damaged clutch shoe Worn clutch housing Replace Replace Symptom possible causes and remedy Valve clearance out of adjustment Poor seating of valves Defe...

Page 185: ...iming advance circuit Defective CDI unit Defective ignition coil Defective generator coil Low float chamber fuel level Clogged fuel hose resulting in inadequate fuel supply to the carburetor Clogged fuel valve Clogged air cleaner element Sucking air from carburetor joint Replace Replace Adjust Adjust Replace Replace Replace Replace Adjust float height Clean and prime Clean Clean or replace Repair ...

Page 186: ...ace Tighten or replace Adjust float height Replace Retighten or replace Drain out excess oil Symptom possible causes and remedy Heavy carbon deposit on piston head Not enough oil in the engine Use of incorrect engine oil Low float chamber fuel level Air leakage from intake pipe Incorrect spark plug Clogged exhaust pipe muffler Ignition timing too advanced due to defective tim ing Clean Add oil Cha...

Page 187: ... or loose pilot jet Air leaking from carburetor joint Clogged pilot outlet port Clogged bypass port Starter plunger not fully closed Clean or tighten Tighten or replace defective part Clean Clean Adjust Symptom possible causes and remedy Clogged main jet Clogged needle jet Improperly working piston valve Clogged fuel filter Clean Clean Adjust Clean or replace Symptom possible causes and remedy Wor...

Page 188: ... or worn suspension arms and related bushings Distorted front wheels Loose chassis nuts and bolts Regulate Tighten Replace Replace or tighten Replace Replace Replace Tighten Symptom possible causes and remedy Unequally inflated tires Improper front wheel alignment Worn front wheel hub bearings Distorted frame Defective shock absorber Regulate Adjust Replace Repair or replace Replace Symptom possib...

Page 189: ...torted wheel rims Damaged or worn rear axle housing bearings Defective or incorrect tires Defective rear axle Loose nuts or bolts on rear suspension Loose rear wheel hub nuts Loosen rear axle housing mounting bolts Improper rear brake adjustment Rear shock absorber leaks oil Damaged or worn rear swingarm and related bush ings Replace Replace Replace Replace Retighten Tighten Tighten Adjust Replace...

Page 190: ...t Symptom possible causes and remedy Carbon adhesion on lining surface Loose front wheel hub nut or rear wheel hub nut Damaged wheel hub bearings Worn linings Wrongly fixed spring Repair surface with sandpaper Tighten to specified torque Replace Replace Set correctly Symptom possible causes and remedy Worn brake lever cam Replace brake cam Symptom possible causes and remedy Rusty part Insufficient...

Page 191: ...ems in valve guides Worn stem oil seal Replace Replace Replace Replace Symptom possible causes and remedy Too hot spark plug Overheated the engine Loose spark plug Too lean mixture Replace with cold type plug Tune up Retighten Adjust carburetor Symptom possible causes and remedy Open or short circuited lead wires or loose lead connections Short circuited grounded or open generator coil Short circu...

Page 192: ...cuiting Internally short circuited generator Defective regulator rectifier Repair or replace Replace Replace Symptom possible causes and remedy Run down battery Defective switch contacts Brushes not seating properly on starter motor commutator Defective starter relay Defective main fuse Repair or replace Replace Repair or replace Replace Replace P a r t S h a r k c o m 8 7 7 9 9 9 5 6 8 6 ...

Page 193: ...ercharging Internal short circuit in the battery Too low battery voltage Too old battery Check the generator regulator rectifier and circuit connections and make necessary adjustments to obtain specified charging operation Replace the battery and correct the charging sys tem Replace the battery Recharge the battery fully Replace the battery Symptom possible causes and remedy Incorrect charging rat...

Page 194: ... B W B R B W B O W R R B B W Y G B W B W R R W R B B W B W W R R W Br W R O G O Br W R O G O B W B W R R W R B B W B W W R R W Br W R O G O Br W R O G O R R W B W B W B O W Y G W B O W O G O R W W B O Y G B W O W O G O R B W B Y WIRE COLOR B Black Br Brown O Orange R Red B W Black with White tracer B Y Black with Yellow tracer O B Orange with Black tracer O G Orange with Green tracer O W Orange wi...

Page 195: ...us terminal Engine ground Remote engine stop switch case Wiring harness To the rear fender Regulator rectifier Clamp Clamp Starter motor Generator Remote engine stop switch Remote engine stop switch Clamp Wiring harness Clamp Generator Storter motor Wiring harness Clamp Ignition switch Clamp Handlebar switch L P a r t S h a r k c o m 8 7 7 9 9 9 5 6 8 6 ...

Page 196: ...SERVICING INFORMATION 7 15 Clamp Clamp Generator lead wire Starter motor lead wire Pick up coil Generator rotor Handleber switch leadwire 2 0 5 P a r t S h a r k c o m 8 7 7 9 9 9 5 6 8 6 ...

Page 197: ... cable R Align the clearance less than 1 mm difference between W1 and W2 Front brake cable L Throttle cable Front brake cable L Front brake cable L Rear brake cable Front brake cable R Front brake cable L Throttle cable Rear brake cable Align the slit of bracket with axle housing Rear brake cable W1 4 6 mm 0 16 0 24 in Rear brake cable Wiring harness Front brake cable R Front brake cable L Throttl...

Page 198: ...l tank breather hose Handlebars Fuel hose Clip Vacuum hose Clip Air vent hose Fuel valve Clip Fuel hose Install the rounded side of fuel hose to the fuel valve Throttle cable Carburetor top cap Air breather hose Air vent hose Fuel tank breather hose Throttle cable Cable guide P a r t S h a r k c o m 8 7 7 9 9 9 5 6 8 6 ...

Page 199: ...INFORMATION CARBURETOR AND CVT CASE HOSE ROUTING Clamp Clamp Clamp CVT case breather hose Clamp Clamp Clamp Clamp Drain hose Screw Screw Left Right Lower Upper Air vent hose P a r t S h a r k c o m 8 7 7 9 9 9 5 6 8 6 ...

Page 200: ...ebar upper holder Handlebar lower holder Align the center of knurling on handlebars with the center of handlbar holders Handlebar clamp bolt Handlebars Clamp Clamp Clamp Handlebar pad Handlebar pad Handlebars Handlebars Punched mark P a r t S h a r k c o m 8 7 7 9 9 9 5 6 8 6 ...

Page 201: ...7 20 SERVICING INFORMATION HEAT SHIELD INSTALLATION Right frame cover Heat shield 0 4 mm 0 0 16 in 13 17 mm 0 51 0 67 in P a r t S h a r k c o m 8 7 7 9 9 9 5 6 8 6 ...

Page 202: ...tic stand 09900 20803 09900 20806 Thickness gauge 09900 20805 Tire depth gauge 09900 21304 V block set 100 mm 09900 22401 10 18 mm Small bore gauge 09900 25008 Multi circuit tester set 09900 25009 Needle pointed probe set 09913 50121 Oil seal remover 09913 70210 Bearing installer set 09913 10750 Adaptor 09915 64512 Compression gauge set 09920 13120 Crankshaft separator 09921 20240 Bearing remover ...

Page 203: ...her it is available or not 09923 73210 Bearing remover 09924 84510 Bearing installer set 09924 84521 Bearing installer set 09930 30104 Sliding shaft 09930 40113 Rotor holder 09941 34513 Steering race installer 09941 50111 Bearing remover P a r t S h a r k c o m 8 7 7 9 9 9 5 6 8 6 ...

Page 204: ...k up coil bolt 4 5 0 45 3 0 Crankcase bolt 11 1 1 8 0 Generator case bolt 11 1 1 8 0 CVT case bolt 11 1 1 8 0 Generator cover bolt 11 1 1 8 0 CVT case cover bolt 11 1 1 8 0 Engine oil drain plug 12 1 2 8 5 Final reduction gear box cover bolt 11 1 1 8 0 Engine mounting nut 31 3 1 22 5 Muffler mounting bolt 23 2 3 16 5 Exhaust pipe nut 10 1 0 7 0 Recoil starter friction plate bolt 5 4 0 54 4 0 Spark...

Page 205: ... 29 2 9 21 0 lower 29 2 9 21 0 Front hub nut 65 6 5 47 0 Wheel set nut front and rear 28 2 8 20 0 Front brake cable equalizer bolt 6 5 0 65 4 5 Front brake cam lever nut 3 3 0 33 2 5 Swingarm pivot nut 102 10 2 74 0 Rear shock absorber bolt 29 2 9 21 0 Rear shock absorber nut 29 2 9 21 0 Rear hub nut 75 7 5 54 0 Rear brake cam lever nut 7 7 0 77 5 5 Rear brake panel nut 28 2 8 20 0 Rear axle housi...

Page 206: ...rked bolt N m kgf m lb ft N m kgf m lb ft 4 1 5 0 15 1 0 2 3 0 23 1 5 5 3 0 3 2 0 4 5 0 45 3 0 6 5 5 0 55 4 0 10 1 0 7 0 8 13 1 3 9 5 23 2 3 16 5 10 29 2 9 21 0 50 5 0 36 0 12 45 4 5 32 5 85 8 5 61 5 14 65 6 5 47 0 135 13 5 97 5 16 105 10 5 76 0 210 21 0 152 0 18 160 16 0 115 5 240 24 0 173 5 Conventional bolt 4 marked bolt 7 marked bolt P a r t S h a r k c o m 8 7 7 9 9 9 5 6 8 6 ...

Page 207: ...0 0020 Valve guide I D IN EX 4 000 4 012 0 1575 0 1580 Valve stem O D IN 3 975 3 990 0 1565 0 1571 EX 3 960 3 975 0 1559 0 1565 Valve stem deflection IN EX 0 35 0 014 Valve stem runout IN EX 0 05 0 002 Valve stem end length IN EX 3 0 0 12 Valve head thickness IN EX 0 5 0 02 Valve head radial runout IN EX 0 03 0 001 Valve spring free length IN EX 22 8 0 90 Valve spring tension IN EX 36 5 41 9 N 3 7...

Page 208: ... 171 psi 800 kPa 8 kgf cm 114 psi Piston to cylinder clearance 0 015 0 038 0 0006 0 0015 0 120 0 0047 Cylinder bore 36 005 36 015 1 4175 1 4179 Nicks or Scratches Piston diam 35 977 35 990 1 4164 1 4169 Measure at 5 mm 0 2 in from the skirt end 35 885 1 4128 Cylinder distortion 0 05 0 002 Piston ring free end gap 1st O Approx 4 6 0 18 3 7 0 15 2nd R Approx 4 6 0 18 3 7 0 15 Piston ring end gap 1st...

Page 209: ... 995 10 000 0 3935 0 3937 9 980 0 3929 ITEM STANDARD LIMIT Conrod small end I D 10 006 10 028 0 3939 0 3948 10 040 0 3952 Conrod deflection 3 0 0 12 Conrod big end side clearance 0 15 0 50 0 006 0 019 1 0 0 04 Conrod big end width 11 95 12 00 0 470 0 472 Crank web to web width 33 95 34 05 1 337 1 341 Crankshaft runout 0 08 0 003 ITEM STANDARD LIMIT Clutch housing I D 110 00 110 15 4 331 4 337 110 ...

Page 210: ...able driven face spring free length 76 8 3 02 73 0 2 87 Drive chain Type D I D 415 Links 82 20 pitch length 259 0 10 20 Drive chain slack 25 35 1 0 1 4 ITEM SPECIFICATION Carburetor type MIKUNI VM13 Bore size 13 mm I D No 43G0 Idle r min 2 000 150 r min Float height 23 4 1 0 mm 0 92 0 04 in Main jet M J 58 8 Jet needle J N 3N39 Needle jet N J E 6 Pilot jet P J 12 5 Air screw A S PRE SET Throttle c...

Page 211: ...oltage 150 V and more Ground B Pick up coil peak voltage 1 5 V and more Br Ground Generator coil resistance Charging 0 5 2 0 Ω W R Ground Pick up 150 230 Ω Br Ground Generator no load voltage when engine is cold 20 V AC and more at 2 800 r min Generator output 70 W at 5 000 r min Regulated voltage 13 5 15 2 V Starter relay resistance 70 90 Ω Battery Type designation YTX5L BS Capacity 12 V 14 4 kC ...

Page 212: ...12 Wheel rim size Front Rear 7 6 0 AT Toe in with 30 kg 1 5 3 0 05 0 12 Turning radius 2 0 m 6 6 ft Camber 0 Caster 3 Trail 10 0 39 Steering angle 35 Right Left ITEM STANDARD LIMIT Cold inflation tire pressure Solo riding Front 20 kPa 0 20 kgf cm 2 9 psi Rear 20 kPa 0 20 kgf cm 2 9 psi Tire size Front AT 16 8 7 tubeless Rear AT 16 8 7 tubeless Tire tread depth Front 4 0 0 16 Rear 4 0 0 16 P a r t ...

Page 213: ...han 5 methanol with appropriate cosolvents and corrosion inhibitor is permissible P 03 28 Gasoline used should be graded 91 octane or higher An unleaded gasoline is recommended The others Fuel tank capacity 2 6 L 0 7 0 6 US lmp gal Engine oil type SAE 10W 40 API SF SG or SH SJ with JASO MA Engine oil capacity Change 300 ml 0 6 0 5 US lmp qt Overhaul 350 ml 0 7 0 6 US lmp qt Final reduction gear bo...

Page 214: ...GE SPECIFICATIONS 8 2 NOTE Asterisk mark indicates the New K9 MODEL specifications The service data is the same as the K8 MODEL LT Z50K9 09 MODEL 8 1 LT Z50K9 09 MODEL 8 P a r t S h a r k c o m 8 7 7 9 9 9 5 6 8 6 ...

Page 215: ...tion ratio 4 272 47 11 Final reduction ratio 3 700 37 10 Drive chain D I D 415 82 links CHASSIS Front suspension Independent swing axle coil spring oil damped Rear suspension Swingarm type coil spring oil damped Front wheel travel 52 mm 2 0 in Rear wheel travel 51 mm 2 0 in Caster 3 Trail 10 mm 0 39 in Toe in 1 5 mm 0 06 in Camber 0 Steering angle 35 right left Turning radius 2 0 m 6 6 ft Front br...

Reviews: