Sunrise Internet Box, User Manual
Introducing the Sunrise Internet Box! Take charge of your internet connectivity with this state-of-the-art device. Seamlessly access the Installation Instructions Manual for a hassle-free setup and configuration. Download it free from our website manualshive.com and unleash the full potential of your Sunrise Internet Box. Experience connectivity like never before!
Share
Download


Reviews:
No comments
Related manuals for Internet Box

KNX-PORT
Brand: TIS Pages: 5

NF17ACV
Brand: NetComm Wireless Pages: 28

CAN@net II
Brand: IXXAT Pages: 21

GW1102-2DRS-485-TB-P
Brand: 3onedata Pages: 3

IZAR IoT GATEWAY Compact
Brand: Diehl Pages: 4

PVSG-IQAN-C2E1M2W1U1
Brand: Parker Pages: 70

SureCross DX80G9M6S0P0V4V4C
Brand: Banner Pages: 8

Thingsee ENVIRONMENT RUGGED
Brand: Haltian Pages: 13
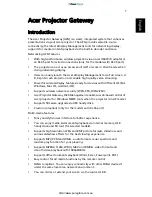
Projector Gateway
Brand: Acer Pages: 58

M2M CONTROL CX660
Brand: Infranet Technologies Pages: 44

WIZ127SR
Brand: Wiznet Pages: 53

ET9500
Brand: Intermatic Pages: 6

A2
Brand: Fanvil Pages: 48

Gateway 100 Series
Brand: 2Wire Pages: 1

PGZNG1
Brand: ADT Pulse Pages: 6

GT704-WG
Brand: ActionTec Pages: 2

OfficeConnect 3CR100A97
Brand: 3Com Pages: 16

SURFboard SBG7400AC2
Brand: Arris Pages: 22


