background image


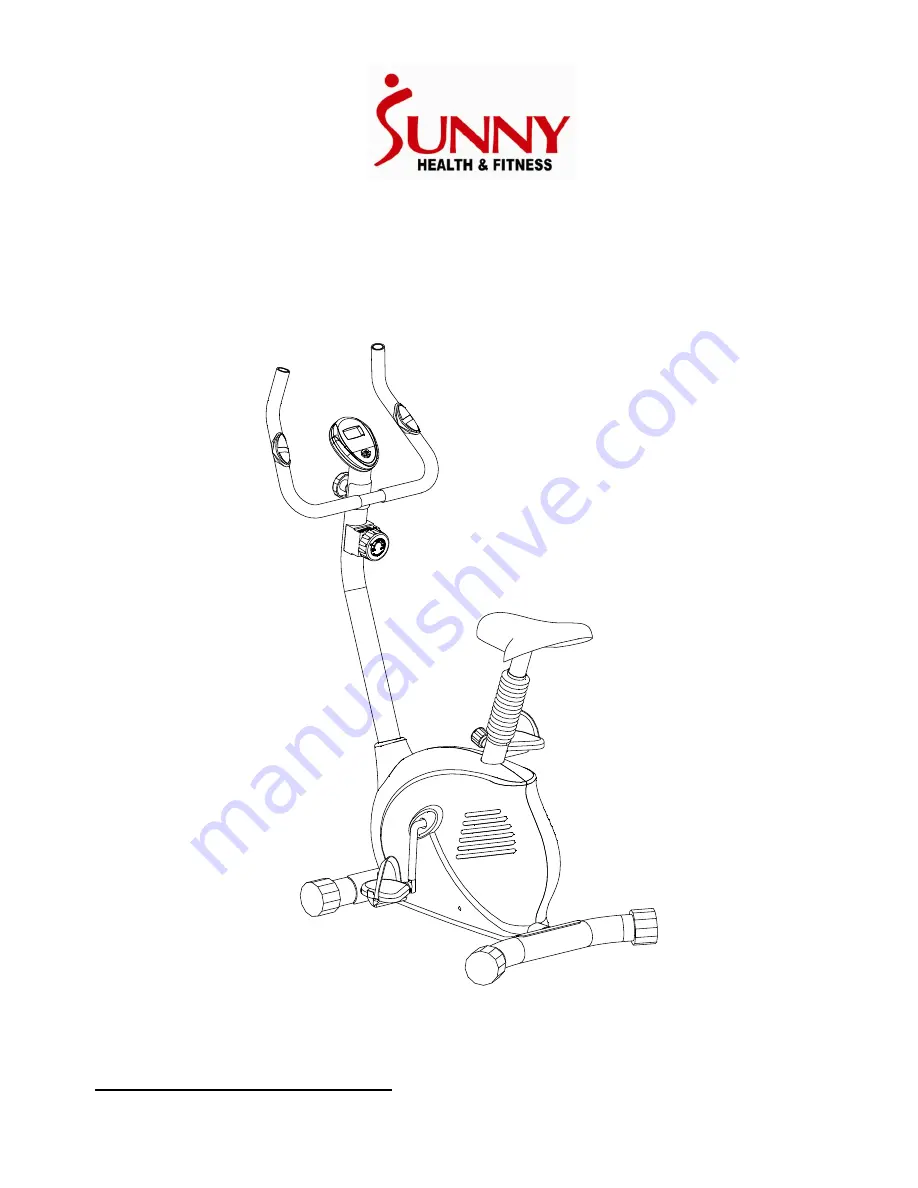
SUNNY MAGNETIC EXERCISE BIKE 

SF-B910


IMPORTANT:  Please  read  this  manual  carefully  before  using  the  product.  Retain 
owner’s  manual  for  future  reference.  For  Customer  Service,  please  contact: 
[email protected]


Summary of Contents for SF-B910

Page 1: ...AGNETIC EXERCISE BIKE SF B910 IMPORTANT Please read this manual carefully before using the product Retain owner s manual for future reference For Customer Service please contact support sunnyhealthfitness com ...

Page 2: ...t on a solid flat level surface with a protective cover for your floor or carpet To ensure safety the equipment should have at least 2 feet of free space all around it 5 Ensure that all nuts and bolts are securely tightened before using the equipment The safety of the equipment can only be maintained if it is regularly examined for damage and or wear and tear 6 It is recommended that you lubricate...

Page 3: ...EXPLODED DRAWING 1 E D 15 14 16 17 E H I 23 19 21 23 22 20 18 13 27 G 12 11 10 F 25R 6 8 29 28 9 25L A 4 5 5 A 2 3 3 C C B 26 B 7 22 20 24 24 D E 2 ...

Page 4: ...ter 1 G Screw M5 15 2 19 Handle pulse wire 1 H Knob M8 1 20 Screw 2 I Bolt M8 94 1 21 Handlebar 1 1 Main frame 1 22 End cap 2 2 Front stabilizer 1 23 Sponge tube 2 3 End cap with wheel 2 24 Pulse sensor 2 4 Rear stabilizer 1 25 R L Pedal Left Right 2 5 End cap 2 26 Crank 1 6 Seat post bushing 1 27 Computer wire 1 7 Extent cover 1 28 Nylon lock nut M8 3 8 Saddle post 1 29 Washer d8 3 9 Saddle 1 10 ...

Page 5: ...HARDWARE PACKAGE 4 ...

Page 6: ...ASSEMBLY INSTRUCTIONS STEP 1 Secure the Front and Rear Stabilizers No 2 and No 4 to the Main Frame No 1 using 4 Bolts No A 4 Arc Washers No C and 4 Cap Nuts No B 5 ...

Page 7: ...9 Then secure the Saddle No 9 to the Saddle Post No 8 using 3 Nylon Lock Nuts No 28 and 3 Washers No 29 Insert the Saddle Post No 8 into the tube located on the back end of the Main Frame No 1 Adjust the saddle post to the desired height and secure it in place using the Knob No F 6 ...

Page 8: ...onnect the Upper Sensor Wire No 13 to the Lower Sensor Wire No 11 shown above in Fig 1 Ensure that the connection is properly secured before continuing Lower the link wire of Tension Control Knob No 14 from the Handlebar Post No 15 and connect it to the Lower Tension Wire No 10 following the tension cable assembly shown above in Fig 2 Attach the Handlebar Post No 15 to the Main Frame No 1 using 4 ...

Page 9: ...Wire No 13 to the Computer Wire No 27 as shown above in Fig 1 Ensure that the connection is properly secured before continuing Secure the Computer No 18 onto the mount at the top of the Handlebar Post No 15 using 2 Screws No G FIG 1 8 ...

Page 10: ...Handlebar No 21 to the Handlebar Post No 15 using 1 Knob No H 1 Arc Washer No E and 1 Bolt No I Tighten and secure with Allen Wrench Insert the Handle Pulse Wire No 19 into the socket on the back of the Computer No 18 9 ...

Page 11: ...ees Gently insert the pedal into the crank arm turn the pedal counter clockwise as tightly as you can with your hand Tighten and secure with Spanner Right Pedal Align the Right Pedal No 25R with the Right crank arm at 90 degrees Gently insert the pedal into the crank arm turn the pedal clockwise as tightly as you can with your hand Tighten and secure with Spanner The assembly is complete 10 ...

Page 12: ...o loosen the knob b With one hand pull the knob out use your other hand to move the seat post to the desired place c Place the knob in the desired hole and turn it clockwise to tighten The lowest magnetic force setting is on level 1 The highest magnetic force setting is on level 8 11 ...

Page 13: ...he batteries 7 AUTO ON OFF When you press a button or start pedaling the computer will turn on After 8 minutes of inactivity the computer will shut off automatically 8 PULSE RATE Press MODE button until P appears In order properly measure your pulse rate you must place both your palms on the contact pads located on the handlebar next to the seat Once you have done this the computer will show your ...

Page 14: ...PLACEMENT The batteries are located on the back of the computer To replace the batteries open the battery cover Remove the batteries Replace with new batteries Make sure the end of the battery goes to the spring end in the battery compartment Put the cover back When changing batteries always change both of them with new batteries Do not mix old and new batteries BATTERY DISPOSAL Dispose of batteri...

Reviews: