background image

1

ABOUT THE PRODUCT

 SPECIFICATIONS

Door

Door pocket

FD50-H SLIDING DOOR SYSTEM Installation Manual

(Ceiling Mount Type for Pocket Door, with Two-way Soft Close)

Part No.FD50DHCP-PD

・  

The closing speed of the soft closing type door may change due 
to ambient temperature, operating method or installation quality.

・  

Recommended ambient temperature range is 5 to 40

FOR YOUR SAFE WORK AND CORRECT INSTALLATION

WARNING:

If these warnings are not followed,  it may result in death or serious injury.

Caution:

If these cautions are not followed, it may result in injury or damage.

Make sure to follow the designated measurements and specifications as well as horizontal and verticals angles. Make sure that frame and door are 
not warped nor bent, since it may affect the movement of the door.

If cutting any parts, make sure to remove any burr before installation. Also check the upper track for any left-over burr or scrap and remove these.

This (sliding door system) is a part for furniture fittings. After installation, make sure to test the finished product thoroughly to ensure that it is 
well-functioning and safe.

Make sure to test the screws for slack at regular intervals (one month from first usage, half year and then one time every year is recommended).

When installing “pocket door” specification, make “easy-maintenance” structure.For example, use removable panel.

We recommend that the installation is carried out by two people, in order to ensure proper installation and avoid unnecessary stress on the parts.

This (sliding door system) should be installed by an experienced person who has correct knowledge. If the system is not installed correctly, the 
door will not operate smoothly, and or may cause injury.
It is necessary to manufacture the frame with sufficient strength so it endures the weight of the door and impact shocks upon opening/closing the 
door. Also make sure to only use the designated screws and to fasten them firmly. A frame with poor strength or loose screws might result in 
improper and slower movement of the door. In the worst case, the door might drop down and cause injury.

Do not try to use this product for any other purposes than originally intended for. Do not use the parts for applications that are out of specification.

Do not disassemble nor modify any parts other than those described in this document.

Prohibited

Warning
Caution

Required

Meaning of symbols

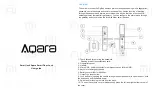
Thank you for selecting our product. Before starting installation, please read this manual thoroughly to ensure correct installation.

Please keep this manual at hand for future reference.

●   

This is the door hardware for sliding door system in stores, 

public facilities and residence.

●   

The track can be divided for easy maintenance after installing.

● 

Built in soft closer enables two-way soft closing movement 

for both direction.

Door width

680 

1500 mm

Max. Door height

2400 mm

Min. Door thickness

30 mm

Max. Door weight

50 kg/door

Height adjustable range

1 mm upward, 4 mm downward

Summary of Contents for LAMP FD50-H

Page 1: ...installation is carried out by two people in order to ensure proper installation and avoid unnecessary stress on the parts This sliding door system should be installed by an experienced person who has correct knowledge If the system is not installed correctly the door will not operate smoothly and or may cause injury It is necessary to manufacture the frame with sufficient strength so it endures t...

Page 2: ...ng aluminum ally Drill bit for metal ϕ4 Drill bit for metal for ϕ7 8 countersunk hole The profile of and are the same but the cut length and hole location are different See installation procedure 1 for the detail COMPONENT PARTS INSTALLATION DRAWING EXAMPLE TOOLS REQUIRED FOR INSTALLATION 30 30 30 30 30 30 200 30 Margin DN LGWK RI GRRU SRFNHW 5S 5 í5R í 1 Track length opened area Lo Available open...

Page 3: ...CSK Process holes for track mounting No use No use No use I5 2 I9 6 CSK Process holes for track mounting 1 Cutting Track and Hole Processing 2 Installing Door Pocket Track Door pocket track Attached screws Cross recessed countersunk head tapping screws 4 40 Remove any dirt or aluminum chips from the track Assemble the cover panel to the door pocket after mounting the track The end which has three ...

Page 4: ... back the trigger catcher to the correct position using 6mm diameter hard bar Incorrect set position 7 Assembly of Psrts for Open Area Track Assemble the parts in order of to with care of direction You can insert the parts smoothly from the connecting end which has no burr 1 3 Front trigger Upper roller Two way Soft Closer Pay attention to the direction 1 2 3 Open area track The edge which has thr...

Page 5: ... if the tracks are not aligned The edge which has three countersunk holes is the end to be connected When sliding Pocket trigger use a screwdriver Take care not to damage the track when sliding the Pocket trigger with screwdriver which jumps out of the hole Scratches on the running track may cause a noise of rollers during operation Take care of the alignment of both track when tightening screws S...

Page 6: ...e roller until a click sound is heard Two way Soft Closer Upper roller 2 3 4 Floor guide Support of 10 mm thickness Lever Upper roller main unit Upper roller casing Click Confirm that upper roller main unit is not dislocated from casing for both door head and door tail sides Do not close the door with excessive force It may cause damage or malfunction of soft close mechanism Trigger 1 上 下 上 下 Mark...

Page 7: ...s parallel to upper track with 9 mm clearance between door and floor 13 Vertical adjustment range 7 mm Forward backward adjustment range 4 mm 右 上 下 左 Clockwise Raise Counterclockwise Lower 3 mm 4 mm 10 右 上 下 左 Do not turn adjustment screw beyond adjustment range CAUTION Do not use moter screw driver Adjusting Floor Guide Adjust range 4 mm If the door movement is not smooth remove the door then mak...

Page 8: ...er Slide the Pocket trigger into the Door pocket track Remove the Open area track The trigger can be deformed when to remove the Open area track without sliding the Pocket trigger into the Door pocket track Hold the Open area track when removing the last screw 右 上 下 左 Be careful not to fall the door down 2 1 2 3 4 1 2 3 1 When sliding the Pocket trigger use a screwdriver etc Take care not to damag...

Page 9: ...30 2 x ϕ5 additional holes Mark as front end of the door Door pocket track Open area track Mark on Pocket trigger Factory made Pocket trigger 30 Margin DN Door width Width of door pocket Track length door pocket Opening width Track length opened area Margin DN 30 2 x ϕ5 additional holes Position of front end of the door Door pocket track Open area track Front end of the door at full opened positio...

Page 10: ...ack rollers for aluminum dust Remove the track and pull out the roller Then clean the roller Check for loose screws retaining the upper track Tighten the screw Heavy door operation Check if door touches adjacent parts Correct door position to avoid contact to other objects Adjust position of floor guide or stopper Check if door is warped Use a door without warp Door does not move Check track retai...

Reviews: