StarTech.com 8STSDOCK1EU3P2, User Manual
Looking for a comprehensive User Manual for StarTech.com 8STSDOCK1EU3P2? Look no further! Download it for free from manualshive.com, offering hassle-free access to the manual you need. It ensures a seamless user experience with detailed instructions and insightful information, helping you make the most of your product.
Share
Download


Reviews:
No comments
Related manuals for 8STSDOCK1EU3P2
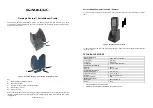
Skorpio
Brand: Datalogic Pages: 2

Weather Forecast 302 NE
Brand: National Geographic Pages: 128

SFA2200
Brand: First Alert Pages: 10

THE BRIDGE IIIP
Brand: Harman Kardon Pages: 6

WIP043
Brand: Logic3 Pages: 4

IP 240
Brand: Blaupunkt Pages: 56

10 series
Brand: Dreamcom Pages: 104

Thunderbolt 4
Brand: Accell Pages: 6

HA-RF100S
Brand: JVC Pages: 30

KS-K6013 - Sirius Satellite Radio Receiver
Brand: JVC Pages: 8

KS-K6013J
Brand: JVC Pages: 8

KS-K6012
Brand: JVC Pages: 12

0809DUMMDWJMM
Brand: JVC Pages: 1

AC-RS5
Brand: JVC Pages: 2

NX-PN10
Brand: JVC Pages: 77

KS-K6003UJ
Brand: JVC Pages: 8

GV-DS1
Brand: JVC Pages: 68

0397MKV*UN*YP
Brand: JVC Pages: 68


