© 2016 Spire Payments Holdings S.a.r.l. All rights reserved.
All information is subject to
change without notice and Spire Payments does not warrant the information’s accuracy
or correctness.
Spire Payments and the Spire Payments logo are trademarks, service marks or registered
trademarks or service marks of Spire Payments Holdings S.a.r.l. All other trademarks are the
property of their respective owners.
Any Spire Payments software described in this document is subject to a Software License
Agreement. Please refer to the Software License Agreement for information regarding
the terms of use.
Step 1.
Terminal connections
• Place the terminal face down and use both thumbs to slide
the cable tidy upwards as indicated by the unlock arrow.
(
fi
g. 1)
• Thread the black power supply cable carefully around
the routing post and insert the plug into the rear of the
terminal.
(
fi
g. 2)
• Plug the telephone cable into the socket identi
fi
ed with
the blue LINE label.
• Alternatively if you are connecting the terminal to an
Internet connection point, connect the network cable to
the socket identi
fi
ed with a white LAN label.
• If a PIN Pad has been supplied, plug the black curly PIN Pad
cable into the socket identi
fi
ed with the yellow PIN PAD
label.
• Ensure all cables are located in the recesses moulded in
the rear of the terminal and re-
fi
t the cable tidy by sliding
downwards until you hear a ‘click’.
(
fi
g. 3)
• Connect the telephone cable to the telephone socket, and
the network cable (if required) to your Internet connection
point.
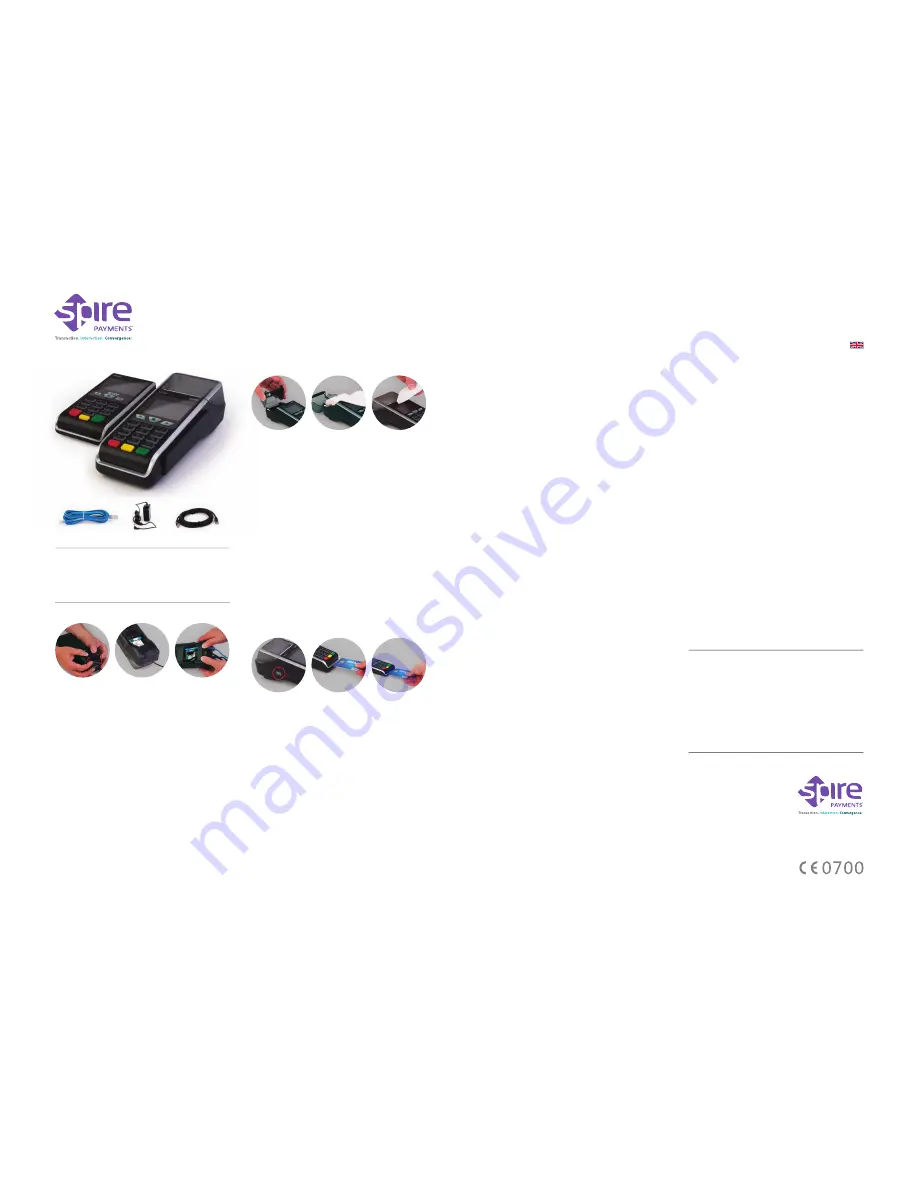
What you have received:
fig. 2
fig. 1
fig. 3
Step 2.
Paper roll installation
• With the terminal facing up, place
fi
nger and thumb on
either side of the printer door and pull upwards.
(
fi
g. 4)
• Discard any packing material from the paper roll.
• Fit the roll as shown in the diagram.
The correct
orientation of the paper is critical.
(
fi
g. 5)
• Pull 10 cm of paper until it protrudes from the top of the
terminal.
• Close the printer door until a ‘click’ is heard.
• Remove the excess paper by pulling down and tearing
along the serrated edge.
(
fi
g. 6)
Step 3.
Turning on the terminal
• Connect power supply to a nearby electrical outlet.
• Hold down the power key on the left hand side of the
terminal until the display illuminates.
(
fi
g. 7)
• Remove the protective
fi
lm from the display.
• Your terminal may prompt you to enter your MID as a
security check.
Step 4.
Performing a Chip Card sale transaction with PIN
• Insert the customer’s Chip Card into the card slot in the
terminal with chip facing upwards. Or, if a PIN Pad is
fi
tted,
ask the customer to insert the Chip Card into the PIN Pad.
(
fi
g. 8 or
fi
g. 9)
• Enter the transaction amount into the terminal when
prompted.
• Pass the terminal or PIN Pad (if
fi
tted) to the customer for
PIN entry.
• The terminal will automatically contact the acquirer and
approve/ decline the transaction.
• A merchant copy of the receipt will be printed. Tear o
ff
and
retain for your records.
• Con
fi
rm display prompt to print the customer’s receipt.
• Once printing is complete, tear o
ff
receipt and pass to
customer. If the card is in the PIN Pad ask the customer to
remove it, otherwise pass it to the customer.
fig. 4
fig. 5
fig. 6
fig. 7
fig. 8
fig. 9
PIN Pad and
attached curly
cable (optional)
Terminal
(Complete with paper roll)
Power supply
(region specific)
Telephone cable
(optional)
Network cable
(optional)
Declaration of Conformity and Compliance
EU Compliance Statement:
Spire Payments Holdings S.à.r.l. hereby declares that this device is
in compliance with the essential requirements and other relevant
provisions of the R&TTE Directive and the Directive on the restriction
of the use of certain hazardous substances in electrical and electronic
equipment.
A copy of the EU Declaration of Conformity is available online at:
www.spirepayments.com
PCI PTS •
The PCI Notice and Installation Guidance is available online
at: www.spirepayments.com
Spire Payments Holdings S.à.r.l. Proprietary Information
www.spirepayments.com
English Language 160316-10
SPc50 Countertop Terminal
Quick Reference Guide
Step 5.
Other transaction types
• Please refer to the User Manual for performing all
transaction types and reading card data by Swipe, Keyed
and Contactless.
Step 6.
End of day/shift change procedures
• It is essential to perform specific processes at the end of
a working day, and possibly between shifts for internal
records.
Please refer to the User Manual provided by your
bank or payment service provider for more details.
PABX/Prefix digit(s)
If the phone line you intend to use needs a PABX/pre
fi
x
digit(s) in order to dial out, your terminal will need to be
con
fi
gured for this. Please read the User Manual for more
information or call the helpdesk for assistance.
DHCP
(relevant if you are using a network connection)
Your terminal will be pre-con
fi
gured for use on standard
networks featuring DHCP (automatic allocation of IP address).
In the unlikely event that your network does not have this
feature, please call the helpdesk for assistance.
Troubleshooting
In the unlikely event you experience issues with this
product, please follow the relevant procedure detailed
below. If this does not resolve the issue, please visit
www.spirepayments.com
for further assistance.
No display on terminal or PIN Pad (if fitted)
• Check terminal is switched on.
• Check connection between terminal and PIN Pad (if
fi
tted).
Poor printing performance
• Check the printer door is closed fully.
• Ensure the paper roll is installed correctly.
• Refer to User Manual for additional printer set-up options.
Communication problems
• Ensure the telephone cable is connected correctly.
• Use a telephone to ensure there is dial tone on the
telephone line.
• Reset the terminal by powering o
ff
and on.
• Ensure the Internet connection is operational.
• If connecting to a broadband phone line, ensure the
terminal is connected to the link through a DSL
fi
lter.
Cannot read Cards
• Ensure the magnetic stripe card has swiped in the correct
orientation.
• Ensure the Chip Card has been inserted in the correct
orientation.
• Ensure the contactless card has been placed at a distance
of 0 to 4 cm from the terminal display.
• Test with another card of the same type.
Caution and Safety Instructions
• Do not attempt to disassemble, service or repair any part.
• Do not use if damaged or with signs of tampering.
• Only use the supplied power adapter with an electrical
outlet of the correct rating.
• To avoid the potential hazard of electrical shock do not use
in wet environments or during an electrical storm.
• Do not use in proximity of potentially
fl
ammable gases or
substances.
• Ensure cables used do not cause a trip hazard or risk the
device being dropped on to a hard surface.
• Do not expose to excessive heat or cold. Only operate
between 0 °C and 40 °C.
• Before cleaning, disconnect from the electrical outlet. Use
only a dry or dampened soft cloth.
• Do not immerse, use liquids, sprays or aerosol cleaners.
Clean all spillages quickly.
• Dispose any part in an environmentally sound manner and
in accordance with local laws.
• Spire Payments will not be held liable for any damage
resulting from user operation that does not comply with
the guidance stated.


