Sony PCGA-DVD51, Operating Instructions Manual
The Sony PCGA-DVD51, a portable DVD-CD-ROM drive, offers seamless multimedia experience on-the-go. Enhance your computing capabilities with this sleek device. Download the Operating Instructions Manual for free from our website to maximize your product knowledge and optimize its features. Explore the world of technology with the Sony PCGA-DVD51.
Share
Download


Reviews:
No comments
Related manuals for PCGA-DVD51

L-force EWS0069
Brand: Lenze Pages: 12

HCM3 RB1
Brand: Oray Pages: 3

T-Verter E2 Series
Brand: TECO Pages: 64

Allen-Bradley PowerFlex 400P Series
Brand: Rockwell Automation Pages: 34

DUW160812X0502A
Brand: AOpen Pages: 41

DM860I
Brand: StepperOnline Pages: 12

6415
Brand: Pacific Scientific Pages: 107

ecodrive03
Brand: Mannesmann Pages: 128

EZ Writer
Brand: Apricorn Pages: 20

C1250-LU-XC
Brand: LinMot Pages: 20

Planetgear 7000
Brand: Rexnord Pages: 33

H6R B Series
Brand: YASKAWA Pages: 14

JM 4-003 V
Brand: Vari Pages: 30

Velocd
Brand: TDK Pages: 11

ACS880+N5350
Brand: ABB Pages: 247

DCS 400
Brand: ABB Pages: 192

ACS880-07CLC
Brand: ABB Pages: 214
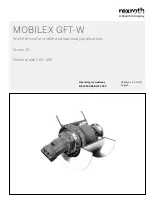
Rexroth MOBILEX GFT-W 30 Series
Brand: Bosch Pages: 86


