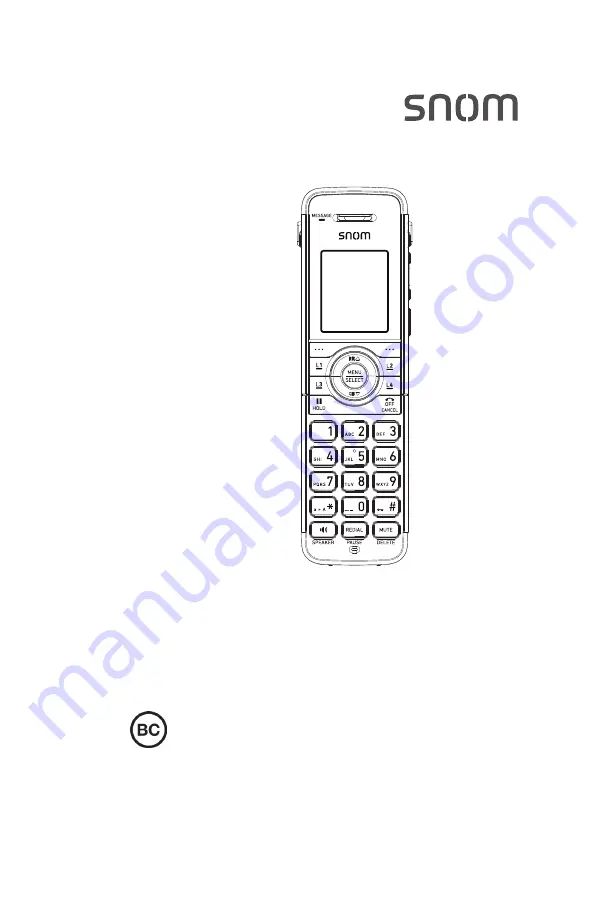
background image

M10 KLE

SIP DECT 4-Line Handset

User Manual

Taihoon Kim | 24. Jan. 2019 | Revision 1.0

AW |  M10-Handset (US version)

illustration scale 100%

Silkscreen on the Rear

Pantone 8001C

Silkscreen on the Rear

Pantone Cool Gray 3C

Silkscreen on the Rear

Pantone Cool Gray 3C

Silkscreen on the Top

Pantone 200C

Silkscreen on the Rear

Transluscent

Pantone Cool Gray 3C

Summary of Contents for M10 KLE

Page 1: ...M10 KLE SIP DECT 4 Line Handset User Manual AW M10 Handset US version illustration scale 100 Silkscreen on the Rear Pantone 8001C ...

Page 2: ...r 18 Adding a corded headset 19 Registering the handset to the base station 20 Deregistering the handset 21 Locating the Handset 22 Screen icons 22 Using the Handset 23 Idle screen 23 Making calls 23 Answering Incoming calls 24 Multiple Incoming calls 24 Ending a call 25 Speakerphone 25 Volume 25 Mute 25 Call Waiting 26 Ignoring calls 26 Dismissing calls 26 Missed Calls 26 Answering Internal calls...

Page 3: ...the screen contrast 54 Backlight 54 Setting the ringer tone and volume 55 Turning low battery tone on or off 55 Turning link lost tone on or off 55 Turning key tones on or off 55 Registering or deregistering your handset 56 WebUI 57 Using the WebUI 57 System Status 59 Handset Status 60 Call Settings 60 User Preferences 62 Base Directory 63 Blacklist 66 Remote XML 66 Security 66 Troubleshooting 67 ...

Page 4: ...its permission to download and print copies of its content for the intended purpose of using it as a manual No parts of this document may be altered modified or used for commercial purposes without the express written consent of Snom Technology GmbH Although due care has been taken in the compilation and presentation of the information in this document the data upon which it is based may have chan...

Page 5: ...e shelf stand or other unstable surfaces 8 Slots and openings in the back or bottom of the base station and handset are provided for ventilation To protect them from overheating these openings must not be blocked by placing the product on a soft surface such as a bed sofa or rug This product should never be placed near or over a radiator or heat register This product should not be placed in any ar...

Page 6: ...osing of any electrical circuit The user should not plug the phone into a power outlet and should not put a charged handset into the cradle if the phone is located in an environment containing concentrations of flammable or flame supporting gases unless there is adequate ventilation A spark in such an environment could create a fire or explosion Such environments might include medical use of oxyge...

Page 7: ...ol N utilisez qu un chiffon doux et légèrement humecté 6 N utilisez pas ce produit près de l eau tel que près d un bain d un lavabo d un évier de cuisine d un bac de lavage ou d une piscine ou dans un sous sol humide ou sous la douche 7 Ne déposez pas ce téléphone sur un chariot support ou table chancelants L appareil pourrait tomber et être sérieusement endommagé 8 Le boîtier de l appareil est do...

Page 8: ... de celles ci peut être à l origine de dommages ce qui nécessiterait des réparations considérables pour remettre l appareil à son état de fonctionnement normal E Si l appareil a été échappé ou son boîtier endommagé F Si le produit affiche une nette diminution de sa performance 15 Évitez d utiliser un téléphone autre qu un sans fil pendant un orage Les éclairs peuvent être à l origine d une électro...

Page 9: ...e montage mural assurez vous de monter le socle du téléphone sur le mur en alignant les oeillets avec les goujons de fixation de la plaque murale Ensuite faites glisser le socle vers le bas sur les deux goujons de fixation jusqu à ce qu il se verrouille en place Reportez vous aux instructions complètes dans la section Installation dans ce guide d utilisation 22 MISE EN GARDE Éloignez les petits ob...

Page 10: ...r compliance could void the user s authority to operate the equipment Caution To maintain the compliance with the FCC s RF exposure guideline place the base unit at least 20 cm from nearby persons For body worn operation this handset has been tested and meets the FCC RF exposure guidelines when used with the accessories supplied or designated for this product Use of other accessories may not ensur...

Page 11: ...sion of your M10 KLE SIP DECT 4 Line Handset and or M100 KLE SIP DECT 4 Line Base Station Please read Important Safety Information on page 4 of this user manual Please thoroughly read this user manual for all the feature operations and troubleshooting information necessary to install and operate your handset Please refer to the M100 KLE Administrator and Provisioning Manual for complete configurat...

Page 12: ...ne Base Station supports shared calls among multiple cordless handsets desksets with a single SIP account With Key System Emulation the line keys L1 to L4 on handsets desksets can be configured as KeyLine type which enables the keys to be used as for making calls picking up held calls and barging in calls The features of the M10 KLE SIP DECT 4 Line Handset include Backlit Liquid Crystal Display Sp...

Page 13: ...in menu or context menu Press to select a menu item HOLD Press to put a call on hold CID q While in menus press q to scroll down the menu Press to display the Call history DIR p While in menus press p to scroll up the menu Press to display Directory Dial pad and audio controls On back BELT CLIP SPEAKER HANDSET LOCK Press and hold to lock handset keys and prevent accidental key presses L1 L4 Line k...

Page 14: ...ine All handset users can use the shared line via the line keys L1 to L4 The LEDs on the line keys L1 to L4 will be on or flashing to indicate calls in progress across all handsets A handset user can make a new call pick up a held shared call or barge in a shared call by pressing the line keys L1 to L4 For more information see Using Key System Emulation on page 34 ...

Page 15: ...cing the handset and charger too close to Communication devices such as television sets DVD players or other cordless telephones Excessive heat sources Noise sources such as a window with traffic outside motors microwave ovens refrigerators or fluorescent lighting Excessive dust sources such as a workshop or garage Excessive moisture Extremely low temperature Mechanical vibration or shock such as ...

Page 16: ...performance keep the handset in the charger when not in use The battery is fully charged after 11 hours of continuous charging If the screen is blank you need to charge the handset without interruption for at least 30 minutes to give the handset enough charge to use the telephone for a short time When the battery is low the handset shows Low battery and a flashing Battery indicators Battery Status...

Page 17: ... snomamericas com If you do not use the handset for a long time disconnect and remove the battery to prevent possible leakage Very low battery charging less than 30 minutes Charging 30 to 80 minutes Charging 80 minutes to 7 hours Charging more than 7 hours Fully charged at 11 hours B at te ry P ac k B T 16 43 92 B T 26 43 92 2 4V 55 0m A h N i M H W A R N IN G D O N O T B U R N O R P U N C T U R E...

Page 18: ...oles on the wall Make sure the space between the two holes is 30 mm Drill two holes in the wall according to the marks 2 If you drill the holes into a stud go to step 3 OR If you drill the holes into an object other than a stud insert the wall anchors not provided into the holes and tap gently on the ends with a hammer until the wall anchors are flush with the wall 3 Insert the screws not provided...

Page 19: ...corded headset You can use this handset hands free when you install any industry standard 2 5 mm corded telephone headset purchased separately Plug a 2 5 mm headset into the HEADSET jack on the side of the handset ...

Page 20: ...ndset 1 Make sure the handset has a charged battery before proceeding Make sure the base station is connected to power 2 If the handset is displaying go to step 6 3 If the handset is displaying go to step 7 4 If the handset is displaying go to step 8 5 If the handset is displaying go to step 7 6 Press CANCEL The handset displays the following message ...

Page 21: ... currently registered To deregister the handset 1 Press MENU on the handset The Main Menu appears 2 Press q to scroll to User settings and press SELECT 3 Press q to scroll to Registration and press SELECT 4 Press q to highlight Deregistration and press SELECT The handset screen displays a list of devices registered to the base station 5 Press q to highlight the name of the handset you want to dere...

Page 22: ... handset only press MUTE Screen icons The following screen icons indicate your phone s current status Icon Status Indicates signal strength from one bar weak to four bars strong Flashes when out of range Indicates battery strength from 1 3 to 3 3 Flashes when empty Indicates the currently displayed call is on hold with your handset This icon is visible when displaying the Call List The ringer is o...

Page 23: ...g calls below MENU to view the main menu See Configuring the Handset on page 47 Making calls You can make calls to any phone number an outside call or you can call another handset an internal call To make an outside call 1 Use the dial pad to enter the desired number Press BACKSP if you enter an incorrect digit 2 Call the number by pressing an idle line key L1 to L4 DIAL or SPEAKER When the call i...

Page 24: ...e handset you wish to call then press SELECT If you select All then you will be connected to the first handset to answer When the call is answered the active call screen appears â SELECT 3 To end the call press OFF or END or place the handset in the charger Answering Incoming calls You can answer a call by pressing the flashing line key L1 to L4 ANSWER or SPEAKER Multiple Incoming calls If you hav...

Page 25: ... is active the handset displays the speakerphone icon at the top of the screen Volume To adjust the listening volume during a call Press VOLUME or on the side of the handset Mute The mute function enables you to hear the other party but the other party cannot hear you To mute unmute your handset s microphone during a call Press MUTE When your handset s microphone is muted the handset displays the ...

Page 26: ... ignored call To ignore an incoming call Press IGNORE on the Incoming Call screen or Call Waiting screen The ignored call will be shown in the Call List until it is picked up by another handset deskset You can pick up the ignored call from the Call List see To view the Call List on page 33 Dismissing calls You can dismiss an incoming call from an outside number if you don t want to answer the call...

Page 27: ... also puts calls on hold automatically when you answer another call transfer a call or create a conference Note that you cannot put an internal call on hold â HOLD To take the call off hold 1 Press CALLS 2 If you have multiple calls on hold as indicated by press q or p to select the call you want to take off hold 3 Press RESUME If another party puts you on hold you may see the message Held by far ...

Page 28: ...e hold to prevent other handsets desksets from retrieving your held call from the Call List To put a shared call on private hold press and hold the HOLD button To resume the call select it from the Call List Switching between two calls If you are managing two calls you can switch between them by one of the following ways Press the flashing line key L1 to L4 of the call you want to pick up OR Press...

Page 29: ...ect a handset deskset and press SELECT Your handset displays Paging device name When a connection is established your handset displays Broadcasting with a timer 4 Speak into your handset 5 To end the page press END or OFF The receiving handset deskset can also end the page The receiving handset deskset will not receive the page if It is on an active call It has an incoming call ringing It is off h...

Page 30: ...kes or answers the call Your system administrator will determine whether or not calls on a SIP account will be shared among handset deskset users Whether or not calls on a SIP account will be shared among other handset deskset users is configured by your system administrator via KeyLine assignment The following examples show how to use the Call List to pick up a held shared call and barge in an ac...

Page 31: ...e is on a call 2 Alice presses HOLD to put the call on hold 3 Alice shouts across the room Bob can you pick up line 2 4 Bob presses CALLS to display the Call List and presses q to select the call on line 2 5 Bob presses RESUME to pick up the call The call is now on Bob s handset ...

Page 32: ...is on a call 2 Alice shouts across the room Bob can you join my call on line 3 3 Bob presses CALLS to display the Call List and presses q to select the call on line 3 4 Bob presses BARGE to barge in the call Bob is now in a conference call with Alice and the caller on line 3 ...

Page 33: ...ot are yet answered by other handsets desksets In the Call List a number on the handset display indicates which KeyLine number is assigned to the call KeyLine numbers 1 4 usually correspond to the L1 L4 keys on the handset á To view the Call List 1 Press CALLS 2 If there are multiple calls in the Call List as indicated by press q or p to select a call 3 To retrieve a call on hold press RESUME 4 To...

Page 34: ...r barge in when you resume the call To turn call privacy on off during an active shared call 1 Press MENU 2 Press q to scroll to Call privacy and press SELECT 3 Press to q or p to select On or Off then press ENTER When Call privacy is on your handset s call screen shows Private When Call privacy is off your handset s call screen shows On a call Using Key System Emulation Your phone is equipped wit...

Page 35: ...ared call Alice s handset Bob s handset 1 Alice is on a call 2 Alice presses HOLD to put the call on hold 3 Alice shouts across the room Bob can you pick up line 2 4 Bob presses L2 to pick up the call The call is now on Bob s handset ...

Page 36: ...ed call Alice s handset Bob s handset 1 Alice is on a call 2 Alice shouts across the room Bob can you join my call on line 3 3 Bob presses L3 to barge in the call Bob is now in a conference call with Alice and the caller on line 3 ...

Page 37: ...You can transfer a call to another party If you talk to the transfer recipient before completing the transfer you are making a supervised transfer However the transfer recipient does not have to talk to you before receiving the transferred call If you do not talk to the transfer recipient before transferring the call you are making a blind transfer You can also transfer a call to a held call Note ...

Page 38: ...ing a call press SELECT 2 Press q to scroll to Transfer and press SELECT â SELECT 3 Press q to scroll to A call blind then press SELECT 4 Dial the number to which you want to transfer the call OR Press q Call History or p Directory and call a number from a list 5 Press TRANS to transfer the call When the far end picks up the call will be immediately transferred â TRANS ...

Page 39: ...caller to notify them of the transfer 6 Press TRANS to transfer the call â TRANS To transfer a call to another handset deskset in your system 1 During a call press SELECT 2 Press q to scroll to Transfer and press SELECT â SELECT 3 Press q to scroll to A handset party then press SELECT 4 Press q or p to select a handset or deskset then press SELECT 5 When the second call is established you can talk...

Page 40: ...arty highlighted press SELECT The call is automatically put on hold 4 Dial the second number for the other party you want to join your conference Wait for the phone to automatically dial once it recognizes a valid number OR Press q Call History or p Directory and call a number from a list 5 When the second call is established press CONF The conference begins and the conference screen appears â CON...

Page 41: ...ely â CONF Press CANCEL to terminate both calls and end the conference To set up a conference call with another handset deskset in your system 1 During a call press SELECT 2 Press q to scroll to Conference and press SELECT â SELECT 3 Press q to scroll to A handset party then press SELECT 4 Press q or p to select a handset or deskset then press SELECT 5 When the second call is established press SEL...

Page 42: ...essage highlighted press SELECT The Message screen appears â SELECT 2 Press q to highlight the desired account and press SELECT The handset dials the voicemail access number 3 Follow the voice prompts to listen to your messages Using the Directory The handset has three lists of contacts The Local directory is only available on your handset The Base directory is usually maintained by your system ad...

Page 43: ...ntry 1 Press MENU Press q to scroll to Directory and press SELECT The Directory menu appears 2 Press p or q to select the directory to add a new entry to then press SELECT 3 Press q to scroll to Add new and press SELECT 4 Use the dial pad to enter the first name last name work mobile and other phone numbers Press NEXT after entering each item 5 Press SELECT to choose the ringer tone then press NEX...

Page 44: ...view call and store list entries To view the Call History 1 Press MENU Press q to scroll to Call History and press SELECT or press q when the phone is idle The Call History menu appears 2 Press q or p to highlight the desired list and press SELECT 3 With Review highlighted press SELECT 4 Press q or p to view entries The Call History entry screen shows the time date name and number of the call the ...

Page 45: ...tering each item 4 Press SELECT to choose the ringer tone then press NEXT 5 Press SELECT to choose the dial line account 6 When you are done press SAVE to return to Call History To delete entries 1 To delete the entry you are viewing press DELETE 2 To delete all entries a In the main Call History menu press p or q to select the list you wish to delete then press ENTER b Press q to scroll to Delete...

Page 46: ...l pad to enter a name and then press q 5 Use the dial pad to enter a number and then press q 6 Press SELECT to choose the dial line account and then press SAVE To edit existing Speed Dial entries 1 Select the entry in the Speed Dial list then press SELECT 2 Press q or p to select an item to edit 3 Use the dial pad to change the name and number Press BACKSP to delete characters 4 Press SELECT to ch...

Page 47: ...isturb DND is on for an account calls to that account will be rejected To turn DND on or off 1 Press MENU 2 Press q to scroll to Features and press SELECT 3 With DND highlighted press SELECT 4 Press p or q to select which account DND should apply to then press SELECT 5 Press p or q to choose On or Off 6 Press SET to save Note that DND will apply to all handsets assigned the account Setting call fo...

Page 48: ...not ring To block anonymous callers 1 Press MENU 2 Press q to scroll to Features and press SELECT 3 Press q to scroll to Block anonymous and press SELECT 4 Press p or q to select which account Block anonymous should apply to then press SELECT 5 Press p or q to choose On or Off 6 Press SET to save Note that Block anonymous will apply to all handsets assigned the account Dialing anonymously When thi...

Page 49: ... Features and press SELECT 3 Press q to scroll to Call waiting and press SELECT 4 Press p or q to choose Show alert or Hide alert 5 Press SET Viewing handset status In the Status menu you can view information on the LAN network your phone system is connected to the registration status of your SIP accounts or view the software version of your handset You may need this information for troubleshootin...

Page 50: ...o go to the next value c Press BACK to go back to the previous value 5 On the Set time screen set the values for HH MM and AM PM The currently selected value is flashing a Press p or q to select a number or AM PM or use the dial pad to enter a number b Press SAVE to go to the next value c Press BACK to go back to the previous value Setting the handset name You can change the handset name from the ...

Page 51: ... go to step 5 To configure the soft keys 1 Press MENU 2 Press q to highlight User settings and then press SELECT 3 Press q to highlight Progrm able key and then press SELECT 4 Press q to highlight Softkey and then press SELECT 5 Press q or p to select a soft key and then press EDIT 6 Press SELECT to choose the Type of key For a list of available Types see Programmable Key Types on page 52 7 If the...

Page 52: ...e key nothing will happen KeyLine Configures the key for Key System Emulation You can manage your own held calls and shared calls within the system The key LED will change according to call activity Select the desired line index number Line Configures the key for accessing a line You can make calls or answer calls by pressing these keys The key LED will change according to call activity Select the...

Page 53: ... L4 indicate call status and other information Type Light Activity Description KeyLine Steady GREEN Quickly flashing GREEN Slowly flashing GREEN Shared Call operation On a call or dialing OR Shared call is active on your handset or another handset deskset Ringing incoming call Shared call is on hold on your handset or another handset deskset Line Steady GREEN Quickly flashing GREEN Slowly flashing...

Page 54: ... settings and then press SELECT 3 Press q to highlight LCD Backlight and then press SELECT 4 Press q or p to choose Backlight Time During idle or Being triggered If you select Backlight Time press q or p to choose the timeout period between 10 seconds and 60 seconds If you select During idle or Being triggered press q or p to choose On or Off 5 Press SET to save Notes If During idle is on and Bein...

Page 55: ... p to select an account then press ENTER c Press q or p to select a ringer tone d Press SELECT to save Turning low battery tone on or off 1 Press MENU 2 Press q to scroll to User settings and press SELECT 3 Press q to scroll to Low batt tone and press SELECT 4 Press q or p to choose On or Off 5 Press SET to save Turning link lost tone on or off 1 Press MENU 2 Press q to scroll to User settings and...

Page 56: ...r deregistering your handset You can register or deregister your handset using the handset menu Follow the instructions in Registering the handset to the base station on page 20 and Deregistering the handset on page 21 ...

Page 57: ...ation about your handset To access the WebUI 1 Ensure that your computer is connected to the same network as your base station 2 Find the IP address of your base station a When the phone is idle press MENU b Press q to highlight Status and then press SELECT The Status menu appears c On the Status menu ensure that Network is highlighted and then press SELECT The Network screen appears d On the Netw...

Page 58: ... WebUI appears Click topics from the navigation bar at the top of the page and then click the desired setting on the left side of the WebUI to see the page for that setting You view and change settings in two different types of fields drop down lists and entry fields into which you type information For your security the WebUI times out after 10 minutes so if it is idle for that time you must log o...

Page 59: ... and firmware version Account Status information about your SIP account registration IPv4 and IPv6 network information regarding your phone s network address and network connection The System Status page has no settings that you can change You may need some of the status information for troubleshooting purposes ...

Page 60: ...the WebUI header and then click Call Settings in the sidebar You can configure call settings for each account that is available to your phone Click Account 1 Account 2 and so on to select the call settings page for the desired account Call Settings include Do Not Disturb and Call Forward settings You can also set Do Not Disturb and Call Forward using the handset See Configuring the Handset on page...

Page 61: ...all forwarding for all calls on that account Target Number Enter a number to which all calls will be forwarded Enable Call Forward Busy Select to enable call forwarding for calls when you are on another call on that account Target Number Enter a number to which calls will be forwarded when the account is busy Enable Call Forward No Answer Select to enable call forwarding for unanswered calls on th...

Page 62: ...WebUI language After changing the setting on this page click Save to save General User Settings Setting Description Range Default WebUI Language Sets the language that appears on the WebUI Any language supported by your phone For example English French Spanish etc English ...

Page 63: ...n for up to 1 000 entries The page also allows you to export your phone s base directory or import a base directory file The export function lets you back up your contacts to your computer The Base directory lists entries across several pages Click Next First Last or a page number to view the desired page of entries Note You can also use the phone menu to manage your base directory entries For mor...

Page 64: ... Click Add New Entry The Create Local Directory Entry page appears 2 Enter the required information At minimum a first and last name are required Setting Description Range Default First Name Enter the appropriate names in these fields N A N A Last Name Ringer Tone Sets a unique ringer tone for calls from this directory entry Auto Tone 1 10 Auto Account Sets the account used when you dial this dire...

Page 65: ...about creating or editing a directory file consult your system administrator To import a base directory file 1 Click Choose File 2 In the Choose File to Upload window navigate to the directory file 3 Click the file and then click Open 4 If you are importing an XML file click Import XML 5 If you are importing a comma separated value CSV file a If the first line of the CSV file is a header line clic...

Page 66: ... ringer tone Remote XML On the Remote XML page you can configure up to three server hosted Remote XML directories to appear on the Directory menu of your deskset For more information about configuring Remote XML directories see the M100 KLE Administrator and Provisioning Manual Security On the Security page you can change the User Password that you use to access the WebUI After changing your passw...

Page 67: ... must use caller ID compatible equipment Handset registration is not working Place the handset in the charger for a few seconds remove it and repeat the registration procedure Ensure the handset is within range of the base station Cannot make external calls Check if your SIP account is registered Press MENU g Status g Line and select an account Check that the status reads Registered You might be o...

Page 68: ...s RF frequency band 1921 536 1928 448 MHz Channels 5 Operating temperature 32 104 F 0 40 C Power requirements Base station 5 0 Vdc 800 mA Handset charger 6 0 Vdc 100 mA Handset 2 4 V 550 mAh Ni MH battery pack Power over Ethernet IEEE 802 3at supported class 2 Ethernet network port 10 100 Mbps RJ 45 port Special characters Entering special characters When entering text using the dial pad the follo...

Page 69: ...to electronic equipment For your own safety take caution when using electric appliances during storms Cleaning your telephone Your products have a durable plastic casing that should retain its luster for many years Clean it only with a soft cloth slightly dampened with water or a mild soap Do not use excess water or cleaning solvents of any kind Remember that electrical appliances can cause seriou...

Page 70: ...e referring to freedom not price Our General Public Licenses are designed to make sure that you have the freedom to distribute copies of free software and charge for this service if you wish that you receive source code or can get it if you want it that you can change the software or use pieces of it in new free programs and that you know you can do these things To protect your rights we need to m...

Page 71: ...m In addition mere aggregation of another work not based on the Program with the Program or with a work based on the Program on a volume of a storage or distribution medium does not bring the other work under the scope of this License in effect making the program proprietary To prevent this we have made it clear that any patent must be licensed for everyone s free use or not licensed at all The pr...

Page 72: ...opies directly or indirectly through you then the only way you could satisfy both it and this License would be to refrain entirely from distribution of the Program 3 You may copy and distribute the Program or a work based on it under Section 2 in object code or executable form under the terms of Sections 1 and 2 above provided that you also do one of the following a Accompany it with the complete ...

Page 73: ...mstance the balance of the section is intended to apply and the section as a whole is intended to apply in other circumstances It is not the purpose of this section to induce you to infringe any patents or other property right claims or to contest validity of any such claims this section has the sole purpose of protecting the integrity of the free software distribution system which is implemented ...

Page 74: ...se as published by the Free Software Foundation either version 2 of the License or at your option any later version This program is distributed in the hope that it will be useful but WITHOUT ANY WARRANTY without even the implied warranty of MERCHANTABILITY or FITNESS FOR A PARTICULAR PURPOSE See the GNU General Public License for more details You should have received a copy of the GNU General Publ...

Page 75: ...75 ...

Page 76: ...VTECH COMMUNICATIONS INC Tigard Oregon 97223 USA Copyright 2019 Snom Technology GmbH All Rights Reserved v2019002 Version 2 06 19 ...

Reviews: