Smittybilt Overlander Tent, Manual
The Smittybilt Overlander Tent is a top-quality camping shelter designed for outdoor enthusiasts. With its durable construction and spacious interior, this tent provides a comfortable and safe overnight experience. Need a manual? Download the comprehensive and user-friendly guide for free from our website, ensuring a hassle-free setup every time.
Share
Download


Reviews:
No comments
Related manuals for Overlander Tent

SOUL
Brand: Vango Pages: 2

SlimShady
Brand: Yakima Pages: 9

QUASAR Q8 Series
Brand: Extreme Canopy Pages: 12

ANEAS
Brand: Saxun Pages: 28

68002
Brand: Bestway Pages: 28

R030A00008
Brand: ClearSpan Pages: 13

PB03000R5
Brand: ClearSpan Pages: 23

6S-WDC
Brand: RioOutdoors Pages: 27

L-GZ428PST
Brand: Sunjoy Pages: 5

PL600GW
Brand: Game Winner Pages: 28

SEMI PRO 6x12m
Brand: Dancover Pages: 8

Tuscany 3x4.2
Brand: Palram Pages: 51

GM1407
Brand: Quictent Pages: 24

2000007823
Brand: Coleman Pages: 2

2000007822
Brand: Coleman Pages: 2

Instant Shelter Eclipse II
Brand: E-Z UP Pages: 2
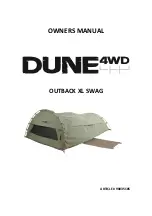
OUTBACK XL SWAG
Brand: Dune 4WD Pages: 8

TPE0080213010
Brand: Turtleplay Pages: 4


