1
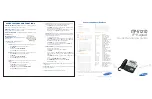
SZ-KPD04N Touch Keypad Installation Guide
SZ-KPD04N is a Zigbee touch keypad that controls the security system. It is protected against passcode guessing and supports silent alarm in
case of a forced passcode entry. It is connected via the secure Zigbee protocol.
Frequency
Zigbee 2.4GHz
Battery Type
CR123A x 2
Key Button Type
Capacitive
Operating Temperature
0
C to 50
C (32°F - 122°F) at 90% RH Non-condensing
Storage Temperature
-20
C to 60
C (-4°F - 140°F)
Dimension
65mm x 101mm x 26mm (2.56" x 3.98" x 1.02")
Proximity Sensor Distance
7 cm (Max)
Auto Joining State:
A Keypad that does not have a network shall search for a network that is open for joining.
1.
Set your security gateway to pairing mode.
2.
Slide out battery cover and insert CR123A battery 2 PCS. (Figure 2)
3.
The Network / Pairing indicator (Green LED) will be lit for 2 seconds to indicate the sensor is booting successfully
4.
It will Network / Pairing indicator (Green LED) blink three times every 5 seconds while attempting to pair with the security panel or home
controller.
5.
If network is not found after 100 seconds, the Keypad will go into sleep mode. To wake the pairing mode again, you need to touch any
Keypad button to trigger a paring process, and then sensor will repeat steps from 3 to 4.
6.
Slide in battery cover.
Joined State:
A Keypad that has joined shall resume the network.
1.
Slide out battery cover and insert CR123A battery 2 PCS. (Figure 2)
2.
Illuminate the Network / Pairing indicator (Green LED) for 2 seconds to indicate a successful boot.
3.
Resume operation with the existing network.
Manual Defaulting:
Default a Keypad puts it into a state where it is ready to be joined to a coordinator.
The process for manually default a Keypad shall be as follows:
1. Remove 2 CR123A battery, press the Tamper switch and hold it. (Figure 3)
2. Insert CR123A batter. Power it up again. The Kepyad should illuminate the Network / Pairing indicator
(Green LED) once all boot up/initialization tasks are complete.
3. Release the tamper switch (
in 4 seconds
) while the Network / Pairing indicator (Green LED) has been illuminated.
Introduction
Specification
Pairing Keypad
Figure 1
Figure 2
Figure 3