background image

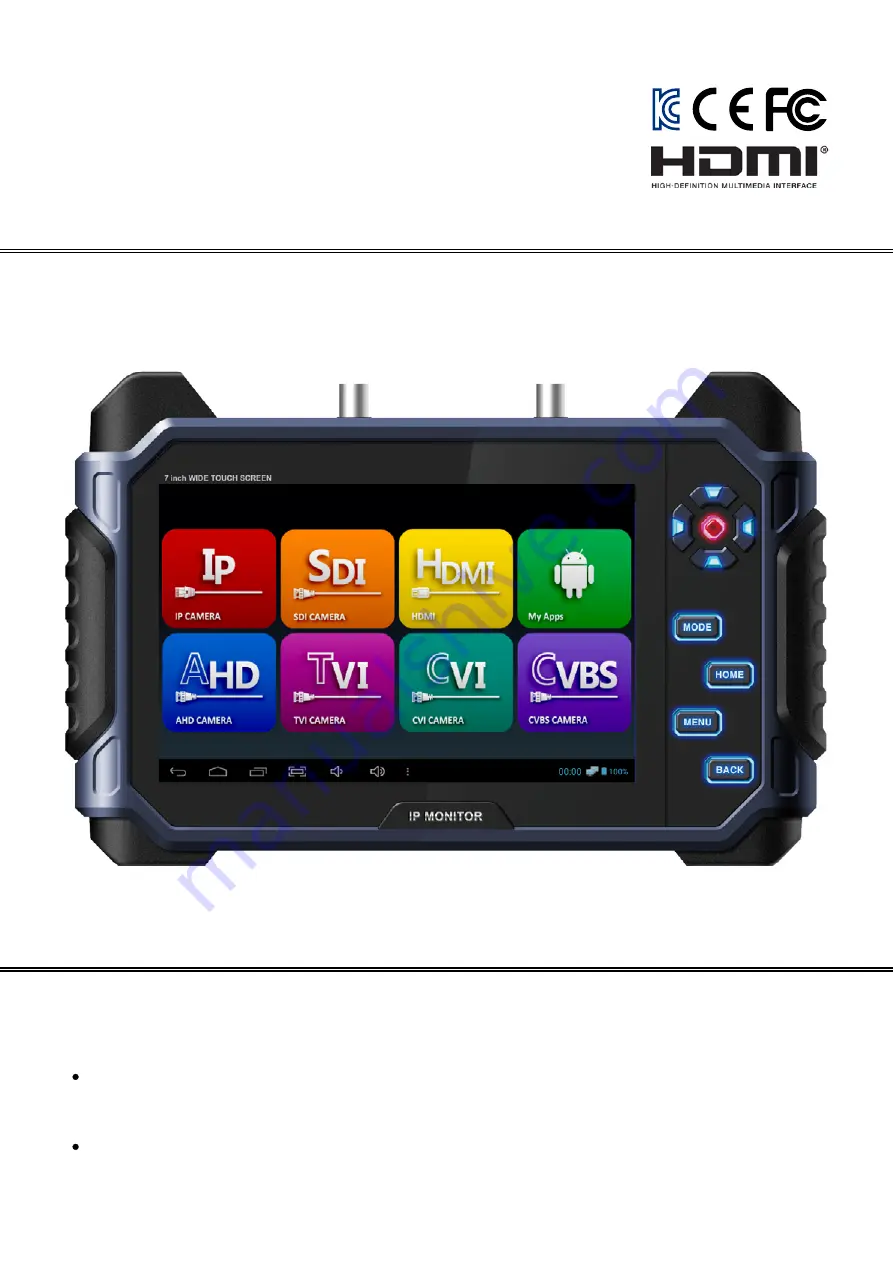
7 inch wide touch screen

Versatile IP Test Monitor

This product is for CCTV system installation and management. Some problems may occur with 

inappropriate use.

Video Surveillance Products (Installation and management)

Please read the instructions prior to its use and keep it with the warranty certificate.

Release Version 1.8

Summary of Contents for SC-IPM07HD

Page 1: ...uct is for CCTV system installation and management Some problems may occur with inappropriate use Video Surveillance Products Installation and management Please read the instructions prior to its use and keep it with the warranty certificate Release Version 1 8 ...

Page 2: ...oduct Do not disassemble or short circuit the batteries Free A S is not available in this case If the charger terminal is short circuited or has the polarity in opposite way the batteries may be damaged Keep this product in the provided bag to prevent the main body and LCD from getting cracked Do not put any conductive materials such as screwdrivers coins metal parts etc Do not place this product ...

Page 3: ...rd Memory Card Classes You can find a number marked in a circle on the memory card It is called Class Type Capacity Class 2 The class 2 can transmit 2MB per second and is not appropriate for video and or voice storage Class 4 The class 4 can transmit 4MB per second and is not appropriate for video and or voice storage Class 6 The class 6 can transmit 6MB per second and is appropriate for low quali...

Page 4: ... Errors may occur in the saved file if you remove the memory card during use Please refer to the following instructions to remove the memory card 1 Enter My Apps page from the Home screen Main Home 2 Select Settings 3 Click Storage on the Settings menu Settings Menu ...

Page 5: ...card is disabled even though the SD card is inserted Please remove the SD card and insert it again 5 Select OK when a message for unmounting the SD card is shown on the screen Unmount Screen If the SD card unmount is still enabled even after selecting OK button please reboot this test monitor and try the steps above again For SD card insertion no settings are required ...

Page 6: ...king items prior to the camera discovery and connection 21 IP camera connection and settings 23 Utilize configuration 25 IP App Main page 26 PoE voltage check Menu in the IP App main page Configuration rearrangement 27 IP device search 28 Camera settings 29 Camera network settings Edit media profile Live video main page 30 Live video menu bar 31 Video recording 32 Snapshot capturing 33 Audio input...

Page 7: ...nction 45 Focus meter function CRC error count function 46 Video menu bar 47 PTZ 48 RS 485 Tx 49 RS 485 Rx Analyze function 50 UTC 51 Video recording 52 Video capturing How to use gallery 53 PoC function 54 User settings 55 App update USB Lan Card 56 Specifications 57 FAQ 58 Extra features 59 63 Warranty certificate 61 64 ...

Page 8: ...as 7 IPS capacitance type touch screen in 1280x800 resolution on the front side D pad directional keys and other function buttons on the right side for the user s convenience Also optical bonding is applied for visibility in outside work to provide the screen with clear image This test monitor provides the best solution to users for video surveillance camera installation and system maintenance as ...

Page 9: ... feature once the camera setting information is saved Camera configuration storage Save network camera configuration to the IP App main page Monitor IP setting IP address change of the test monitor Ping test for network status check Ping a network camera connected with this test monitor or on your LAN to check the network connection status PoE Output PoE output up to 30W for the network PoE camera...

Page 10: ...d data analysis in RS 485 Rx mode RS 485 Analysis RS 485 data analysis in analysis mode Video recording Snapshot Storage capacity extension possible by mounting Micro SD card additionally It is available to save the recorded video or captured image into Micro SD card PoC Output Optional PoC output up to 10W for the PoC camera operation Audio playback Playback of the recorded HDMI audio signal HD A...

Page 11: ...ay be scratched Exclusive Charger This charger is exclusive for this test monitor If any other charger is used to recharge this device it may generate some problems Power output leads Use this cable for DC12V power output from this test monitor through DC12V IN OUT port Coaxial Cable Use this cable for SDI or Analog video signal input Power input leads Use this cable for DC power input User s Manu...

Page 12: ...r over Coax to PoC camera PoC is optional IP Camera Connector RJ 45 This test monitor can connect a network camera directly or via a Hub Switch Also it can supply PoE to a PoE camera NVR Connector RJ 45 PoE voltage test is available through this port Video Input AHD TVI CVI or CVBS input is available through this port and camera PTZ and OSD menu settings are also easily implemented by UTC function...

Page 13: ...eys are for adjusting directions Up Down Left Right SET Mode button This button is for opening the menu in the App In the Viewer App it can be used to switch to PTZ or OSD mode Home button This button is for going to the Home screen However in this case the App running just before turning to Home screen is still ongoing Menu button This button is for opening the menu in the Viewer App or IP App Ba...

Page 14: ... previous page Home button This button is for going to the Home screen However in this case the App running just before turning to the Home screen is still ongoing Multi window Multi window is for showing the currently active Apps Screen Shot Take a screen shot of the current screen Audio Adjust the audio volume Menu button This button is for opening the menu in Viewer App or IP App ...

Page 15: ...or Stand Test monitor stand for convenient monitoring Adjust the angle of this test monitor Speaker Dual speakers are mounted Adjust volume HD Analog CVBS Camera HD EX SDI Camera HDMI Output Exclusive Adapter DC 12V Power Output RS 485 In Out HDMI Input IP Camera USB Memory Micro SD Card PoE HUB Input ...

Page 16: ... icon to open the HDMI Viewer App AHD Camera App This App is for AHD Video Tap the icon to open the AHD Viewer App TVI Camera App This App is for TVI Video Tap the icon to open the TVI Viewer App CVI Camera App This App is for CVI Video Tap the icon to open the CVI Viewer App CVBS Camera App This App is for CVBS Video Tap the icon to open the CVBS Viewer App My Apps Show all installed Apps The fol...

Page 17: ...ct a network camera Launcher page 2 The IP Camera App has various functions such as IP search camera settings monitor settings ping test gallery etc If you connect an IP camera by LAN directly please go to page 18 If you connect an IP camera by DHCP please go to page 20 IP App Home page ...

Page 18: ...dress settings If nothing is discovered with the two IP addresses mentioned above please reset the camera to factory defaults and try it again DHCP is enabled when the monitor is connected to a router or a server 3 Enter 169 254 1 2 in the IP Address do not enter anything in the Mask Address Gateway DNS server and press OK Then all of the settings will be saved 4 Move to the IP App main page by pr...

Page 19: ...r and an IP camera have different IP address ranges the camera will not be discovered If you do not remember the camera IP address please reset it to factory defaults and go to page 18 DHCP is enabled when the monitor is connected to a router or a server 3 Enter the same values in the IP Address except for the last value as the connected IP camera s IP address e g Camera IP Address 192 168 2 120 M...

Page 20: ...ge Use Ethernet on the top of this page shall be marked all the time Cautions for IP address settings When a DHCP server is configured it assigns an IP address to the monitor and an IP camera When the camera IP address is set manually the camera will not be discovered and connected This test monitor does not assign an IP address to a camera A DHCP server or a router should be configured 3 Mark DHC...

Page 21: ...ork connection so in this case you must recheck the monitor settings and the previous steps mentioned above If the monitor icon is still not shown even after rechecking all steps pull out the LAN cable and connect it to this test monitor again Check the LED status of the LAN port If the network connection is normal you will see green and orange LEDs on If the green LED is off the camera is still s...

Page 22: ...meras IP addresses For 3 and 4 cameras they will be also connected but in this case the monitor s IP address temporarily changes to match the IP camera s IP range e g The IP address of 3 camera is 192 168 5 72 When this camera is selected the monitor s IP address will temporarily be modified to the same IP range as the camera s IP but not the exactly same address such as 192 168 5 73 The monitor s...

Page 23: ... find the default information in the camera instructions 5 Enter the password in the Password field If you do not know the password reset the camera to its default factory setting and enter the default password The default password of each camera is normally specified in the camera instructions 6 For transport protocol and RTSP port overwrite no need to change them now Once all values are added ta...

Page 24: ...ng Page 8 After completing all settings press the Save button to save the configuration to the IP App main page for future use if you choose so To watch the live video of the connected camera press the Full Screen at the right upper corner in the preview video mode 10 Tap the saved configuration of the camera on the IP App main page to see the live video in full screen without the need camera sear...

Page 25: ...g the same type of cameras All cameras have their default IP addresses As the saved camera configuration includes the camera IP address ID password etc you can use it for the installation of the same type of cameras However the same type of the camera needs to be the default mode or it must have the same IP address range How to register the IP address used frequently for your installation After sa...

Page 26: ...n the camera setting page a device tile will be added as shown in the above picture For any camera with the same IP address and camera information as the saved configuration you can check the video by selecting the relevant configuration without any setup process Menu of IP App Main Page This menu includes Sort Tiles Settings Help Feedback and about functions Network Connection Status If the netwo...

Page 27: ...this test monitor 1 4 5 3 2 Configuration Rearrangement All saved configurations will be shown Drag any of the star shaped icons to where you want Select the location for saving recorded or captured images Menu in the IP App Main Page In the IP App main page once you press the menu or mode key or touch menu icon the menu bar will be shown as follows PoE Voltage Check PoE ON PoE OFF PoE OFF PoE fun...

Page 28: ... as shown below All IP cameras will be searched automatically when entering this screen 1 2 3 When the camera is not searched When using unsupported protocol Non ONVIF cameras may not be discovered These cameras can be connected manually by RTSP The RTSP address depends on the camera brand and can be found in the camera instructions When using a wireless router When connecting the camera wirelessl...

Page 29: ...de User Name Password Enter the user name and password of the credential used to connect the camera Transport Protocol Select a transport protocol between HTTP TCP and UDP HTTP is recommended If HTTP is not supported this test monitor finds the appropriate protocol automatically Overwrite RTSP Port Specify the RTSP port value This is not needed usually It is useful only under certain circumstances...

Page 30: ...ket size for the transmission in network This may be useful to accommodate some routers to achieve the best data rate 6 When the error window is displayed The operation depends on camera network specifications as each manufacturer has different specifications When the IP address is not changed after modification The IP address will be changed once you reboot the camera When an error window is disp...

Page 31: ...ttings You can set its resolution encoding type video quality through video encoder and also you can set bit rate encoding type sample rate through audio encoder View details Tap icon to check its source and encoder s contents in details Encoder Edit Settings Tap the to change its video and audio encoders configurations In case of not supporting audio it will be indicated as N A 1 2 3 ...

Page 32: ...full screen mode The focus meter function is to adjust a camera s focus more easily and accurately by indicating the optimum and current focus status in numerical values in real time The focus value is between 255 and 0 Please refer to the page 47 for more information Video Menu Bar This menu includes aspect ratio settings Full Original images recording capturing mute presets digital PTZ settings ...

Page 33: ...only for Digital PTZ cameras 7 Gallery Recorded or captured images are stored here 8 Video Information You can check the information of the input video in real time 9 Email log for debugging You can send the errors generated during the product operation by e mail Preset saved in the camera is available for use Digital Zoom function is available for use This function is available only during Wi Fi ...

Page 34: ... location from Internal to SD Card which is in the Settings of the menu bar in the IP App main page Then the recorded video will be saved in the SD card The recording is available up to 5 minutes The recorded video is saved in MP4 format The maximum recording time is 5 minutes Check the storage space prior to continuous recording If you take the SD card out or turn off the test monitor during reco...

Page 35: ... function will be terminated 2 Cautions for capturing Capturing specifications depend on each camera manufacturer Change the media file saving location from Internal to SD Card which is in the Settings of the menu bar in the IP App main page Then the captured image will be saved in the SD card The captured image is saved in JPG format If you tap the capture button continuously the image may not be...

Page 36: ...JPEG codecs You can select the video codec by choosing a Media Profile of the IP camera setting page accordingly You can control the speaker output by using the mute function Cautions for changing codecs Codec specifications depend on each camera manufacturer H 265 is not supported by ONVIF currently MPEG4 is not supported Multicast method is not supported When saving the configuration or turning ...

Page 37: ... the screen and wiping it Swipe left from right Swipe up from down Swipe diagonally Pan tilt functions are available by both touching the screen and using the arrow keys The pan tilt speed depends on each camera brand when operating by the arrow keys Press the right arrow key Press the down arrow key Unavailable to operate it by arrow keys ...

Page 38: ...orts opto mechanical PTZ enable the Digital PTZ first to use Digital Zoom function Otherwise opto mechanical Zoom will be applied Pinch two or more fingers together to zoom out Stretch two or more fingers apart to zoom in Zoom out in available by pressing of the zoom bar at the bottom of the screen ...

Page 39: ...formation Select the Video Information from the video menu bar It will be shown as follows Network Video Transmitter 1 NVT type 2 Camera model 3 Media profile 4 Video resolution 5 Video encoding 6 Transport protocol 7 H 264 profile level 8 RTP packets received Real time 9 RTP packets lost Real time 10 Frame rate Real time Audio codec If available ONVIF port RTSP port 11 12 13 14 Data rate Real tim...

Page 40: ...settings are saved When changing the camera settings please save the configuration again 1 2 Stored Information 1 All setting information to set a camera such as Name IP Address ID and Password is saved Save Tap the Save button in the Camera Setting page to save the configuration to the IP App main page 2 Configuration saving is available only when any camera has been connected successfully The ca...

Page 41: ...uration Explore Check extensive ONVIF properties of the camera Delete Delete the selected configuration Delete All Delete all saved configurations Reboot Reboot the selected camera Soft reset to Factory Default Reset the camera settings except for the network setting to the factory default Hard reset to Factory Default Reset the camera settings to the factory default 1 2 3 4 6 5 7 If the camera co...

Page 42: ...monitor It does not mean that the test monitor becomes a DHCP server IP Address Enter the IP address This test monitor normally uses 169 254 1 2 or 192 168 0 10 To connect an IP camera please enter the same range of the camera IP address For more information please check page 43 Mask Address Enter the Subnet Mask address For this test monitor 255 255 0 0 is the most recommended Gateway Enter the G...

Page 43: ... same network but cannot pass through the router It is used for LAN only IP address classes shall match each other Specific IP addresses such as Class D E are not available for use These IP addresses are normally used for specific purposes such as multicasting or broadcasting If you use this kind of IP addresses in general it may cause some problem in network Link local Address All devices support...

Page 44: ... 3 4 No Name Description IP Address Enter the camera IP address for the Ping test Packet Size byte Set the packet size of the Ping to transmit It can transmit up to 1024 byte Count Set the number of packets to transmit Timeout s Set a specific time for the packet return If the packet comes back after the specified time a timeout error is generated ...

Page 45: ... signal quality so if the value is greater it means the signal quality is better Depending on signal size the following letters and percentage will be displayed at the bottom left corner SDI mode has S Level meter and AHD CVI TVI CVBS modes have A Level and F Level meters 0 29 NG 30 59 Normal 60 100 Good Focus Meter function is to adjust the camera focus more easily and accurately in numerical val...

Page 46: ...rted Resolution 720p 25 30 50 60 Hz Input 1080i 50 60 Hz Input 1080p 24 25 30 Hz Input 2 3G SDI Supported Resolution 1080p 50 60 Hz Input 3 The Video Input Status window will be closed in 10 seconds after video is entered AHD TVI CVI Supported Resolution 4 720p 25 30 50 60 Hz Input 1080p 25 30 Hz Input CVBS Supported Resolution NTSC PAL Input 5 HDMI Supported Resolution Up to 1080p 60HZ Input 6 Vi...

Page 47: ...evel Meter can measure signal attenuation rate and adjust the level of the UTP receivers 2 Analog Level Meter F LVL FOCUS 100 100 100 A LVL 100 A Level 1 A Level represents the signal brightness size Sync and the standard value is 100 Lower value means more signal loss that is decreased brightness and increased noise F Level 2 F Level represents the video color size Burst and the standard value is...

Page 48: ... Functions CRC Error Count measures the number of CRC errors in HD EX 3G SDI mode HD 3G SDI Mode EX SDI Mode CCRC TIME 000 00 00 00 YCRC 000 XCRC TIME 000 00 00 00 When HD 3G SDI is entered CCRC and YCRC values will be displayed For EX SDI input XCRC value will be displayed To activate this function press the Set button once after connecting the camera 1 To initialize the values press the Set butt...

Page 49: ...ptured images are saved in Gallery Playback Gallery Recorded or captured images are stored here Power over Coaxial Optional Supply power to camera over a coaxial cable This function is available for PoC camera only Settings Set where to save the recorded or captured images Turn on off the Level and Focus Meter functions 2 5 6 4 3 Viewer App Functions Deactivated in HDMI mode Deactivated in AHD TVI...

Page 50: ... to control in the same way Address represents the camera ID Baudrate Settings The available baudrate is 2400 4800 9600 19200 Termination Resistance 75Ω termination resistance is available Termination resistance is used to avoid of reflection effects which is generated by the impedance of transmitters 2 3 4 5 UTC function is activated in HD Analog and CVBS modes and by this function camera control...

Page 51: ...ame Description Setting Status All setting values such as mode protocol address baudrate are displayed PTZ Mode In PTZ mode you can select and change Pan Tilt and Zoom Focus by touch or set key In OSD mode the function will be implemented according to the selection keys Operating Mode You can select and change PTZ or OSD mode The set functions depend on the operating mode Back button This button i...

Page 52: ...ble is displayed in HEX value on the screen RS 485 commands received from CCTV controller or external devices are displayed The current settings are displayed on the top of the screen When the data is more than 264 Byte the previous data will be deleted Analyze function ...

Page 53: ...ha Samsung Techwin Winner5 Pelco D Max PIXIM AHD Mode A CP Cameras supporting AHD UTC TVI Mode TVI UTC Cameras supporting TVI UTC CVI Mode CVI UTC Cameras supporting CVI UTC Cautions for using UTC function UTC function for HD Analog may not work properly in a long distance Video may be flickering during UTP operation UTC function for 3MP or higher resolution cameras may not work properly depending...

Page 54: ...apacity is full recording is not available anymore and will be terminated The recorded images will be saved automatically The quality of the recorded video depends on the video transmission quality For AHD TVI CVI up to 2MP can be recorded When recording video it is saved in MP4 format No Name Description Recording Status Check the recording time and status Once the recording is finished the recor...

Page 55: ... is not sufficient You can set the storage location in Settings after mounting Micro SD Card How to use Gallery The recorded or captured images are saved in Gallery The routes for video generated in the IP App and Viewer App are displayed differently If you unmount the Micro SD card during using Gallery App some problem may occur in the stored files ...

Page 56: ...cking If the connected camera is PoC camera after checking it moves to the next step PoC Supply Standby PoC camera is connected To supply power to the camera press Yes Then it moves to the next step PoC Power Supply Supply power to the camera for its operation PoC Operation PoC is being supplied to the camera currently PoC Cable Disconnected This is displayed when removing the cable during PoC ope...

Page 57: ...meter functions Storage Folder 1 Set where to save the recorded or captured images Activated only when Micro SD Card is mounted 2 Level Focus Meter Turn on off the Level Focus meter functions Viewer App Functions User Settings The level meter will not be displayed in HDMI mode ...

Page 58: ...est version Tap this button to update each App The update speed depends on WI FI When the update is not working properly Remove the App and retry it if errors occur during the update Retry the App if it is stopped during the update Check if there is sufficient storage space inside when parsing error message is displayed USB LAN Card Please use the USB LAN card that is provided in the package Other...

Page 59: ...SDI 1 485Gbps 3G SDI 2 970Gbps EX SDI 270Mbps HDMI Up to 1080p 60Hz AHD 1280x720p 25 30Hz 1920x1080p 25 30Hz 2560x1440p 15 25 30Hz CVI 1280x720p 25 30 50 60Hz 1920x1080p 25 30Hz 2560x1440p 25 30Hz TVI 1280x720p 25 30 50 60Hz 1920x1080p 25 30Hz 2048x1536p 18 75Hz 2560x1440p 25 30Hz 2592x1944p 12 5 20Hz CVBS NTSC PAL LAN 10 100Mbps IP Cam PoE Power of Ethernet Support OUTPUT HDMI 1080p 60Hz Measurem...

Page 60: ... HDMI Input Output HDMI C Type F HD SDI Input BNC F LAN Input RJ 45 Analog Input BNC F USB Input USB 2 0 Micro SD Input Standard Type RS 485 Input 2P Terminal Block Battery Li Polymer 11 1V 5 680mAh Language Korean English Japanese Italian German Operating Temperature 0 C 50 C Operating Humidity 0 80 Storage Temperature 10 C 50 C Material PCABS Flame Retarding Material Weight 1014g Dimensions 246 ...

Page 61: ...ignal is weak or the signal dies frequently Check the networking settings If setting value is different such as the camera IP address subnet mask and gate way the video may not be displayed Check the network settings of this product The IP range of the IP camera and this product should be same to check the video Check if Use Ethernet is marked in Monitor Settings It must be marked all the time for...

Page 62: ... the product is bent or cracked Check the manufacturers of Micro SD USB If not certified memory cards are used there may be some problems with the product operation Press and hold the power button for about 7 seconds to shut down this test monitor forcibly when the touch pad or D pad does not work properly After then please turn it on again for use Press and hold the power button for about 7 secon...

Page 63: ...ery Initialization is not available if you do not remember password or pattern once you lock it Miracast 1 Search products currently available for Miracast by entering Display Wireless Display Search Display Miracast is technology that share video and audio by wireless connection It is available during Wi Fi ...

Page 64: ...repair service free of any charge will be provided according to the warranty certificate We charge you with the fee for parts and services provided despite of free warranty service period in case of Warranty Period Breakage or trouble made by natural disaster lighting fire flood tsunami etc Breakage or trouble made by breaking the product guide or manual Breakage or trouble made by wrong power vol...

Reviews: