background image

User’s Guide

XT30/XT50

Summary of Contents for XT30

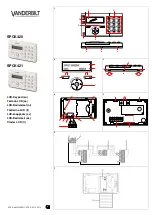
Page 1: ...User s Guide XT30 XT50 ...

Page 2: ...e Sleep Away System CANCEL VERIFY displays If a burglar alarm is valid press VERIFY to send a verification message to the Central Station If a valid alarm has not occurred press CANCEL to cancel the alarm and send an Abort or Cancel message to the Central Station The keypad displays ALARM CANCELLED and the security system will be disarmed What to do when a trouble tone is sounding You can silence ...

Page 3: ...nctions 12 Key Fob Arming 13 Key Fob Disarming 13 Area System Arming 13 Area System Disarming 14 All Perimeter System Arming 15 All Perimeter System Disarming 16 Home Away System Arming 17 Home Away System Disarming 18 Keypad Shortcut Keys 19 User Menu 21 Accessing the User Menu 21 User Menu Options 21 User Check in 22 Zone Activity Check 22 Sensor Reset 23 Outputs On Off 23 Bypass Zones 24 Zone M...

Page 4: ...ent Displays 36 User Check in Event Displays 36 User Code Change Event Displays 36 Supervisory Event Displays 37 System Monitor Event Displays 37 Wireless Jamming Event Displays 37 Wireless Trouble Event Displays 37 Appendix B 38 DMP Wireless Description 38 Appendix C 39 User s Guide 39 Entering User Names 41 Appendix D 42 Email Cell Phone Message User s Guide 42 PhoneAccess User s Guide 43 Common...

Page 5: ...f the functions you need to fully operate your system such as changing the time of day or a personal user code A Note About False Alarms One of the most important concerns facing the security industry today is false alarms The accidental dispatching of police and fire agencies places others in jeopardy by limiting the response capability of those emergency service units As part of our commitment t...

Page 6: ...n sheet of paper draw the walls windows doors and stairs Also draw any obstacles that a person may encounter while exiting the building such as large furniture or appliances Develop escape routes Determine at least two routes the occupants in each room can take to safely escape One route can be the most obvious such as the door Another can be through an easily opened window If the window is high o...

Page 7: ...ta Entry Digit keys COMMAND Key Back Arrow Key Security Command Keypad 32 Character Display Armed LED Power LED Data Entry Digit keys COMMAND Key Back Arrow Key Select Keys 1 2 3 4 9 0 CMD 5 6 7 8 ABC PRINTING FRI 2 51 AM Backlit Logo and Proximity Antenna Thinline Aqualite Keypad Icon Display Shortcut and Digit keys Backlit Logo and Proximity Antenna COMMAND Key Back Arrow Key Select Keys Thinlin...

Page 8: ...ct key touch Select Area 1 the second Select key touch Select Area 2 third Select key touch Select Area 3 and the fourth Select key touch Select Area 4 Power Armed LED Security Command Thinline and Aqualite Keypads The Power LED indicates the panel Power status It is recommended you contact the service department when the Power LED is off or blinks LED Operation AC Battery ON Steady OK OK OFF Trou...

Page 9: ...s Police Emergency Fire Thinline Aqualite Thinline Icon Keypad Panic Keys With Shaded Buttons To Indicate Police Panic Keys Clear Touch Keypads Touch the icon for 2 seconds until a beep is heard Clear Touch Keypad Panic Icons 7 0 Panic Function Security Command Thinline and Aqualite Keypads Security Command Thinline and Aqualite Keypads may also be programmed at installation to allow the user to i...

Page 10: ...for key presses During alarm trouble and prewarn conditions the volume is always at maximum level At SET VOLUME LEVEL use the left Select key to lower the keypad volume Use the right Select key to raise the volume On Thinline Icon Series keypads enter the desired speaker volume level from the range of off 0 to maximum 8 Common Keys on All Keypads Data Entry Digit keys These keys allow you to enter...

Page 11: ... output from the alarm panel Key press tone A short beep as you press a key on the keypad Prewarn tone A continuous pulsed tone that sounds when you open an entry delay door on a system that is armed turned on reminding you to disarm the burglary protection Your system will silence the tone as soon as the first user code digit key is pressed If a valid user code is not entered within 5 seconds or ...

Page 12: ...formation from the protection devices to the panel Wireless systems have a few unique keypad displays BACK DOOR LOBAT Low Battery The battery in a wireless transmitter is low BACK DOOR is used as an example only BACK DOOR MISNG Missing The panel is not receiving the wireless transmitter periodic test report WIRELESS TRBL Trouble Some part of your wireless system is operating improperly Call the se...

Page 13: ...s faulted Fire panic and other 24 hour devices are always turned on and do not need to be armed ALARM NOT SENT The alarm signal was aborted and was not sent to the central station because a user code was entered to disarm the system before the alarm signal was sent to the central station Also your system may be pre programmed at installation to send an Abort signal to the Central Station Refer to ...

Page 14: ...stantly 24 Hour Zone A 24 hour zone is not turned on or off by arming or disarm ing your system Some examples of 24 hour zones are fire zones panic zones and temperature control zones Areas An area is made up of burglary zones that can be armed or disarmed together The Perimeter area for example consists of all the doors and windows on the outside of the building When you arm the Perimeter these z...

Page 15: ...edroom area is off Also for keypads that include an Armed LED the Armed LED is ON steady anytime a burglary protection area is armed and OFF when ALL areas are disarmed Exit Error This is an automatic panel function that occurs if an exit door does not close all the way after the system is armed For example if the front door is left ajar upon exit and the exit delay time expires the system attempt...

Page 16: ...s guide any differences between the systems are noted for your convenience Arming Functions Arming During arming the system verifies that all doors windows and other protection devices to be armed are in normal condition If everything is normal the system arms If there is a problem on one or more burglary zones the keypad displays the problem and allows you to correct the problem or bypass those z...

Page 17: ...ng station before displaying the armed mes sage See Arming Report below This verifies that the arming message was received by your monitoring station While the system waits the display reads DIALING If the report is received the keypad buzzes for one second and displays the armed message If the report is not received the keypad displays LOCAL ALARM ONLY before displaying the armed message Arming R...

Page 18: ... Select BYPASS to bypass the zone s before arming Note 24 hour zones cannot be bypassed 7d Select STOP to stop the system from arming Correct the zone problem s and return to step 1 8 The display reads SYSTEM ON if at least one area in the system is armed and ALL SYSTEM ON if all areas in the system are armed 9 The keypad then displays the exit time in seconds and counts down the remaining time EX...

Page 19: ...me you can cancel the exit and entry delays and cause all zones to be instant zones Select INSTNT while the exit delay displays This immediately arms the exit zones However no entry delay is provided and an alarm immediately occurs should an entry door be opened Alarm Display After disarming the keypad displays any zones that wentintoalarm orany communicationproblemsthatoccurredduring the armed pe...

Page 20: ... delay alert and when the delay expires all zones are armed 8 You can select INSTNT while EXIT INSTNT displays to immediately arm all zones and make them instant The keypad displays INSTANT When you select INSTANT any entry exit zone that trips immediately activates an alarm and the exit delay countdown immediately stops 9 When the system is armed the keypad displays PERIMETER ON for perimeter arm...

Page 21: ...ystem Arming Area Assignment Your security system is divided into two or three separate areas Motion detectors inside doors and other interior devices are assigned to an Interior and possibly Bedroom area while windows and exterior doors are assigned to a Perimeter area Arming the system When arming a Home Away system the keypad displays HOME AWAY or HOME SLEEP AWAY If you select AWAY you arm all ...

Page 22: ...rmed 9 You can select INSTNT while EXIT INSTNT displays to immediately arm all zones and make them instant The keypad displays INSTANT When you select INSTANT any entry exit zone that trips immediately activates an alarm and the exit delay countdown immediately stops 10 When the system is armed the keypad displays HOME SYSTEM ON for Perimeter arming SLEEP SYSTEM ON for Perimeter and Interior armin...

Page 23: ...s or communication problems that occurred during the armed period 3 The keypad next displays ALL SYSTEM OFF to confirm the system is disarmed Disarming During an Alarm 1 While the alarm bell or siren sounds you may choose to enter your user code to silence the alarm sounder For a burglary alarm the keypad displays CANCEL VERIFY and after the pre programmed alarm communication delay the alarm is se...

Page 24: ...can use the Monitor Chime shortcut key 5 when the system is disarmed When pressed the Zone Monitor operation is initiated As needed refer to the Zone Monitor section The keypad displays MONITOR ON and chimes or displays MONITOR OFF and no tone is sounded Note The Monitor Chime shortcut key applies to all Exit zones in an Area system and to all zones assigned to the perimeter in a Home Sleep Away o...

Page 25: ...rs that have latched during an alarm condition OUTPUTS ON OFF Allows you to turn on or off any of the outputs described in the System Setup section of this guide BYPASS ZONES Allows you to Bypass a zone or reset an already bypassed zone ZONE MONITOR Allows you to add or remove a zone from the monitor mode SYSTEM TEST Tests the system siren communication to the central station and backup battery US...

Page 26: ...tion for the Zone Activity Check feature allowing you to monitor a person for non activity When no activity is detected for the programmed time period your keypad sounds a steady tone for a set period of time and displays PRESS ANY KEY Pressing any key on the keypad before the steady tone stops prevents your system from sending a User Activity Not Detected report to the central station Pressing th...

Page 27: ...s Press 2 for 2 seconds then enter your user code if required to reset the system Outputs On Off User Code Level Master Standard or Limited Function Allows you to turn the system outputs on and off This function is used to individually turn your system relay outputs on and off Your system may use these outputs to control interior and exterior lighting or heating air conditioning or other appliance...

Page 28: ...ays the zone name This is an ideal feature for monitoring door zones to tell when someone comes in or goes out and for system testing You can place any combination of disarmed zones in Zone Monitor but only the most recently tripped zone displays The displayed zone name clears automatically after a short time or when the zone is armed Zone Monitor does not function while the system is armed but a ...

Page 29: ...n should be part of your weekly testing and should be followed by placing the interior and perimeter burglary devices in Zone Monitor mode This allows you to open and then close each protected door and window while listening for the keypad to beep confirming its operation See Zone Monitor Using the Zone Monitor Function 1 Access the User Menu 2 Press the COMMAND key until ZONE MONITOR displays 3 P...

Page 30: ...ogrammed with the user name You may enter up to 16 characters for the name As needed refer to Appendix C for Entering User Names information Authority Level The user is also assigned a level of authority Master Standard Limited or Scheduled by the person administrating the system to determine the functions the user can access The XT30 allows Master and Standard users while the XT50 allows all leve...

Page 31: ... to step 10a FOR XT50 Panels 8 The display changes to LEVEL STANDARD 9 Press any Select key The keypad displays SCH LTD STD MSTR 10 Select the authority level to assign to the user code The following user code options can then be selected 10a TEMP CODE NO YES Select NO to make this a permanent user code Select YES to make this a temporary code The keypad displays TEMP DAYS Enter the number of days...

Page 32: ...r a new name 8 If you are changing a code other than your own the keypad next displays LEVEL 9 Press any Select key The keypad displays SCH LTD STD MSTR Refer to item number 10 in the Adding User Codes section on the previous page Note Changing a user code does not change the user number User number 2 may have their user code changed from 1234 to 5678 but they are still user number 2 Deleting User...

Page 33: ...ed or changed See System Setup for Output information Your system provides you with three different types of schedules Permanent schedules are used for automatic arming and disarming and always occur at the same time until you change or delete them Extend schedules allow an authorized user to extend the present day s permanent scheduled closing time Output schedules are used for automatically turn...

Page 34: ... displays SUN MON TUE WED Press the COMMAND key to display THU FRI SAT 6 Select the day you want to program Note After selecting the day of the week for the schedule to occur the keypad displays any currently programmed ON OFF times previously set for that day This feature allows you to review programmed schedules at any time 7 If ON OFF times display the keypad then displays DELETE KEEP Select DE...

Page 35: ...o TIME DAY DATE Press the Back Arrow key to exit the User Menu Display Events User Code Level Master Standard Limited or Scheduled Function Allows you to view up to 100 XT30 or 200 XT50 past events that occurred on your system from any keypad Any event older than 45 days automatically clears from the system memory Once the full 100 or 200 events are reached any new event received clears the oldest...

Page 36: ... each area can have a name or description that displays at the keypad This can help you easily track events when they occur elsewhere in your system Area What it Controls 1 ________________________________________ 2 ________________________________________ 3 ________________________________________ 4 ________________________________________ Output Record Your system has outputs that can be used fo...

Page 37: ...User Name Button Programmed Action TOP BTM LFT RGT TOP BTM LFT RGT TOP BTM LFT RGT TOP BTM LFT RGT TOP BTM LFT RGT TOP BTM LFT RGT User Codes The XT30 system provides 32 user codes you can program for individual users and the XT50 system provides 99 As you add new users or change current user codes you can keep track of their name user number and other information here in this section Use a pencil...

Page 38: ...s What areas does this user have the authority to arm and disarm Arm Only Is this user restricted to just arming Refer to the User Codes section of this User s Guide for additional information Y N 1 2 3 4 Y N Y N 1 2 3 4 Y N Y N 1 2 3 4 Y N Y N 1 2 3 4 Y N Y N 1 2 3 4 Y N Y N 1 2 3 4 Y N Y N 1 2 3 4 Y N Y N 1 2 3 4 Y N Y N 1 2 3 4 Y N Y N 1 2 3 4 Y N Y N 1 2 3 4 Y N Y N 1 2 3 4 Y N Y N 1 2 3 4 Y N...

Page 39: ...to scroll down through the event displays Display Events allows you to view up to 100 XT30 or 200 XT50 past events that occurred on your system from any keypad Any event older than 45 days automatically clears from the system memory Once the full 100 or 200 events are reached any new event received clears the oldest event from the list Zone Activity Check Event Display This displays the date and t...

Page 40: ... Arming and Disarming Event Displays This displays any system areas arming or disarming Description ARM 5 10P 10 17 WAREHOUSE The warehouse area was armed at 5 10 PM Press any Select key to display the area number and user number Arming Event Types There are two event types you may see here ARM User armed the system DIS User disarmed the system User Check in Event Displays This shows when a user s...

Page 41: ...te and time Wireless Jamming Event Displays This displays wireless interference events that have occurred Keypad Display Description ALR 11 41A 10 17 WIRELESS The DMP wireless receiver detected interference on October 17 at 11 41 AM Wireless Jamming Event Types There are three event types TBL Trouble an interference event occurred when the panel was disarmed ALR Alarm an interference event occurre...

Page 42: ...ess if another button is pressed too soon LED Status Operation Depending on the programmed action of a key fob button the Status LED lights to acknowledge a button press or to indicate the armed state of the system When the button is programmed for Panic Panic 2 Emergency Emergency 2 Output or Sensor Reset a 1 2 second Green light displays to acknowledge the button press When the button is program...

Page 43: ...l Perimeter Door Strike From the Status List present your card to the reader When the card is validated by the system the Door Strike relay activates for 5 seconds during which time you can open the door Once you open the door you have 40 seconds to exit and close the door before the Zone 2 Soft Shunt expires Home Away systems only activate the Door Strike relay when arming and disarming ARMING AN...

Page 44: ... ALL SYSTEM OFF If the system is disarmed when you present your card once the system validates the card HOME SLEEP AWAY displays You can manually press the Select key under the desired option or after short time all areas automatically arm in the AWAY mode ENTRY DELAY All Systems Once the protected door is opened and the entry delay starts the keypad displays ENTER CODE Present your card to the re...

Page 45: ...ach number key are three letters 1 2 4 3 5 6 8 7 9 0 1 A B C 1 A B C 1 2 Once the letter you want displays press the number key above the next letter you want to enter You can enter up to 16 characters for each name into the keypad A 1 2 4 3 5 6 8 7 9 0 3 4 9 The nine and zero keys Y Z space Pressing the 9 key provides you with Y Z and a space to use between names For example BOB SMITH 0 Pressing ...

Page 46: ...n by User In Activity For alarm messages the message provides the system name zone name zone number and message type Each alarm message will be detailed in the following way Fire Fire Alarm Burglary Burglary Alarm Panic Panic Alarm All other types Alarm From John s Home System mailto AlarmAdmin ABCSecurity com Sent Wednesday June 04 2008 8 33 AM To JohnSmith myhome com Subject Fire Alarm Message T...

Page 47: ... and what they represent If You will hear All areas are armed 3 short beeps Area 1 Perimeter is armed 1 short beep Any area is armed 2 short beeps All areas are disarmed 1 long beep Note You can also find out the system armed status by pressing the key at any time 3 If the user code is not accepted by the panel you hear four short beeps Check the user code and try again After three unsuccessful at...

Page 48: ...er low or missing Contact your service person System Trouble or Service Required Yes There is a problem with one or more components in the system Contact your service person System Busy No The system is performing another task with a higher priority Wait a few moments for the system to complete the task Contact your service person if the problem remains 4 Wire Bus Trouble No There is not a supervi...

Page 49: ...lays 44 D Data Entry Keys 6 Date and Time 31 Disarming 14 All Perimeter 16 40 Area 14 During an Alarm 17 19 Home Away 19 40 Key Fob 13 Display Events 31 35 Arming and Disarming 36 Supervisory 37 System Monitor 37 User Events 36 37 Wireless Events 37 Zone Events 35 36 DMP Wireless 8 38 E Easy Entry User s Guide 39 Easy Exit Shortcut Key 20 Emergency Evacuation Plans 2 ENTER CODE display 9 Entering ...

Page 50: ...3 Panic Keys 5 Tones 7 Security System Terms 9 Select Keys 4 Sensor Reset 23 Setting the Date and Time 31 Shortcut Keys 16 17 19 22 23 24 Arming Function 16 17 20 Check in Latch Key Report Function 20 22 Easy Exit Function 20 Monitor Chime Function 20 24 Sensor Fire Reset Function 20 23 Silencing an Alarm b 7 Status List 10 Supervisory Event Display 37 System Monitor Event Display 37 System Ready ...

Page 51: ...________________ 3 __________________________ 2 _ ________________________ 4 __________________________ PhoneAccess Quick Commands Press For this action You will hear Note Zones in a faulted condition are force armed when the area arms then 1 Arm all 3 short beeps then 2 Arm Perimeter 1 short beep then 3 Arm Perimeter Interior 2 short beeps then 0 Disarm all areas 1 long beep 5 4 0 n Toggles the o...

Page 52: ... beeps Area 1 Perimeter is armed 1 short beep Any area is armed 2 short beeps All areas are disarmed 1 long beep 1 Call the panel phone number The panel answers and sounds one short tone 2 Enter your code within eight seconds One beep means the code is good Four short beeps means enter it again You have three tries 3 You have 30 seconds to enter the first command see other side and 30 seconds for ...

Page 53: ... This page intentionally left blank ...

Page 54: ...LT 0982 1 01 8283 ...

Reviews: