Sanyo PLV-Z4000, Owner'S Manual
The Sanyo PLV-Z4000 is an exceptional projector that delivers stunning picture quality and immersive viewing experience. To enhance user convenience, we offer the complete service manual for free download on our website. Explore the detailed manual to make the most of this top-notch projector - download it from manualshive.com today.
Share
Download


Reviews:
No comments
Related manuals for PLV-Z4000

E400
Brand: IBM Pages: 80

E400
Brand: IBM Pages: 78
Optima pro
Brand: Sven Pages: 4

Delta Lite
Brand: Isotek Pages: 2

Projector Accessories
Brand: AccuScreens Pages: 12

Christie DS+300
Brand: Christie Pages: 2

MH684
Brand: BenQ Pages: 75

TITAN 1080p-600
Brand: Digital Projection Pages: 44

CP-X2011
Brand: Hitachi Pages: 2

PLC-SU20N
Brand: Sanyo Pages: 1

PLC-HF15000L - 15000 Lumens
Brand: Sanyo Pages: 1

PLC-HF10000L - 10000 Lumens
Brand: Sanyo Pages: 1

PLC-HF10000L - 10000 Lumens
Brand: Sanyo Pages: 1

PLC-LNS08
Brand: Sanyo Pages: 4
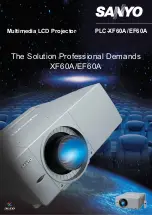
PLC-EF60A
Brand: Sanyo Pages: 2

PLC-EF60
Brand: Sanyo Pages: 1

PLC-EF31N - SXGA LCD Projector
Brand: Sanyo Pages: 1

PLC-SU33
Brand: Sanyo Pages: 48


